Welcome to the Celebrating Sentiments theme week. I am trying a couple of different things this week. First, I am trying the traffic on Friday instead of my usual Thursday. There are no stencils on this card, so no need to participate on Dreamweaver Thursday. Secondly, I am making probably my EASIEST card ever! After all, these stamps that include the sentiment are super simple to use. Here it is:
Have you ever colored in one of those very trendy adult coloring books? Well, this is the same thing, only better! Why? Because when you are done with your relaxing therapy, you can give this away, and save yourself a little money on a birthday card. This is how it was done:
MATERIALS:
Birthday Balloons Rubber Stamp RS-R259
White Mixed Media Paper
Momento Tuxedo Black Ink
Prisamcolor Pencils in Grass Green, Poppy Red, Orange, Ultramarine and Violet
May Arts Ribbon
Black Card Stock
White Card Stock
Red Cork Paper (Optional, I just added a little texture)
Adhesive
1) Stamp the image on the mixed media paper.
2) Have a fun, relaxing time coloring your image.
3) Tie ribbon around the bottom.
4) Assemble the card. This card has a standard 4 1/4" by 5 1/2" front.
See how easy? Give it a try with stamps that have a built in sentiment!
Here are the rest of the players for today, check out the fun:
Showing posts with label May Arts Ribbon. Show all posts
Friday, May 20, 2016
Friday, January 29, 2016
May Arts Ribbon and an Embossing Powder Tree Line

Thanks for stopping by today to check out our Stampendous and May Arts Ribbon Blog Hop. Of course, because it is a Blog Hop, we are offering some wonderful prizes.

Comment to win on of three prize packages that include:
- CRR247 Cling Beautiful Braid Rubber Stamp
- SSC1220 Sisters Perfectly Clear Stamps
- Assortment of May Arts Ribbon
See Stampendous Official Contest Rules for details.
Here is my project for the day:
Materials:
My Colors Card Stock in Charcoal and Sky
Glue Dots
Heat Tool
Directions:
1) The card base is 9” by 5 ¾” folded on top
2) Either soap the back the Tree Line Stencil or cover
it with Versamark. You need to create a light film across the back that
makes the stencil easy to remove from the adhesive on the mounting paper.
3) Cut the mounting paper to match the sizes of the
stencil.
4) Remove one side of the coverings on the double sided mounting paper and place the stencil, soap or Versamark side down, on the paper.
5) Pour the colored (non-silver) embossing powders over the stencil in strips and then blend the colors together with your finger.
9) Place the project upside down on a flat surface and carefully peel the mounting paper off of the stencil.
4) Remove one side of the coverings on the double sided mounting paper and place the stencil, soap or Versamark side down, on the paper.
5) Pour the colored (non-silver) embossing powders over the stencil in strips and then blend the colors together with your finger.
9) Place the project upside down on a flat surface and carefully peel the mounting paper off of the stencil.
10) Use the heat tool
to emboss the image.
11) Cover the newly revealed sticky paper with Aged Silver Embossing Enamel and press down lightly with your finger.
12) Pour the Sterling
Silver Embossing Enamel in the areas that seem a little bare.
13) Emboss with your heat tool.
14) Assemble the card. Remember that removing the backing from the
Double Sided Mounting Adhesive makes it into a sticker.
Thank you for stopping by my blog for this Blog Hop. Be sure to leave a comment for your chance to win. Here are all the players for today:
Thursday, January 28, 2016
May Arts Ribbon and Dreamweaver Stencils Together on a Spring Bird Card

Thanks for joining me during this wonderful Stampendous and May Arts collaboration Blog Hop!

It’s a blog hop this week and so we have prizes!
Comment to win on of three prize packages that include:- CRR247 Cling Beautiful Braid Rubber Stamp
- SSC1220 Sisters Perfectly Clear Stamps
- Assortment of May Arts Ribbon
See Stampendous Official Contest Rules for details.
Here is my project for today:
Materials:
Removable Tape
Chameleon Pens in BR2 Hot Cocoa and BR5 Bark
Paper Trimmer
Adhesive
Scissors
Distress Ink in Vintage Photo
Heat Tool
Glue Dots
My Colors Card Stock in Winter Lake, Sandy Beach, Coral Rose
and Café Ole
Paper Towel
Directions:
1)
The card base is 6 ½” by 11’ folded on the side.
2)
Tape the Cherry Blossom Stencil over the Winter Lake
card stock. Be sure to start taping with
one full strip of tape adhering the top edge of the stencil. It will act as a hinge.
3)
Use the palette knife to place Embossing Paste on the
edge of the Paste Spreader.
4)
Place the paste spreader on the top edge of the stencil
and pull towards you, leaving the spreader on the stencil, like a squeegee and
depositing paste into all of the wells of the stencil.
5)
Replace unused paste into the container.
6)
Remove the stencil, pulling the tape from the bottom
and the sides and tilting the stencil up, using the top piece as a hinge. You will lastly remove that top piece with
the stencil.
7)
Repeat steps 2-6 with the other two stencils, using the
Nest Flourish Stencil upside down. Let
all the paste dry.
8)
Color the twigs and the nest with the brown markers.
9)
Use Versamark Pens to color over the pasted image in
small sections, covering it with the color of embossing ink you wish to use and
heating to create an enameled look. Work
on one color at a time.
10) Tape the Quatrefoil Stencil over the pink card stock. Rub the stencil brush over the Versamark Ink Pad and rub a little off on a piece of paper towel. Use circular motions with the brush to appy the clear ink over the stencil and onto the card stock.
11) Remove the stencil. Cover the card stock with the clear embossing powder and pour off the excess.
12 Heat the embossing powder with the heat tool.
13) Cut
the fancy frames out of the Mixed media Paper and the Café Ole card stock using
the Fitted Frames A and B die sets and your manual die cut machine.
14) Use
the craft sheet, blending tool and Distress Ink to age the pieces.
15) Assemble the card.
Thanks for stopping by to see my project today. Don't forget to leave a comment for your chance to win! Here are all the posts for today:
Laura Drahozal (DW and May Arts)
Pam Bray (DW and May Arts)
Louise Healy (DW and May Arts)
Lea Fritts (DW and May Arts)
Alison Heikkila (May Arts)
Thursday, November 5, 2015
Fall Fun with Dreamweaver
The Stampendous theme for this week is Fall Fun. I am using one of my favorite stencils today.
MATERIALS:
Large Oak Leaf Stencil DWLG754
Crusade Stencil DWLX7025
Mixed Media White Paper
Pencil
Faber Castell Pitt Pen in Sanguine
Micron Pens in Red, Orange, Green and Black
Stamping Details Rubber Embossing Mat
Manual Die Cut Machine
May Arts Ribbon
Card Stock
INSTRUCTIONS:
1) Place the oak leaf stencil on the Mixed Media Paper and lightly trace with a pencil.
2) Trace all the pencil lines with the sanguine pen.
3) Add designs with the sanguine pen, including the veining on the leaves.
4) Create dots with the sanguine pen on the center areas of the leaves.
5) Create dots for color on the leaves with the red, orange and green pens. This works best if you cluster like colors in the same area.
6) Use the black pen to add shading or accents to the image.
7) Use the crusade stencil and brown cardstock in your manual die cut machine. The stencil should go face down over the bottom plate and be followed with the card stock face down, the rubber embossing mat and the top mat.
8) Assemble the card.
Check out the rest of the Fall Fun Players today, and leave us all a comment, if you get a chance. We love comments.........
MATERIALS:
Large Oak Leaf Stencil DWLG754
Crusade Stencil DWLX7025
Mixed Media White Paper
Pencil
Faber Castell Pitt Pen in Sanguine
Micron Pens in Red, Orange, Green and Black
Stamping Details Rubber Embossing Mat
Manual Die Cut Machine
May Arts Ribbon
Card Stock
INSTRUCTIONS:
1) Place the oak leaf stencil on the Mixed Media Paper and lightly trace with a pencil.
2) Trace all the pencil lines with the sanguine pen.
3) Add designs with the sanguine pen, including the veining on the leaves.
4) Create dots with the sanguine pen on the center areas of the leaves.
5) Create dots for color on the leaves with the red, orange and green pens. This works best if you cluster like colors in the same area.
6) Use the black pen to add shading or accents to the image.
8) Assemble the card.
Check out the rest of the Fall Fun Players today, and leave us all a comment, if you get a chance. We love comments.........
Laura Drahozal (DW)
Louise Healy (DW)
Pam Hornschu (DW)
Lyn Bernatovich (DW)
Lea Fritts (DW)
Kristine Reynolds (DW)
Thursday, May 14, 2015
Dreamweaver Art
Apparently, I have the world's SLOWEST mail service. You see, Stampendous is having a blog hop with Clear Scraps that we, the Dreamweaver Specialists, could also get in on. We were sent some Clear Scraps, but ours went out later than the rest of the team's. EVERYONE got their goodies. Except me........I still don't have them. Therefore, today I am posting a project that does not include the Clear Scraps, but it does have an art theme. Clear Scraps and Stampendous do encourage you to follow your art.....
The silver portions were created by using Versamark with the stencil brush and covering it with Stampendous Silver Embossing Powder. Of course, the Follow Your Art Stamp is from Stampendous and stamped with Versafine. The ribbon is May Arts and the words and art supplies were raised with 3D foam.
The rest of the Dreamweaver Specialists are also posting today. I included their links. I also included a link to that blog hop that I mentioned earlier.
Meanwhile, as I have mentioned, the rest of the team is posting a great blog hop with Clear Scraps. Under this great banner, you will find the link to one of today's posts.....and a great way to start hopping for wonderful prizes:
Thursday, January 29, 2015
The Fifth Thursday
It is the fifth Thursday of the month, so the whole team is playing this week. Of course, our theme is still birthdays, but I always prefer a nice, all occasion type card for birthdays. I feel better when I can write in anything I want.
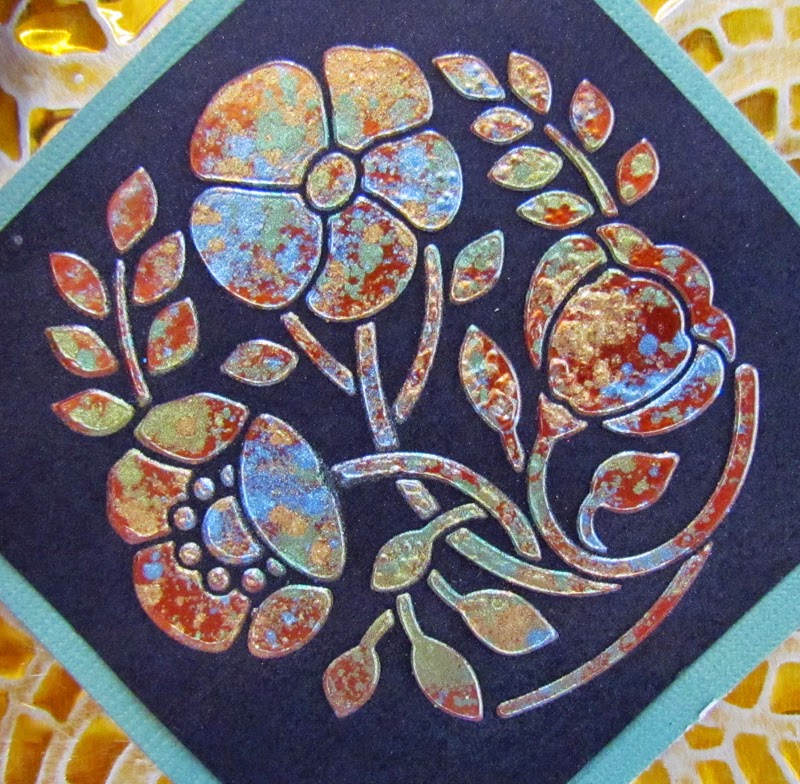
For this card, I used two different techniques. First up, I pasted LM2011 Poppy Circle with Metallic Copper Embossing Paste. While it was still wet, I sprinkled on some Metallic FX in http://www.stencilwithstyle.com/accessories/fxpins.html, FX 10 Kiwi, and FX 17 Navajo Sky. I let them dry for awhile, but then got a little impatient, and used my heat gun to speed the process. It caused a few little bubbles on the surface, but I really liked it. When everything was completely dry, I rubbed off the excess Metallic FX with a Swiffer refill. Here is a little detail shot:
While the paste dried, I ran the LJ 901 Mosaic Swirls Stencil through my Cuttlebug with yellow coated aluminum and the Stamping Details Rubber Embossing Mat. After the embossing, I simply sanded off a little of the gold color.
With the addition of some May Arts ribbon and a little card stock, I was finished.
Thanks for stopping by today. Try making something yourself and upload it to the Dream It Up! Blog for your chance to win a great prize. For inspiration, be sure and check out the other team members this week at the following links:
While the paste dried, I ran the LJ 901 Mosaic Swirls Stencil through my Cuttlebug with yellow coated aluminum and the Stamping Details Rubber Embossing Mat. After the embossing, I simply sanded off a little of the gold color.
With the addition of some May Arts ribbon and a little card stock, I was finished.
Thanks for stopping by today. Try making something yourself and upload it to the Dream It Up! Blog for your chance to win a great prize. For inspiration, be sure and check out the other team members this week at the following links:
Friday, August 15, 2014
Christmas in August Blog Hop with Woodware--The Final Day

Yes! It's that time of year again! The time when we inspire crafters on both sides of the "pond" with a mix of both Dreamweaver and Woodware UK* products for the holidays! Six days, SIX, of beautiful, elegant, merry, cute, artsy, and craftsy projects to have you heading out to your local stores or internet sites to buy these goodies immediately!
Of course, there will be prizes as well. Three prize packages will be given to three commenters during this week's posts on the team's blogs, including five stencils and one nested die set. You can have an opportunity to win these goodies by leaving some holiday sweetness for each team member posting each day, to be one of the three winners for the week. Here are the team members that are inspiring you today:
First, I stamped with a beautiful Woodware stamp on white card stock with Jet Black Archival Ink. Then, I ran a couple of stencils through my manual die cut machine with the Rubber Embossing Mat. I ran the Dreamweaver Stencil LX 7002 Plaid through with red velvet paper. The Dreamweaver Stencil LL557 Long Merry Christmas was used with Red Coated Aluminum. I put the aluminum red side up over the stencil, which was also right side up. I enhanced the "debossing" with the Teflon Tool from the Beginner Metal Tool Set. I used a Qtip with Color Solutions Alcohol Ink Thinner to remove the red in the holly leaves. I then used a little Color Solutions in Pine Bough to add green to the leaves. Finally, a sanding block removed all the color I did not want. I did all of these steps with the stencil still behind the metal.
The image was colored with Crayola Crayons. The card was assembled using regular adhesive, Double Stick Mounting Paper behind the metal, 3D Dots and a lovely May Arts Ribbon.
*For a stockist near you contact Woodware Craft Collection in the UK and Notions Marketing in the USA.
Thursday, May 1, 2014
Dreamweaver Flora and Fauna
It's May! The Dream Team members are challenging you this month to a "Flora and Fauna"theme! Considering most of the Dreamweaver designs incorporate these themes, you should have no problem playing along with our challenge this month! As usual, link your creations at the end of theDream It Up! blog post. As the challenge gets underway, you'll see thumbnails of others who are playing along as inspirations for your own creations! Speaking of inspirations...the month of April was our Inspirations month, and we had many that linked with us! So exciting! Our randomly chosen winner for April is...JULIE STAVES! Check out two of her creations...
Congrats, Julie! Be sure to email lynell@dreamweaverstencils.com with your choice of stencil, and your address!
Now here is my creation for this week:
It was pretty simple to make, and I took lots of pictures, so here is my tutorial:MATERIALS:
Dreamweaver Stencil LJ 927 Floral With Dots
Black Coated Mercart Aluminum
Stamping Details Rubber Embossing Mat
Color Solutions Thinner
Color Solutions in these colors: Mojito, Pine Bough, Paprika Red and Winter Red
Mercart Deerfoot Teflon Tool (in Beginner Kit)
Large Stencil Brush
Scissors
Manual Die Cut Machine
Q Tips
Sanding Block
Adhesive
Hole Punch
May Arts Ribbon
Card Stock
DIRECTIONS:
1) Place the stencil on top of the metal and trim around the outside with scissors. Leave just a little extra metal.
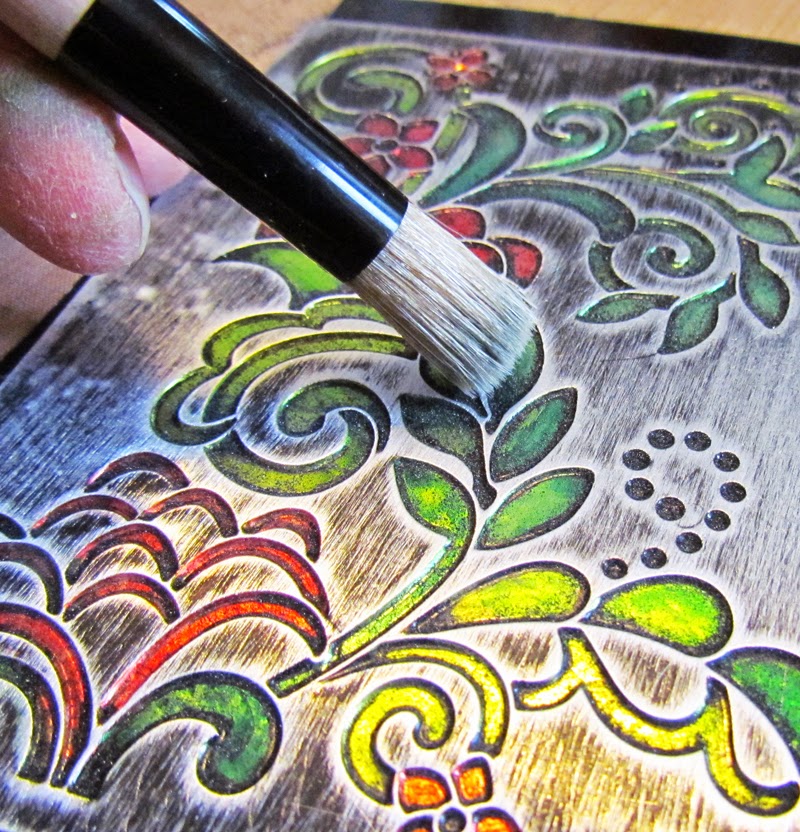
4) Use the pointed end of the Teflon tool to further define the wells created by the stencil. You can see in this picture how the bottom of the well appears sharper than the top part. I accomplished this by pressing the metal up against the edge of the metal stencil.
9) Trim any extra metal and assemble the card.
Thanks for stopping by. I hope you enjoyed the tutorial.
Please welcome our new "A" team, officially posting for the first time!
Thursday, February 6, 2014
February Flutters
Are you ready for the new Dreamweaver challenge for the month of February? It will be a short month of posts for the Dream Team, but we're pretty excited to share with you our versions of "February Flutters", meaning anything that flutters. Heart flutters, wings that flutter, breezes, sails, etc. So, come along for the ride and link your own "flutterings" to the Dream It Up! blog for a chance to win the stencil of your choice. Meanwhile, here's my "fluttering" for the week:
Here is how it was done:
MATERIALS:
A Piece of Suede to Work On
May Arts Ribbon
Sanding Block or Sand Paper
Cotton Swab
Card Sock
Adhesive
Manual Die Cut Machine with Cutting Mats
DIRECTIONS:
1) Run the gold coated aluminum through your manual die cut machine with the background stencil and the rubber embossing mat. The "sandwich" for the Cuttlebug is A Plate, stencil (face UP), metal (face UP), rubber embossing mat, and two B Plates. This is technically debossed, because the metal is being pressed into the stencil. Leave the metal on the stencil.
2) With the metal still over the stencil, sand lightly to uncover the silver color where the stencil remains.
3) Remove the stencil.
4) Run the metal through the manual die cut machine again. This time, use the butterfly stencil and place the "sandwich" this way: A Plate, stencil (face DOWN), metal (gold side DOWN), rubber embossing mat and to B Plates. This way, the metal is pushed down into the back of the stencil, as if the color is being pushed out and through. This is embossing.
5) Place the metal face down on the suede and use the ball tool to press the metal out and give the butterfly dimension.6) When the butterfly is nice and "poufy", place right side up on a hard, smooth surface. Go around the edges of the design with the Teflon Tool and refine them. Also make sure to use the "deerfoot" side of the tool to flatten out where the metal bent around the edges of the butterfly stencil.
7) When you have the effect you want on the butterfly, flip it gold side down and full the cavities with the MercartUSA Filling Paste. You just squeeze it into the holes and let it dry a couple of hours.
8) When the butterfly is dry and hard, flip it back to the front and use a cotton swab to gently apply color to the raised area. I used Blue Velvet and Sugar Plum on the wings and Black Beauty on the body and antennae.
9) Run the Blue Coated Aluminum through the machine with the words. You will be debossing, so put the stencil and the metal both face UP before you run it through. Leave the metal on the stencil.
10) With the metal still on the stencil, use the Teflon Tool to push the metal into the letters a little further.
11) Add a little Sugar Plum Color Solutions in the letters if desired.
12) With the metal still on the stencil, vigorously sand the blue and purple off of the areas over the stencil.
13) Remove the stencil.
14) Assemble the card.
Be sure to leave me some encouragement before flitting over to the "A" team blogs:
Subscribe to:
Posts (Atom)