Thursday, August 30, 2012

A Beautiful, Pasted, Christmas!

I don't often post projects made with paste, but today I am posting two.  This one has the more traditional approach to pasting.  The other is on Paper Craft Planet here.
This card actually has a couple of different techniques.
The Holly Sprig in the background is Holly Fourish Stencil LG 731.  I simply ran the cardstock through my Cuttlebug after spritzing it with a little rubbing alcohol.  The Sandwich is A Plate, upside down stencil, face down cardstock, Stamping Details Embossing Mat, and two B Plates.  Then, berfore I removed the stencil, I brushed it with a little Distress Ink, using two different colors .  I highlighted the berries with a little Stickles. 
The word is the Christmas Script Stencil LL 3009.  I taped the stencil over brown cardstock onto my craft sheet with removable tape.  Then, I used my paste spreader to "pull" the Metallic Gold Embossing Paste over the whole thing.  I removed the stencil and let it dry.  Then, I added red Stickles to the berries.  After everything was dry, I cut around it and assembled the card. 
For a completely different approach to using Gold Metallic Embossing Paste, check out the Molten Magic Tutorial on Paper Craft Planet. 
 
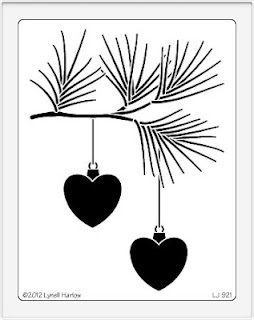
Do YOU want to get into the holiday spirit a little early? Link your own Christmas in August creations to the Dream It Up! blog mr. linky, or email pics of your creations to lynell@dreamweaverstencils.com, for an opportunity to win this wonderful newly released Heart Ornaments:


Don't you just love this new design? There are several newly released stencils and products from CHA last month, which you can view for yourself HERE. Be sure to check out what the rest of the team has been creating this week:


Sunday, August 26, 2012

Connie Crystal Christmas


My post today features an ornament that I created for the Connie Crystal CHA booth.  Of the three ornaments featured in the booth, this was the easiest to create.  Let me give you the instructions:

MATERIALS:
One medium sized clear plastic Christmas ornament from your big box store
Assorted Connie Crystals.  I used several pieces from the Red Theme Suncatcher
Connie Crystal 20 mm Raindrops (6)
Connie Crystal 1.5 inch Teardrop.  If you purchase the suncatcher, use the one on that.
Clear or silver glass seed beads
The clear thread from the Suncatcher
Heavy Duty Thread in any color
Small hand sewing needle

INSTRUCTIONS:
1)  Remove the center metal piece from the ornament
2)  Using string from the suncatcher, make an insert for the ornament
3)  Tie the string up and through the center of the ornament.  Knot.
4)  Use the needle and thread to create a circle of beads that fits around the top of the ornament.  I like to make a pattern.  In this case, it alternates between red and white.  Close the loop.
5)  Count the number of beads you used to make the collar.  Divide this by six.  This will be the number of beads you will leave blank between each drop.
6) Pass the thread through part of the collar, and then start adding beads until you achieve the drop length that you want.  Finally, pass through the raindrop crystal and back up through the other beads.
7)  Continue in the pattern that you have chosen until you get all the way around the ornament.
You are done.  See how simple?
Here is a last picture of the ornament, taken outside (sorry about the aluminum siding), showing how sparkly the ornament is.  And the best part?  It is super shiney, thanks to the crystals, but less prone to breakage because it is made with plastic.  Personally, I like that the ornament seems to contain a magical world, thanks to the crystals in the center.

So, create a special ornament of your very own this year.  I have a larger, slightly more complex one featured on the Connie Crystal blog, which you can check out at  http://ccsparkle.com/southwest-holidays/#respond  Hope to see you there!

Saturday, August 25, 2012

Woodware and Dreamweaver Hop--Warm Metal Mittens


All of this week, the Dream Team and the Woodware UK teams are celebrating the release of the new holiday designs from Dreamweaver Stencils. Of course, no celebration is complete without prizes...and there are some fabulous ones for those commenting on both sides of the "pond".

Each team will be providing the opportunity to win four prize packages of stencil designs, perfect for the holidays. Just leave your comments each day on each players' post as well as the Dream It Up! and Woodware UK blogs, and the Dreamweaver and Woodware Facebook pages. Two random commentors will be chosen from the batch of weekday posts, one each from the DW and WW Facebook pages, and from the big hop on Saturday...from each side of the pond!* That's a total of eight prize packages up for grabs! Here's what you could win:


 Here is my post for today:


If you follow my blog, you know that I have a love affair with metal. Of course, I truly enjoyed making this card.  It wasn't nearly as hard as it looks.  Here is the material list and the instructions:
 
MATERIALS:
Cuttlebug or any manual die cut machine (optional--it makes this easier)
Stamping Details Rubber Mat (tan Spellbinders mat will work, but the embossing is shallower)
Small Piece of Suede
Acrylic Block
Sandpaper
 
INSTRUCTIONS:
 
1)  Set up your die cut machine:  Place the mitten stencil face down on the bottom plate, followed by the green coated metal, green side down, then the Details Rubber Mat and flat top plates.  In my case, with a Cuttlebug, it was A Plate, stencil, metal, mat, and two B Plates.
2)  Run the stencil through your machine.
3)  Remove the metal from the stencil and place, green side down, on the suede.
4)  Use the ball tools from your basic kit to push the metal out.  You can get into the laces with the tiny ball that is on the pick looking tool.  The larger areas should be pressed outward with the larger ball.  You are trying to "sculpt" the metal, so push harder on the areas that need to be more 3D.
5)  When the metal appears sculpted, flip it over and place it on the acrylic block.  Use the Teflon Deer Foot and Refiner Tool to refine the areas around the "poufed" parts.  You will be using the fine point to outline the project and the deer foot to smooth down the larger parts.
6)  When the project is the way you like it, flip it over again and fill it with the Mercart Paste.  You will be filling the divots that you have created from the back.  It is a self levelling product, so you don't have to worry too much about getting it to lay evenly.  When it dries, it will make the embossed areas so hard that you can send your projects through the mail.
7)  Take a break and let that paste dry for a couple of hours or so (depending on the depth of the paste and the weather.....)
8)  When the paste is dry, set the project face up on the face up background stencil.  Rub the background with the blending stump and leave the stencil in place.
9)  Sand the background and raised bits, and you are DONE!
 
 I know that I often make projects that aren't for the faint of heart, but believe me when I tell you that this one is EASIER than it looks.  I promise.  Now, gather up the inspiration that you can, it is time to hop........


Don't forget to leave me some holiday cheer as you move on to the other players for today:
Remember to follow along with the challenges on the Dream It Up! and Woodware UK blogs for more prize opportunities, and more crafty inspiration, as well as "liking" DW and WW on Facebook.
*Winners selected must be from USA/Canada/UK only.


Thursday, August 23, 2012

Christmas Hearts in August--Woodware Blog Hop Day Four


All of this week, the Dream Team and the Woodware UK teams are celebrating the release of the new holiday designs from Dreamweaver Stencils. Of course, no celebration is complete without prizes...and there are some fabulous ones for those commenting on both sides of the "pond".

Each team will be providing the opportunity to win four prize packages of stencil designs, perfect for the holidays. Just leave your comments each day on each players' post as well as the Dream It Up! and Woodware UK blogs, and the Dreamweaver and Woodware Facebook pages. Two random commentors will be chosen from the batch of weekday posts, one each from the DW and WW Facebook pages, and from the big hop on Saturday...from each side of the pond!* That's a total of eight prize packages up for grabs! Here's what you could win:


My post today is very easy.  The Stencil does most of the work.  Here are the materials and directions:
MATERIALS
Cardstock in brown and red
Ribbon
 
DIRECTIONS
1)  Soap the back of the stencil
2)  Brush off the excess soap fragments that are stuck to the insides of the stencil
3)  Remove the paper from one side of the Double Sided Mounting Paper and place stencil on it, soap side down on the adhesive.
4)  Start with the Hot Pink Stampee Foil.  Place dull side down on top of the hearts. 
5)  Rub gently with fingers in the center of the heart. 
6)  Remove foil and replace with the red foil, also dull side down.
7)  Rub around the edge of hearts with the embossing tool.
8)  Apply colored glitter as follows:  Place a little glitter on the stencil near the area that you want the color.  Gently shove into the holes with finger and rub down a little.  I used Microfine Glitter to get into all of the tiny areas.
9)  Brush off the excess glitter. 
10)  Place a little gold glitter over the stencil and rub into ALL the holes--including the heart area.
11) Brush off excess glitter.  Be thorough.
12)  Carefully remove the paper from the stencil by placing the stencil face down on a flat surface and pulling the paper off while "walking" your fingers across the stencil to keep it flat.
13)  Cover the entire paper with the Ultrafine Crystal and brush off excess.
14)  Remove the paper from the other side of the Double Sided Mounting Paper to adhere to cardstock mat.
15)  Assemble card.
 
It was simple, really.  This card took very little time and made a complete picture with only one stencil.  Give it a try yourself!
 
Don't forget to leave me some holiday cheer as you move on to the other players for today:

Remember to follow along with the challenges on the Dream It Up! and Woodware UK blogs for more prize opportunities, and more crafty inspiration, as well as "liking" DW and WW on Facebook.
*Winners selected must be from USA/Canada/UK only.


Wednesday, August 22, 2012

The Mermaid Jar

If you are anything like me, you collect things--buttons, scrapbook paper, recipes, and, my husband would argue, shoes, are some of my favorite things to collect. ( If you go over to the Art Glitter Blog today, you will see that I also, apparently, like to collect empty jars.  I made one into a solar lantern.)  All of these collections reminds me vaguely of a certain little mermaid we all remember.  She had 20 thingamabobs, after all.  It was with this inspiration that I set out to create this mermaid jar--a place to store all of the little things that interest you.  Of course, I think of mermaids as the magpies of the sea, out to collect anything that sparkles.  The best place to start is with my glitter collection. 
I have broken the instructions for this lengthy project down into sections, so if you just want to learn how to paint on acetate, or make a bit of "sea glass", you can just read that part.  Here we go:

THE MERMAID--Painting with glitter on acetate.
MATERIALS
Art Glitter Designer Dries Clear Glue with fine metal tip
Stayzon Black
Acetate long enough to fit around jar
Stampendous Cling Rubber Stamp CRP151 Mermaid
Glitter colors that I used (you might want to chose your own) broken down into the places used and the order they were laid down within those sections
SKIN

Art Glitter Microfine Transparent 708 Ramosa
Art Glitter Mircofine Transparent 734 Sherbert
Art Glitter Microfine Transparent 717 Poupon

HAIR
 
TAIL
 
SHELLS, STARFISH, SEAHORSE
 
THE BASIC STEPS
 
1)  Stamp image on center of acetate, using Stayzon.  Let dry.
2)  Flip image over--you need to glue from the back.  Place on white paper.
3)  Use Designer Dries Clear with the fine metal tip to put glue into an area and glitter.  You are "painting" with glitter, but you are also working from the first thing you see to the background.  As an example, on the hair, I first used the yellow highlights, let them dry, and then added the coppery and red background colors.  Also, keep in mind that if you want to see the next color through the first, you have to use transparent.  On the hair, I used transparent colors as the highlights so that the base colors would show through.
You can see the back of the image in this picture.  I don't have the darkest red of the hair in place yet, and you can see how there are blanks in those areas.  You need to let the image dry in between layers of color.  I am not suggesting that you stop between each color, but after you glue a color, let it dry just a little as you work on another part of the image.  Then, you can return for another layer.
Here is the front of the mermaid completed.
 
I used the microfine in her body to get a more subtle sparkle on her skin.  I used it on the hair to get the first round of details.  The Canadian Blue on her tail was for the shadows, but I put them in first. 
 
THE LID--Using glitter on 3D objects and making your own textural areas
 
MATERIALS
One large mason jar.  I used one that I had bought spaghetti sauce in
One red plastic starfish.  I bought mine (in a package with a bunch more toys) at the Dollar Tree
One nail file
White Tissue Paper
 
INSTRUCTIONS


1)  Cover the top of the starfish with Designer Dries Clear.  Put a little on and rub it around with your finger.
2)  Douse starfish in Pearlescent Tang Glitter.  Let dry.
3)  Sand with nail file to reveal some of the bumpy red details of the plastic beneath
4)  Glue the bottom of the starfish to to lid of the mason jar.  Use just a little of the Designer Dries Clear.  Press and hold down to the metal for a little while, as the plastic starfish is not flat.


5) In each section of the lid, cover the metal with Designer Dries Clear and then add the tissue on top of the glue, crinkling it as you put it on.  Make sure that you put a little glue under tissue that sticks up too much.
6)  Put glue over the top of the tissue and cover with Art Glitter Ultrafine Transparent 197 Flax.  Let dry,
7)  When glue is dry, cover with a layer of Globecraft Glastique.  Put this on rather heavy and expect to LEAVE IT OVERNIGHT TO DRY.  This is an important step, because it protects the tissue and all the glitter as you open and close the jar.  It is a type of sealant.
 
THE COLLECTION--BEADS, SEA GLASS, KEY, AND CRYSTAL--lots of tips
 
MATERIALS

Clear Plastic Pony Beads (6-12)
Shish Kabob Skewers (6-12)
Nail File
Clear Packing Tape
Heat Tool
Non Stick Craft Sheet
Hemp
 
BASIC INSTRUCTIONS
 
BEADS
1) Place bead on end of skewer and sand on nail file to remove seams and cut back on the shine.
2)  Put Designer Dries Clear all around bead and dip into any Transparent Glitter colors (mine are listed above, but you can cut down on the list if you like).
3)  Let dry by placing skewers, bead side up, into a jar.
SEA GLASS
1)  Cut a 2" or so piece of clear packing tape into a random shape.
2)  Poke a hole in the tape and thread.
3)  Dip tape into an Ultrafine Transparent Glitter.  I used Key Lime and Coral Reef for my two pieces.
4)  Working on a craft sheet, cover glitter side of tape with enamel powder adhesive and Ultra Thick Embossing Enamel (UTEE).
5)  Heat Set.  Expect lots of curling and bowing by the tape.  This creates the interesting, unexpected Sea Glass Shapes.
6)  While project is still warm, add a little more glitter.
7)  Douse with embossing fluid and more UTEE and reheat.
KEY
1)  Douse the Piccolo key with enamel powder adhesive and cover with gold embossing enamel.
2)  Heat
3)  Repeat steps one and two
4)  While still hot, dip key in Brown and Cool Brown Glitter as desired.
CRYSTAL
1)  Cover crystal in Designer Dries Clear
2)  Dip into Ultrafine Transparent color.  I used Calypso

NET--putting it all together
MATERIALS
 
Completed Mermaid project
Completed Lid project
Completed Collections projects
Glue Dots
Jar
Hemp
Scissors
 
INSTRUCTIONS
1) Cut about 24 pieces of hemp, each about 12 inches long.
2)  Wrap Mermaid around the jar.  Attach with Glue Dots, putting 3 under the opaque areas of the mermaid and a few in the back of the jar.
3)  Wrap on piece of hemp around the neck of the jar and tie in front.
4)  Tie pieces of hemp in groups of two about a half an inch apart all the way around the jar, skipping the front where the mermaid appears.
5) Starting in the back, take one piece of hemp from one pair and tie it to one piece of hemp from the next pair.  You should be making the knot about a half an inch down from the top.  Do this all the way around, skipping the part by the mermaid.
6)  Repeat step 5 in rows down the glass until almost the entire length of the jar is complete.  Occasionally, use the beads that you created in place of a knot.  You will pass both of the two pieces of hemp through the single bead.
7)  Poke two small holes in the bottom of the back of the acetate and thread hemp through it.  Make sure that the hemp ends wind up on top of the acetate.  Tie this hemp in the front of the jar.
8)  The hemp in step 7 is your ending point.  When you reach this, you should have two ends of hemp that tie next to each other, echoing step 4.


 9)  The front and sides are not going to be tidy.  They shouldn't be.  Just tie them up together as you see fit.  Be sure and leave the mermaid showing.
You can sort of see the way that the side is crooked and messy here.  My thought is that these would have been discarded bits of fishing net that she would have put together to hold down her collections.  Therefore, imperfection is key.
10)  Tie the rest of the collection pieces ("sea glass", key, crystal) that you have made to the net.
11)  Fill with whatever you like.  If you look carefully at my picture, you will see that I even used a little Art Glitter Ultrafine Transparent 85 Crystal on one of the shells that I dropped in mine.
I hoped you enjoyed this lengthy tutorial.  I certainly loved making this project and intend to keep it, for myself for a change!  As you know, you can ALWAYS change yours to make it simpler or include less ingredients.  I hope you can use some of the things I mentioned here today.  Sparkle On!


Monday, August 20, 2012

Dreamweaver and Woodware Blog Hop Day 1

All of this week, the Dream Team and the Woodware UK teams are celebrating the release of the new holiday designs from Dreamweaver Stencils. Of course, no celebration is complete without prizes...and there are some fabulous ones for those commenting on both sides of the "pond".

Each team will be providing the opportunity to win four prize packages of stencil designs, perfect for the holidays. Just leave your comments each day on each players' post as well as the Dream It Up! and Woodware UK blogs, and the Dreamweaver and Woodware Facebook pages. Two random commentors will be chosen from the batch of weekday posts, one each from the DW and WW Facebook pages, and from the big hop on Saturday...from each side of the pond!* That's a total of eight prize packages up for grabs! Here's what you could win:


So, here is my post for today.  This card is going to be on many of the new stencil boards in the U.S. this year, so I thought I would let everyone know how it was made.
I began with a piece of Mercart aluminum.  This piece was actually color coated with the plain side up. I ran it through my Cuttlebug with the new stencil LX7016 Season of Joy.  I used the A Plate, the stencil face up, the metal silver side up, the Details Embossing Mat and two flat B Plates (not those curvy, scratched up ones we all have.....).   After I put it through the machine, I left the stencil on and refined the edges with my Mercart Teflon Tool.  I then tackled the coloring challenge with my gorgeous Color Solutions Alcohol Inks.   I dripped it into the "wells" of my card, smooshing it around and into the holes with the tip of the bottle.  I shortened my cleanup time a little by gently wiping the overages with a paper towel before the ink dried.  I used Sugar Plum in the words, Gold Star in the star, Pine Bough in the foreground trees, Noble Fir in the background trees, Creme Brulee in the animals and Iceberg in the stream.  After the colors were dry (moments, really), I sanded it.  Any stubborn spots of color on the background were removed with a little Color Solutions Thinner on a precision Q Tip. Then, it was just a matter of assembly. 

I hope that you got a little inspiration here. 
Don't forget to leave me some holiday cheer as you move on to the other players for today.                                                              
Woodware UK
Dream It Up!
Laura Drahozal
Lee Kellogg
Pam Hornschu
Dorothy Adam
Terrece Siddoway
Wendy Jordan
Louise Healy
Remember to follow along with the challenges on the Dream It Up! and Woodware UK blogs for more prize opportunities, and more crafty inspiration, as well as "liking" DW and WW on Facebook.

*Winners selected must be from USA/Canada/UK only.

Thursday, August 16, 2012

A Vintage Magenta Poinsettia


For this week's post, I am going back to one of my absolute favorite things to do--metal work.  I started with the Poinsettia Stencil LG700.  I really love this stencil because it is very versatile.  Today, I used it with fuschia coated Mercart aluminum.  I placed the metal face up on top of my face up stencil and ran it through my Cuttlebug machine.  The "sandwich" for the Cuttlebug is A Plate, stencil, metal, a  Details Rubber Embossing Mat, and two B Plates.  When it came out of the machine, it was lightly debossed.  I then used my Mercart Teflon tool from the basic tool kit on top of the metal to sharpen up around the edges of the wells in the stencil.  I then sanded the metal with the stencil still attached.  I accidentally sanded into some of the wells, but it created an opportunity.  I dropped some Tim Holtz Alcohol Ink in Wild Plum in the damaged areas.  It created a lovely shadow effect.  After I inked the holes, I finished sanding the project to reveal the silver aluminum color.  I then pulled the metal out of the stencil and dropped some gems into the holes by the "seed" area.  Lastly, I assembled the card and was finished. 
I love this project because it reminds me of the Christmas tree that I had as a child.  We used to have a white tree with pink lights and ornaments and silver tinsel.  We would coordinate the poinsettias with the tree whenever possible. To this day, I love the vintage look of a magenta poinsettia.

Want to get into the holiday spirit a little early? Link your own Christmas in August creations to the Dream It Up! blog mr. linky, or email pics of your creations to lynell@dreamweaverstencils.com, for an opportunity to win this wonderful newly released Heart Ornaments:


Don't you just love this new design? There are several newly released stencils and products from CHA last month, which you can view for yourself HERE. During the week of August 20th - 25th, the Dream Team will be posting all week with a hop on Saturday to top it all...featuring all of these new fabulous designs...in collaboration with the Woodware UK team. Just a little hint...you may want to buy all of these new designs now, so you are ready and waiting for the inspiration that will come your way that week! Meanwhile, check out what the rest of the team has been creating this week:

Sunday, August 12, 2012

A Magical, Crystal Wreath

This is my Connie Crystal post for today.  It is a real mixed media project, and I am pleased with my results.  This is just a sneak peek, though.  For more information on this project and tons more photos, check the Connie Crystal Blog!  Hope to see you there!

Thursday, August 9, 2012

Christmas Chickadees in August


My Christmas creation this week combines some of my very favorite products with the Double Glitter Technique.  If you would like to recreate this, follow a few simple steps.  First, soap up the back of the stencil LG 708 with the Handmade Hawaiian Soap.  Brush the soap crumblies off with a large stencil brush.  Then, place it on exposed adhesive of Double Sided Mounting Paper.  Next, put red pearls into the holes for berries. Stampee Foil goes on the gold beaks and the green leaves.  It is easy.  Just put the foil dull side down over the area where you want it and press it down with your fingers or an embossing sylus.  Then, pull the foil off.  The branches are Ultrafine Opaque Art Glitter in 58 Brown.  You can sprinkle a little on the stencil and push it in with your finger.  Then, use Stampendous Fun Flock in Plain Ol' Black over the whole thing.  When using the flock, you need to use quite a bit and push it down hard to make it look plush.  Then, brush off the excess well, so that it doesn't migrate when you remove the stencil.  Put the whole thing stencil side down on a flat surface and carefully peel the paper off, keeping the stencil flat.  Cover the whole thing in Ultrafine Transparent Glitter in 85 Crystal.
That is it.  It was great fun.  Now, it is your turn.

Want to get into the holiday spirit a little early? Link your own Christmas in August creations to the Dream It Up! blog mr. linky, or email pics of your creations to lynell@dreamweaverstencils.com, for an opportunity to win this wonderful newly released Heart Ornaments:


Don't you just love this new design? There are several newly released stencils and products from CHA last month, which you can view for yourself HERE. During the week of August 20th - 25th, the Dream Team will be posting all week with a hop on Saturday to top it all...featuring all of these new fabulous designs...in collaboration with the Woodware UK team. Just a little hint...you may want to buy all of these new designs now, so you are ready and waiting for the inspiration that will come your way that week! Meanwhile, check out what the rest of the team has been creating this week: