Showing posts with label stampendous fun flock. Show all posts

Thursday, August 9, 2012

Christmas Chickadees in August


My Christmas creation this week combines some of my very favorite products with the Double Glitter Technique.  If you would like to recreate this, follow a few simple steps.  First, soap up the back of the stencil LG 708 with the Handmade Hawaiian Soap.  Brush the soap crumblies off with a large stencil brush.  Then, place it on exposed adhesive of Double Sided Mounting Paper.  Next, put red pearls into the holes for berries. Stampee Foil goes on the gold beaks and the green leaves.  It is easy.  Just put the foil dull side down over the area where you want it and press it down with your fingers or an embossing sylus.  Then, pull the foil off.  The branches are Ultrafine Opaque Art Glitter in 58 Brown.  You can sprinkle a little on the stencil and push it in with your finger.  Then, use Stampendous Fun Flock in Plain Ol' Black over the whole thing.  When using the flock, you need to use quite a bit and push it down hard to make it look plush.  Then, brush off the excess well, so that it doesn't migrate when you remove the stencil.  Put the whole thing stencil side down on a flat surface and carefully peel the paper off, keeping the stencil flat.  Cover the whole thing in Ultrafine Transparent Glitter in 85 Crystal.
That is it.  It was great fun.  Now, it is your turn.

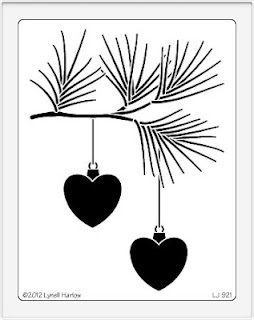
Want to get into the holiday spirit a little early? Link your own Christmas in August creations to the Dream It Up! blog mr. linky, or email pics of your creations to lynell@dreamweaverstencils.com, for an opportunity to win this wonderful newly released Heart Ornaments:


Don't you just love this new design? There are several newly released stencils and products from CHA last month, which you can view for yourself HERE. During the week of August 20th - 25th, the Dream Team will be posting all week with a hop on Saturday to top it all...featuring all of these new fabulous designs...in collaboration with the Woodware UK team. Just a little hint...you may want to buy all of these new designs now, so you are ready and waiting for the inspiration that will come your way that week! Meanwhile, check out what the rest of the team has been creating this week:

Thursday, May 17, 2012

Ummm--Black and White and a Pop of Color?

Well, I ALMOST follow the challenge this week.  Silver is a neutral, after all.  This week, I have a tutorial featured on the Paper Craft Planet site.  My subject is foil with the Double Glitter Technique.  Pam was generous enough to let me count this as my blog post this week.

Two unusual things have come together this week:  I took WAY TOO MANY step out pictures and I am featured on Paper Craft Planet this week.  So, since I REALLY want you to visit my blog there, I am going to try something new.  I am going to give you a photo posting this week.

1) Gather materials


2) Soap the back of the stencil


3) See the soap crumblies?


4) Remove them with a stencil brush


5) Put Double Sided Adhesive Paper on Soaped side of stencil

6) Foil has dull and shiny side

7) Place dull side down on adhesive

8) Rub on with finger

9) Run around edges with stylus

10) Peel off foil
11) Foil backing is clear

12) Pour on coordinating glitter

13) Rub in glitter--I like Art Glitter Microfine

14) Brush off excess glitter


15) Carefully remove paper from stencil

16) Pour on Crystal Art Glitter

17) Finished Background

18) Using first few steps, put butterfly on adhesive

19) This time, use lots of colors

20) It only takes color where there is none

21) So you can layer colors

22) Lots of colors


23) Add Black Fun Flock instead of glitter


24) Brush off excess--WELL!


25)  Remove from backing.  Here is where you add Crystal Glitter
Well, there it is--my never to be repeated photo tutorial.  For the real deal, you will have to go here.
Meanwhile, I hope you have been inspired.  Check out the rest of the team blogs and you will be.  Then make something Black and White with a Pop of Color (or something close to it...), post and link it to the Dream It Up Blog or email it to Lynell for your chance to win!

Friday, April 13, 2012

Dreamweaver and Stampendous Blog Hop


Get ready to be inked, pasted, encrusted, stenciled and stamped! All of this week the Dreamweaver Stencils' Dream Team and the Stampendous Design Teams will be providing some "Dream-pendous" inspiration for you, with multiple opportunities to win some fabulous prizes from both companies. Each day this week, you will be directed from both the Stampendous Impressions' blog or the Dream It Up! blog to the players du jour for your oohing and aaahing pleasure. Everyone will be playing on Saturday, the 14th with our final hop for the week. This is your opportunity to see how to mix and mingle your creativity...if you are a stenciler, you will be fascinated at combining stamps with your first love. If you are a stamper, you will be wowed at how stencils can add to your impressions.


Here is my creation.  I started by pasting Dreamweaver Stencils Branch and Berries LJ900 with Dreamweaver Embossing Paste.  While it was still wet, I sprinkled on Stampendous Aged Copper Embossing Enamel.  Then, I heat embossed it.  Next, I stamped the new Stampendous Cling Bird Manor Stamp CRW073 on the cereal bag that I used on Monday's post.  I used black Stayzon ink.  I let it dry for a little while I created the flowers using the double glitter technique.  With the stencil LG 644 Cherry Blossoms attached to the double sided adhesive paper, I placed pinches of three colors of Stampendous Fun Flock:  Think Pink FL816, Pixie Pink FL803 and Raspberry Tart FL 817 around the flowers.  I pushed the flock down hard and in towards the flower centers to blend the colors.  I then brushed it off well and removed the adhesive paper from the stencil.  I covered the exposed adhesive with Stampendous Multi Ultra Fine Crystal Glitter.  I cut around the flowers and set them aside.  When the stamped image was dry, I flipped it over and put a very small amount of Art Glitter Designer Dries Clear on all the parts of the stamp that I wanted to be opaque silver.  I covered these areas with Stampendous Pearlized Mica Fragments.  I also covered the backs of the birds with glue and added Stampendous Neon Yellow Glitter.  As this dried, I used gold covered aluminum and my Mercart Metal Tools with Dreamweaver Stencil LG 646 Bird & Blossoms to deboss the bird.  I did this by placing the metal face up on top of the stencil, rubbing it down with a fine art blending tool, and pushing it into the stencil with the Mercart Teflon Tool.  When I had the bird, branches, some leaves and a flower debossed, I sanded the top of the metal.  I then used the Designer Dries Clear in the wells that I created to add Aged Copper Embossing Enamel in the branches and heat emboss it.  I also used the glue in the wells to color the eye with Plain Ol' Black Flock, the leaves with Sour Apple Green Flock and the flower with the remaining flock from the double glitter flowers.  I then assembled the card, placed the cage on it with a mix of Glue Dots and Designer Dries Clear, and peeled the backs off of the flowers, placing them on some of the "berries" in the background.  Finally, I put some double sided adhesive on the back of the bird, trimmed it close with an ordinary pair of scissors, and attached it to the card.


Be sure to leave comments as you tour the blogs (with your email addy!) for a chance to win* one of three combined sets of these Dreamweaver and Stampendous goodies:


Leave me some love before you "gear up" for the next player:

Dream It Up!
Stampendous Impressions!
Kristine Reynolds
Cherylynn Moser
Susie Moore
Lynn Mercurio
Laura Drahozal
Pam Hornschu
Terrece Siddoway
Wendy Price
Liz Martin
Taylor Usry
Jessie Hurley
Krissy Fossmeyer
Jennifer Ingle
Lee Kellogg
Janelle Stollfus
Jennifer Dove


*For shipping and handling purposes, USA/APO/FPO/Canada winners only.

Monday, April 9, 2012

Dreamweaver and Stampendous Blog Hop Day One!


Get ready to be inked, pasted, encrusted, stenciled and stamped! All of this week the Dreamweaver Stencils' Dream Team and the Stampendous Design Teams will be providing some "Dream-pendous" inspiration for you, with multiple opportunities to win some fabulous prizes from both companies. Each day this week, you will be directed from both the Stampendous Impressions' blog or the Dream It Up! blog to the players du jour for your oohing and aaahing pleasure. Everyone will be playing on Saturday, the 14th with our final hop for the week. This is your opportunity to see how to mix and mingle your creativity...if you are a stenciler, you will be fascinated at combining stamps with your first love. If you are a stamper, you will be wowed at how stencils can add to your impressions.
Here is my creation.  It is an unusual style for me to be using.  It reminds me a bit more of my friend, Linda's style. I really enjoyed the stretch for this one.  Although I didn't realize it at the time, this card would probably qualify for the Stampendous Challenge on recylcing that is going on right now.  Let me explain.
I started this card with an encyclopedia that I found at the Salvation Army.  I knew that I had this lovely Stampendous Vintage Birdcage Stamp CRV266, so I found the page on Sound and ripped it out, ripped it up and distressed it with Tim Holtz Distress Brushed Corduroy Ink. I had two pieces when I was done, so I put them both on Double Sided Adhesive Paper to make my new "paper".  Then, I used that lovely stamp to stamp a couple of images in the background with the Distress Ink.  I also used that ink and stencilled just the musical staff portion of stencil LM 149 Music.  Using Versamark, I stamped the center birdcage and embossed it with Aged Gold Embossing Enamel.  This embossing powder is a little chunkier and creates a vintagey look, but don't expect it to show all the beautiful fine lines of a stamp like this.  This is why I stamped the black image.  I wanted to use something transparent for both this birdcage and the pasted bird's nest, but I did NOT want that overly shiney look of acetate.  That seemed too modern for my theme.  Fortunately for me, I had just finished a box of cereal that morning.  Well, I washed out the lining and used it here.  Clear, but not too modern looking.  I needed to use the Stayzon on the birdcage.  The Pearlescent Dreamweaver Embossing Paste was perfect on it with the LL 587 Nest Flourish Stencil.  I felt that both of these items could use a little extra "oomph", so I glued Mica Fragments on the reverse side with Art Glitter Dries Clear Designer Glue. The birdcage stamp was enhanced with FRM01-Pearlized Mica Fragments behind the bottom and top screw of the cage.  The bird was enhanced with FRM04-R Tea Stained, and the stencilled nest got FRM03-R Tarnished Mica Fragments.  I pasted the "Sing Your Song" off of the LG 734 Bird Words stencil with Dreamweaver Matte Black Paste. Finally, I used a modified Double Glitter Technique with stencil LS 94 Bird on Branch, Stampee Foil, Stampendous Plain Ol' Black Fun Flock and Stampendous Multi Fine Crystal Glitter.  The papers were edged with Versamark and Aged Copper Embossing Enamel.
Whew!  There was a LOT going on here.  (Quite the contrast with last month).  If you like these assemblages, definitely check back with me on Saturday this week (no, not Thursday this week) for another Stampendous Blog Hop Day.  Better yet, check in with the team daily--we will be hopping all week with Stampendous!

Be sure to leave comments as you tour the blogs (with your email addy!) for a chance to win* one of three combined sets of these Dreamweaver and Stampendous goodies:


Leave me some love before you "gear up" for the next player:


Stampendous Impressions!
Dream It Up!
Cherylynn Moser
Lynn Mercurio
Laura Drahozal
Kristine Reynolds
Pam Hornschu
Taylor Usry
*For shipping and handling purposes, USA/APO/FPO/Canada winners only.

Thursday, October 6, 2011

Dreamweaver Free Challenge Week

Well, here it is, October. It is a glorious month here in Michigan, as the nights are cool, the days are warm and (usually) sunny, and the air is crisp and smells of apples and crackling bonfires. Personally, it was one of my favorites in childhood, being that it contained both my birthday and Halloween, which meant gifts, cake, costumes and candy. Later, it also held my husband's birthday and our anniversary. It was the king of months for me. The past few years, however, it has been a difficult month. It is breast cancer awareness month, and my mother passed due to complications of breast cancer. Now, October is often a month of as many tears as smiles for me. Not only do I miss my mom at the important events of my life, but I also get the "treat" of shopping at stores filled with pink ribbons on one side of the aisle and tombstones on the other. I have to wonder why no one ever foresaw this disturbing imagery when they chose October for Breast Cancer Awareness Month.
You may wonder what all of this has to do with this week's card. Well, this card symbolizes a lot for me, and I thought it wholly appropriate to include it as my first October post. First, the background, the beautiful Opto Checkerboard, LJ 915 which reminds me of MC Escher, art school and a lesson plan I once taught in a previous career. To me, it also relates to October, because it is an unexpected checkerboard. It is just a little "off", like all things in October, especially at the end of the month. I pasted this one with black paste.
The butterfly is absolutely one of my favorite new stencils. It is LJ 916. If you followed my Art Glitter blogs over the summer, you have seen this one before on a straw bag. I just love it. It looks its absolute best, I think, when it is double glittered, like it is here. In this case, I used the Double Sided adhesive paper and soaped the back of the stencil before I attached it. I then filled the holes with stunning autumnal (also Monarch colored) Art Institure Glitter, and black Stampendous Fun Flock (in the body). I removed the stencil and poured black glitter over the whole thing. This is a very large stencil, and it runs over the boundaries set forth by the card. I liked this. It seems like the butterfly's will to fly is so strong that it breaks away from its world. My mother and I used to go to butterfly houses where ever we could find them. She loved the idea and feeling of flight, so I imagine that she would have really loved this strong willed butterfly.
Finally, the Make a Wish sentiment. This one I did with Black Adirondack Pigment Ink and a stencil brush. It is from the Birthday Words stencil LG 704. I chose this one for many reasons. Most of all, it is because my mother and I went to Disneyworld after her cancer metastisized. We saw the fireworks display Wishes for the very first time. During the show, the narrator tells us to all "make a wish". Mom and I both started crying, because we both knew what we were wishing for. Anyway, that is what this phrase reminds me of.
So now, here it is, some years later. Sometimes, especially in October, it seems like yesterday, and I feel like an open wound. Most Octobers, I try to just "lay low" to escape all of those pink ribbons and tombstones in the stores. This year, I am opting to face it head on. That is what this posting really represents. While the butterfly reminds me of my mother, it also brings up the sayings that I have been so fond of lately, "Just when the caterpillar thought the world was over, it became a butterfly" and, of course, "Without change, there would be no butterflies." I can't undo this change in my life, so I guess that it is time for me to try and become the butterfly. So, maybe this post was a little less lighthearted than others, and for that, I guess, I am sorry. Sometimes a card is just a card, but sometimes it is a catalyst for thought. I would love it if you could leave me a comment. Check out the other Dream Team designs for this week and play along if you are so inspired. Link it to the Dreamweaver Blog. I hope I didn't bring anyone down. Just remember, try to become the butterfly. It is never too late. Start now.