Showing posts with label Christmas Card. Show all posts

Thursday, December 10, 2015

Celebrate The Season with an Ornate Tree

The Stampendous theme this week is "Celebrate the Season".  I am combining it with "Dreamweaver Thursday" by presenting this tree.  It is easier to create than you might think.


Cardstock by Bazzill Basics Paper®
Scotch Removable Tape
Scotch 1/2" Adhesive Tape
Chameleon Pens in Grass Green, Hot Cocoa, Crimson Red, Sunshine Yellow, Spring Meadow, Warm Sunset

Instructions:


  1. Cut card base to 7" by 10 1/4" and fold at the side.
  2. Cut blue card stock to 7" by 5 1/8" and adhere to the front of the card.
  3. Cut blue card stock to the size of the Ornate Christmas Tree Stencil.
  4. Tape the stencil over the top of the card stock using removable tape.  Be sure to use one large piece over the top edge of the stencil.  It will act as a hinge.
  5. Use the palette knife to remove Pearlescent Embossing Paste from the jar and lay a strip above the stencil.  Make sure you have a long enough strip to cover the entire width of the Christmas tree.
  6. Place the bottom edge of the paste spreader above the strip of paste and pull towards you.  The paste should completely fill in the wells of the Ornate Christmas Tree Stencil.
  7. Carefully remove the tape from the sides and the bottom of the stencil, leaving the tape on the top.
  8. Lift the stencil from the bottom corner like a door and then remove it entirely from the area. Let the paste dry.
  9. After the paste has dried, use the Chameleon Pens to color directly on it.
  10. Cut the card stock with the Christmas tree image to the size you prefer.
  11. Place Sticky Panels all the way around the inside of the front of the card.  Leave a slight border.
  12. Center the Christmas tree image on the card and adhere--using both your favorite adhesive and the inside of the Sticky Panels strips
Thanks for stopping by today.  Be sure to check out the rest of the "Celebrate the Season" posts for the day!

Thursday, November 19, 2015

Santa Theme Week Stocking Card

The Stampendous theme this week is Santa.  I know this isn't technically a Santa card, but I can imagine that this stocking, hung with care, waiting for Santa, is just the type of stocking that Santa would actually wear himself.  That seemed to follow the theme well enough for me.  Stampendous team members are also showing Action Wobbles cards, but this is not one of them.  This card was created with a little stamping, some die cuts, and some embossing powder.  


Cardstock by Bazzill Basics Paper®
May Arts Ribbon
Small Queen and Co. Rhinestones
Xyron X Adhesive
Scotch Brand 1/2 inch Adhesive Tape
Die Cut Machine (I used Cuttlebug)
Big Bite
Embossing Heat Tool
Paper Trimmer

Instructions:

  1. The base card stock size was 4 1/2" by 11" and it was folded on the top edge.
  2. Use the Jumbo Acrylic Handle and the Snowflake Sky Stamp to stamp red card stock with Versamark Ink.
  3. Generously pour Opaque Winter Wonderland Embossing Powder over the stamped snowflake image and shake off the excess.
  4. Use the heat tool to heat emboss the powder.
  5. Stamp white card stock with the sentiment in Memento Tuxedo Black Ink.
  6. Use your die cut machine and the Nested Stocking Die to cut the stocking shape from the embossed card stock, the stocking top from Sticky Panels and the Holly Die from green card stock.
  7. Remove the paper from the top of the die cut Sticky Panel and generously pour the 3D White Glitter Embossing Powder over it.  Shake off the excess.
  8. Use your heat tool to emboss the powder.
  9. Cut close to the sentiment image and then cut a thin red mat for behind it.
  10. Cut red card stock to match the front of the card.
  11. Cut dotted green card stock to fit inside the red.
  12. Adhere down the stocking, stocking top and holly on the dotted green card stock, leaving room for the ribbons.
  13. Run two pieces of ribbon through your Xyron "X" machine to get adhesive on the back.
  14. Adhere the red mat (the one that will go behind the sentiment) to the dotted green card stock.
  15. Place the adhesive backed ribbon on the green dotted card stock, starting with the bottom ribbon and wrapping a little under the sides.
  16. Adhere the sentiment inside the white rectangle.
  17. Use the Crop-a-Dile to create two small holes on the top of the stocking.
  18. Run ribbon through the holes and tie.
  19. Adhere the large red card stock to the card.
  20. Adhere the green dotted card stock inside the red card stock.
  21. Attach rhinestones.
Here are all the links for today:

Stampendous Blog

Kristine Reynolds (Wobbles, DW and Santa)
Pam Hornschu (Wobbles and Dreamweaver Stencils)
Laura Drahozal (DW and Santa)
Louise Healy (DW and Santa)
Pam Bray (DW and Santa and Wobbles)
Lea Fritts (DW and Wobbles)

Thursday, September 3, 2015

Dreamweaver All In One

Fran Seiford, Owner and Founder of Stampendous, understands that holiday card making can be time consuming. Plus, it’s not always easy to find images that go together to make the perfect card. Enter the All in Ones from Stampendous. These darling stamps are the perfect size to make a whole card. Easy shapes to cut with scissors or simply stamp on a colored background, these stamps have a focal image, a background, a frame, and a phrase for the holidays. Just stamp it, sign it, mail it. OR get as creative as you like by combining with other stamps and embellishments!
Here is what I did by combining one of these stamps with a Dreamweaver Stencil and a die cut.
Materials:
Removable Tape
Blue Card Stock
White Card Stock
Prismacolor Pencils in the following colors:  White, Cool Grey 10%, Cool Grey 20%, Cool Gray 30%, Cool Grey 50%, Cool Grey 70%, Cool Grey 90%, Metallic Silver, Periwinkle, Indigo Blue, Dark Green, Olive Green, Crimson Red and Terra Cotta
Scotch 3M Adhesive
Foam Squares

Directions:
1.  Use the removable tape to adhere the stencil to the blue card stock.
2.  Remove the embossing paste with the palette knife and place on the paste spreader.
3.  Put the paste spreader on the top of the project and pull the paste down over the stencil, filling in all the gaps.  Treat the spreader as if it were a squeegee, keeping contact with the stencil all the way down.
4.  Remove the stencil, sprinkle glitter on the paste and then let it dry.
5.  Stamp the image on the white card stock with Memento Ink.
6.  Color the image with Prismacolor colored pencils.
7.  Die cut the holly leaves.
8.  Cut out the stamped image.
9.  Assemble the card, using foam squares to pop up the main image.

Thanks for stopping by.  I hope you enjoyed my post today.
Here are the other blogs that participated in either the All In One or the Dreamweaver posts for today:

Thursday, October 30, 2014

HallowThanksMas Week 5

We are back to the original theme of the month, HallowThanksMas!  Yes, Halloween, Thanksgiving AND Christmas, but not all together, mind you.  As usual, we'd love for you to play along with the challenge and link your creations to the Inlinkz tool on the Dream It Up! blog. Just in case you are wondering...NO, YOU DO NOT NEED TO POST SOMETHING WITH ALL THREE HOLIDAYS ON IT! However, you get bonus points for actually using Dreamweaver stencils and product on your creations! And bonus points might actually earn you an extra stencil as our monthly winner...just sayin'!
 
Here's my creation for today: 
 
This is another metal creation.  I used both the green coated aluminum and the red coated aluminum.  I cut the ornaments out first using the DG674 Nested Ornaments Die and my Cuttlebug.  I then placed them on the LX7026 Chevron Background and ran it through my Cuttlebug with the stencil face up, the metal face up on the red and face down on the light green, the Rubber Embossing Mat and two B Plates.  I used the same sandwich with the red metal (face up) and the LM 283 Vertical Celebrate Stencil.  I dripped Color Solutions in Mojito into the "wells" on the lighter green ornament.  I sanded all of the metal projects to remove the coating on the raised portions.
 The background was created much the same way, but with paper in the sandwich and both the LX7025 Crusade Background Stencil and the paper face down.  I left the stencil in place as I sprayed it with Memory Mist MM25 Gold. 
The holly ornament was created with the FJ917 Holiday Greetings Embossing Folder. I put a couple of drops of Winter Red Color Solutions into the berry sections.  I then lightly sanded the whole thing.
I attached the two chevron ornaments and the celebrate word with Double Stick Mounting Paper.  Then, I pasted the LL3045 Small Oval Ornament Stencil with Glossy White Embossing Paste and attached the holly ornament while it was wet.

Remember to visit the entire Dream Team for more inspiration:

 
An InLinkz Link-up

Thursday, October 16, 2014

Sandy Claus is Coming to Town--Day Four


SANDY Claus is Coming to Town!
 
 
Yes...SANDY Claus! All of this week, the Stampendous and Dreamweaver teams are playing with a mix of their products, along with some wonderful, SAND-ABLE papers from Core'dinations. Join us as we sand our way to the "core" of all things Christmas and the Holiday season. Of course, there will be prizes, and we give away the best...this time with a mix of fun Core'dinations products as well. To be one of three prize package winners, follow the posted link lists each day, leave a comment, and winners will be selected from these comments at the beginning of next week. Here is what you might win:
Here's what I'm showing off today:


First, I sprayed the back of the Large Damask Stencil LX7001 with Strawberry Daiquri and Metallic Gold Memory Mists and ran them through my Cuttlebug with Color Core Core'dinations Card Stock and the Rubber Embossing Mat.  (Sadly, you can't see the shimmer it created in this photo).  I waited for the card stock to dry before I sanded it to reveal the beautiful core color. 
As I waited, I used Metallic Gold Embossing Paste on White Canvas Textured Core'dinations with the LL 3009 Christmas Script Stencil. This had to dry as well.
 I used the DL3005 Holly & Berries Die Cut with Color Silk Card Stock.  The flourish is from the gorgeous Stampendous Jumbo Cling Rubber Poinsettia stamp set.  I used Gold Delicata ink and Stampendous Clear Embossing Powder on vellum.  I stamped it twice, using the extra edges on the sides of another piece.  I attached it to the white card stock and fussy cut the edges.  After that, it was a simple matter of assembly, using May Arts Ribbon and a few rhinestones.  
Leave a comment for me, and head to the next on the list:
 
Dreamweaver:
*On Stampendous team as well

Core'dinations:
(will not be posting on their company blog, but individual posts only)

Head on over to the Stampendous blog for links to their posts:

Thursday, September 4, 2014

Christmas in September?

Where did the summer go? Kids are back in school, with all the insanity that goes with it, vacations are a not-so-distant memory, and it is once again time to get busy with the important things in life...crafting for the holidays! Yay! All of September the Dream Team will be featuring all the new goodies we have for the "Most wonderful time of the year", the fall and winter holiday season. New stencil designs, new dies, and...(coming soon) brand new embossing folders featuring some of our top-selling designs, all to be found on-line through the Stencil with Style web-site, or your local papercrafting store.
 
Here's my holiday inspiration for this week:
I created it using metal and velvet paper, which means that it did not photograph as well as I would like to (the only thing about these two materials that I don't like), but perhaps a couple of closer shots and some more detailed explanation would be helpful.
For the flowers, I started by running green metal through my Cuttlebug with this sandwich:  A Plate, Stencil LL3046 Tall Poinsettia (face up), Green Coated Aluminum (face up), the Stamping Details Rubber Embossing Mat and two B Plates.  You might wonder why I have those little lines through the metal.  Well, true confession time, I was all out of the Mercart Metal, so I used a different brand in the same color.  If you use the metal that I linked, you won't have that problem.  Anyway, I then left the stencil under the metal as I gently pressed the metal against the inside of the stencil with the Teflon Tool in the Basic Metal Kit.  You can skip this step if you want to, it just won't have as crisp of edges.  Then, I used the Color Solutions Remover on a Q Tip to remove the green inside the flower and seeds.  I left just a little in the edges so that it would darken the tips.  I dropped a little Christmas Red Color Solutions inside the wells of the flowers and Lemoncello inside the seeds.  I did not worry too much about it going over the edges because I knew I would sand it later.  I enhanced the colors a little with Q Tips and Paprika Red in the flowers and Gourd Green in the leaves.  I then sanded the top and brushed of the dust with a stencil brush.  I pulled the metal off the stencil, and placed it on Double Stick Mounting Paper, burnishing it down with my fingers.

 
For the background, I repeated the embossing process I explained, except that I put Stencil LX 7027 Quatrefoil face down and the velvet paper face down on top of it.  Other than that, I used the same sandwich.  For the letters, I used the new Dual Alphabet Dies in my Cuttlebug with green metal.  The sandwich for this was A Plate, dies face up, metal face down, C Plate and B Plate.  If you have any trouble cutting all the way through the metal, a slight shim of cardstock should fix it. Then, I sanded just the outside of the letter and reassembled them on Double Stick Mounting Paper.
Finally, I assembled the card, using the other side of the Double Stick Paper to attach the metals.

 
Of course, we have our monthly challenge for you to play along, so post your own holiday creations, and use the Inlinkz tool on the Dream It Up! blog, for a chance to win the prize at the end of the month. We also have our fabulous Guest Designer for the month of September, Wendy Price! Here's the list of our "A" Team with their links for the week:


;

Friday, August 15, 2014

Christmas in August Blog Hop with Woodware--The Final Day


Yes! It's that time of year again! The time when we inspire crafters on both sides of the "pond" with a mix of both Dreamweaver and Woodware UK* products for the holidays! Six days, SIX, of beautiful, elegant, merry, cute, artsy, and craftsy projects to have you heading out to your local stores or internet sites to buy these goodies immediately!


Of course, there will be prizes as well. Three prize packages will be given to three commenters during this week's posts on the team's blogs, including five stencils and one nested die set. You can have an opportunity to win these goodies by leaving some holiday sweetness for each team member posting each day, to be one of the three winners for the week. Here are the team members that are inspiring you today:
Here's my creation: 

 
First, I stamped with a beautiful Woodware stamp on white card stock with Jet Black Archival Ink.  Then, I ran a couple of stencils through my manual die cut machine with the Rubber Embossing Mat.  I ran the Dreamweaver Stencil LX 7002 Plaid through with red velvet paper.  The Dreamweaver Stencil LL557 Long Merry Christmas was used with Red Coated Aluminum.  I put the aluminum red side up over the stencil, which was also right side up.  I enhanced the "debossing" with the Teflon Tool from the Beginner Metal Tool Set.  I used a Qtip with Color Solutions Alcohol Ink Thinner to remove the red in the holly leaves.  I then used a little Color Solutions in Pine Bough to add green to  the leaves.  Finally, a sanding block removed all the color I did not want.  I did all of these steps with the stencil still behind the metal. 
 
The image was colored with Crayola Crayons.  The card was assembled using regular adhesive, Double Stick Mounting Paper behind the metal, 3D Dots and a lovely May Arts Ribbon.
*For a stockist near you contact Woodware Craft Collection in the UK and Notions Marketing in the USA.

Saturday, August 17, 2013

Christmas in August with Dreamweaver and Woodware!


Welcome to the annual Dreamweaver and Woodware Christmas in August extravaganza week! Monday through Saturday we will be knocking your Christmas stockings off with fun and inspirational ideas for the upcoming holidays. All that you need to do is hop back and forth across the "pond" on each day, oohing and aaahhhing as you go, and leaving us plenty of holiday love. In return, you'll be entered to randomly win one prize package for a UK commenter, and a second prize package for a US commenter, featuring products distributed in the UK by Woodware...including Dreamweaver and Stampendous!

Prize includes four stencils, one die, and two stamps, selection may vary.


Here's what I've created:
I hope you enjoy these cute little mice as much as I enjoyed creating them.  They are part of the House Mouse collection now from Stampendous. This one is called Hang on Tight. I stamped it with an archival ink, which I then heat set.  They were colored with Derwent Inktense water soluble ink pencils.  The background was created by running Black Coated Mercart Aluminum through my die cut machine with the Dreamweaver Rubber Mat and Snowflake Stencil LJ 819 (see embossing tutorial from Thursday).  It was sanded to reveal the snowflakes.  The Happy Holidays Stencil LM 139 was debossed with Red Coated Aluminum (again, see Thursday's post) and enhanced with the Mercart Teflon Tool before being sanded.

I used shrink plastic for the snowflakes.  First, I cut hexagons with my die cut machine, and then I sanded them.  I taped the sanded side to the back of the stencil.  The larger snowflakes were LL 399 Traditional Snowflake and LL 396 Gothic Snowflake.  The smaller snowflakes were from the Snowflake  Stencil LJ 819.  I used a stencil brush to apply black pigment ink on to the shrink plastic.  I punched a large hole in them and used my heat gun to shrink them.  They were attached with embroidery floss and accented with small rhinestones.


Now's the time for you to leave a comment and move on to the next designer for today:

Thursday, August 30, 2012

A Beautiful, Pasted, Christmas!

I don't often post projects made with paste, but today I am posting two.  This one has the more traditional approach to pasting.  The other is on Paper Craft Planet here.
This card actually has a couple of different techniques.
The Holly Sprig in the background is Holly Fourish Stencil LG 731.  I simply ran the cardstock through my Cuttlebug after spritzing it with a little rubbing alcohol.  The Sandwich is A Plate, upside down stencil, face down cardstock, Stamping Details Embossing Mat, and two B Plates.  Then, berfore I removed the stencil, I brushed it with a little Distress Ink, using two different colors .  I highlighted the berries with a little Stickles. 
The word is the Christmas Script Stencil LL 3009.  I taped the stencil over brown cardstock onto my craft sheet with removable tape.  Then, I used my paste spreader to "pull" the Metallic Gold Embossing Paste over the whole thing.  I removed the stencil and let it dry.  Then, I added red Stickles to the berries.  After everything was dry, I cut around it and assembled the card. 
For a completely different approach to using Gold Metallic Embossing Paste, check out the Molten Magic Tutorial on Paper Craft Planet. 
 
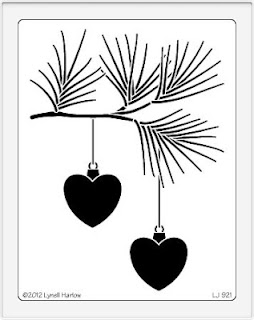
Do YOU want to get into the holiday spirit a little early? Link your own Christmas in August creations to the Dream It Up! blog mr. linky, or email pics of your creations to lynell@dreamweaverstencils.com, for an opportunity to win this wonderful newly released Heart Ornaments:


Don't you just love this new design? There are several newly released stencils and products from CHA last month, which you can view for yourself HERE. Be sure to check out what the rest of the team has been creating this week:


Thursday, August 9, 2012

Christmas Chickadees in August


My Christmas creation this week combines some of my very favorite products with the Double Glitter Technique.  If you would like to recreate this, follow a few simple steps.  First, soap up the back of the stencil LG 708 with the Handmade Hawaiian Soap.  Brush the soap crumblies off with a large stencil brush.  Then, place it on exposed adhesive of Double Sided Mounting Paper.  Next, put red pearls into the holes for berries. Stampee Foil goes on the gold beaks and the green leaves.  It is easy.  Just put the foil dull side down over the area where you want it and press it down with your fingers or an embossing sylus.  Then, pull the foil off.  The branches are Ultrafine Opaque Art Glitter in 58 Brown.  You can sprinkle a little on the stencil and push it in with your finger.  Then, use Stampendous Fun Flock in Plain Ol' Black over the whole thing.  When using the flock, you need to use quite a bit and push it down hard to make it look plush.  Then, brush off the excess well, so that it doesn't migrate when you remove the stencil.  Put the whole thing stencil side down on a flat surface and carefully peel the paper off, keeping the stencil flat.  Cover the whole thing in Ultrafine Transparent Glitter in 85 Crystal.
That is it.  It was great fun.  Now, it is your turn.

Want to get into the holiday spirit a little early? Link your own Christmas in August creations to the Dream It Up! blog mr. linky, or email pics of your creations to lynell@dreamweaverstencils.com, for an opportunity to win this wonderful newly released Heart Ornaments:


Don't you just love this new design? There are several newly released stencils and products from CHA last month, which you can view for yourself HERE. During the week of August 20th - 25th, the Dream Team will be posting all week with a hop on Saturday to top it all...featuring all of these new fabulous designs...in collaboration with the Woodware UK team. Just a little hint...you may want to buy all of these new designs now, so you are ready and waiting for the inspiration that will come your way that week! Meanwhile, check out what the rest of the team has been creating this week: