It's May! The Dream Team members are challenging you this month to a "Flora and Fauna"theme! Considering most of the Dreamweaver designs incorporate these themes, you should have no problem playing along with our challenge this month! As usual, link your creations at the end of theDream It Up! blog post. As the challenge gets underway, you'll see thumbnails of others who are playing along as inspirations for your own creations! Speaking of inspirations...the month of April was our Inspirations month, and we had many that linked with us! So exciting! Our randomly chosen winner for April is...JULIE STAVES! Check out two of her creations...

Congrats, Julie! Be sure to email lynell@dreamweaverstencils.com with your choice of stencil, and your address!
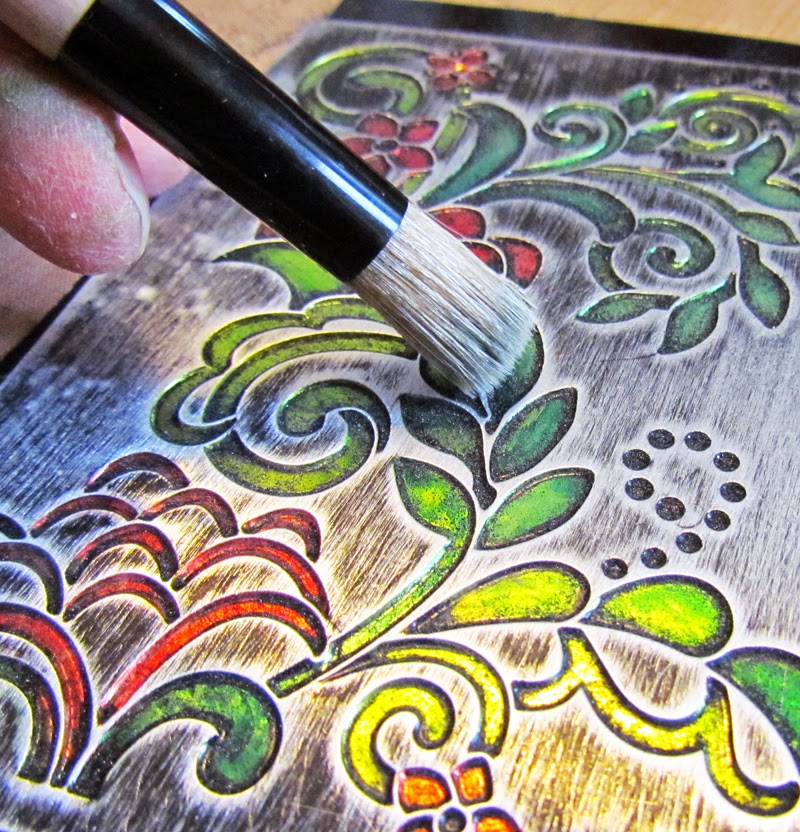
Now here is my creation for this week:

MATERIALS:
Dreamweaver Stencil LJ 927 Floral With Dots
Black Coated Mercart Aluminum
Stamping Details Rubber Embossing Mat
Color Solutions Thinner
Color Solutions in these colors: Mojito, Pine Bough, Paprika Red and Winter Red
Mercart Deerfoot Teflon Tool (in Beginner Kit)
Large Stencil Brush
Scissors
Manual Die Cut Machine
Q Tips
Sanding Block
Adhesive
Hole Punch
May Arts Ribbon
Card Stock
DIRECTIONS:
1) Place the stencil on top of the metal and trim around the outside with scissors. Leave just a little extra metal.


4) Use the pointed end of the Teflon tool to further define the wells created by the stencil. You can see in this picture how the bottom of the well appears sharper than the top part. I accomplished this by pressing the metal up against the edge of the metal stencil.


9) Trim any extra metal and assemble the card.

Thanks for stopping by. I hope you enjoyed the tutorial.
Please welcome our new "A" team, officially posting for the first time!


Wow Laura! Thanks for the tutorial on this amazing and creative project.
ReplyDeleteLove this! I don't have any of the metal working tools yet but I'm looking forward to when I do! This looks amazing, I love your color choices!
ReplyDeleteOh, wow! Truly awesome!
ReplyDeleteGreat tutorial and close up photos. Thank you.
ReplyDeleteGreat technique with a beautiful effect!
ReplyDeleteLOVE this , I worked on this technique of few days ago and was again amazed at how simple you make it seem with your tutorials and creations...I need practice practice practice, thank you too for all of the Stampendous blog hop work last week., Laura.
ReplyDeleteI love embossing on metal, and yours is incredibly beautiful. Thank you for the tutorial.
ReplyDeleteSo pretty Laura! I like the scratched look of the background, it suits it!
ReplyDelete