
We've now had four weeks of festively distressed fun playing with the Ranger/Tim Holtz Distress Powders along with our wonderful line of Dreamweaver Stencils and products. Huge thanks to Tim Holtz and the fab people at Ranger for sharing these four collaborative weeks with us, and providing the yummy shades of Distress Powders for us to create with. We've been inspired by the process, and we hope you have, too!
If you haven't won one of the prize packages yet, you still have one more opportunity this week as the set below is up for grabs to a random commenter on one of the Dream Team blogs.

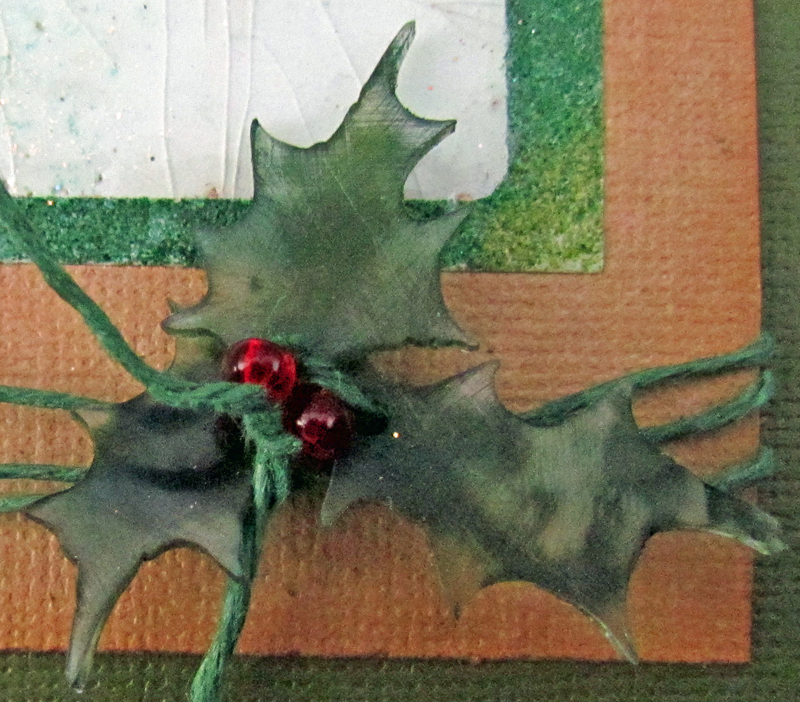
My festively distressed project for this week is this:

Dreamweaver LL 3005 Holly & Berries Stencil
Dreamweaver Double Sided Mounting Paper
Dreamweaver Large Stencil Brush
Handmade Coconut Soap
Ranger Distress Powders in Pine Needles and Peeled Paint
Distress Embossing Ink (optional)
Ultra Thick Embossing Enamel
Dry Stickles in Eucalyptus
Vintage Photo Distress Ink
Ink Blending Tool
Tim Holtz Alterations Holly Die Cut
Inkssentials Shrink Plastic
Manual Die Cut Machine, such as the Vagabond
Heat It Craft Tool
Stickles in Christmas Red
Archival Ink in Olive and Library Green
Big Bite
Sandpaper
Cardstock in Kraft and green
Green Scrappers' Floss
Two Red Beads
Adhesive
Paper Towel
DIRECTIONS:
1) Soap the back of the stencil.


4) Pour some of the Pine Needles Distress Embossing Powder onto the stencil. Use your finger to push it into the wells around the edges.


8) Heat the embossing powder until it melts. Don't overheat.

9) Cover newly exposed adhesive paper with Ultra Thick Embossing Powder. Rub in a little.
10) Heat UTEE (Ultra Thick). While still warm, sprinkle with a little Dry Stickles.


11) Either reheat the UTEE portion and pour more Ultra Thick on, or touch area with Embossing ink and cover with Ultra Thick. Brush off of green areas.
12) Heat again. Place in freezer a few moments.
13) Remove from freezer and "crack"
14) Use blending tool to rub on Vintage Photo Ink.

15) Wipe with damp towel.
16) Add Stickles to berries. Let dry.
17) Use die cut machine and Tim Holtz die to cut out holly leaves from shrink plastic.
18) Use Big Bite to punch holes in leaves.
19) Sand one side of leaves.
20) Rub sanded side on Olive Archival Ink Pad. Rub tips of leaves on Library Green pad.

21) Heat and shrink.

22) Assemble card.
Okay, so maybe it isn't exactly CAS, but it was really fun! And I loved the results.
Don't forget to leave me some love before hopping to the rest of the Dream Team blogs:


Just love everything about this card. Thank you soooo much for reminding me about the cracked glass technique – it goes perfectly with the holly stencil!
ReplyDeleteBeautiful CAS card Laura! It definitely looks icy and cold would love to see it up close and personal some day!
ReplyDeleteBeautiful card and the techniques are amazing!
ReplyDeleteOh WOW!! I LOVE the FUN card!! Such a PRETTY design and the Holly ribbon adds such a NEAT affect!! THANKS for sharing and have a FABULOUS WEEK!! =)
ReplyDeleteLove the cracked glass technique with these powders. Very cool and beautiful card, Laura!
ReplyDeleteGorgeous! Great tutorial and LOVE how the holly berries stand out so much!
ReplyDeleteLove the crackled background! It gives the card a great look.
ReplyDeleteThe cracked and sparkly background is great - thanks for the tutorial Laura!
ReplyDeleteooooo, ahhhh! Very cool! great combo of cracked, embossed & sparkle! Thanks for sharing this.
ReplyDeleteWow--very cool look with the cracked background and the distress powder on the leaves.
ReplyDeleteFabulous card!!!!
ReplyDeletePretty card! I love that Holly and Berries stencil and that great texture!
ReplyDeleteDeniseB
This is gorgeous and I know it is even more so in person!! I love the cracked utee... gives a nice vintage look/feel to it!
ReplyDelete