Showing posts with label stickles. Show all posts

Wednesday, August 13, 2014

Christmas in August Blog Hop with Woodware


Yes! It's that time of year again! The time when we inspire crafters on both sides of the "pond" with a mix of both Dreamweaver and Woodware UK* products for the holidays! Six days, SIX, of beautiful, elegant, merry, cute, artsy, and craftsy projects to have you heading out to your local stores or internet sites to buy these goodies immediately!


Of course, there will be prizes as well. Three prize packages will be given to three commenters during this week's posts on the team's blogs, including five stencils and one nested die set. You can have an opportunity to win these goodies by leaving some holiday sweetness for each team member posting each day, to be one of the three winners for the week. Here are the team members that are inspiring you today:
Here's my creation: (or shall I say creations)


This is one stamp, two stencils, two Memory Mist Sprays, two Archival Inks, Stickles and crayons four ways..........
 
The stamp is from Woodware.
 
The stencils are Dreamweaver LJ 867 and LX 7002. 
 
 The tree is easy to see.  On the first one, I just sprayed through the opening.  On the second and last cards, I sprayed the stencil first and ran it through my die cut machine with the Rubber Embossing Mat.  It worked like a letterpress.  The third card used both of those techniques, first being run through the machine and then being sprayed through the opening.
 You say you can't see where I used the Plaid stencil?  Well, I embossed a piece of white velvet paper through the die cut machine with the stencil and the Rubber Embossing Mat and used it on the second and third cards. Here is a closer look:
 
I used the Memory Mists in Strawberry Daiquiri and Wheatgrass. The Archival Inks are Black and Olive.  I stamped the image first before making the letterpress effect.  The stickles are gold, silver, diamond, eucalyptus and mystery. The crayons added a little extra color here and there. 
 
So there you have it, one card four ways....
*For a stockist near you contact Woodware Craft Collection in the UK and Notions Marketing in the USA.

Thursday, August 30, 2012

A Beautiful, Pasted, Christmas!

I don't often post projects made with paste, but today I am posting two.  This one has the more traditional approach to pasting.  The other is on Paper Craft Planet here.
This card actually has a couple of different techniques.
The Holly Sprig in the background is Holly Fourish Stencil LG 731.  I simply ran the cardstock through my Cuttlebug after spritzing it with a little rubbing alcohol.  The Sandwich is A Plate, upside down stencil, face down cardstock, Stamping Details Embossing Mat, and two B Plates.  Then, berfore I removed the stencil, I brushed it with a little Distress Ink, using two different colors .  I highlighted the berries with a little Stickles. 
The word is the Christmas Script Stencil LL 3009.  I taped the stencil over brown cardstock onto my craft sheet with removable tape.  Then, I used my paste spreader to "pull" the Metallic Gold Embossing Paste over the whole thing.  I removed the stencil and let it dry.  Then, I added red Stickles to the berries.  After everything was dry, I cut around it and assembled the card. 
For a completely different approach to using Gold Metallic Embossing Paste, check out the Molten Magic Tutorial on Paper Craft Planet. 
 
Do YOU want to get into the holiday spirit a little early? Link your own Christmas in August creations to the Dream It Up! blog mr. linky, or email pics of your creations to lynell@dreamweaverstencils.com, for an opportunity to win this wonderful newly released Heart Ornaments:


Don't you just love this new design? There are several newly released stencils and products from CHA last month, which you can view for yourself HERE. Be sure to check out what the rest of the team has been creating this week:


Tuesday, January 10, 2012

And Now For Something a Little Different.....

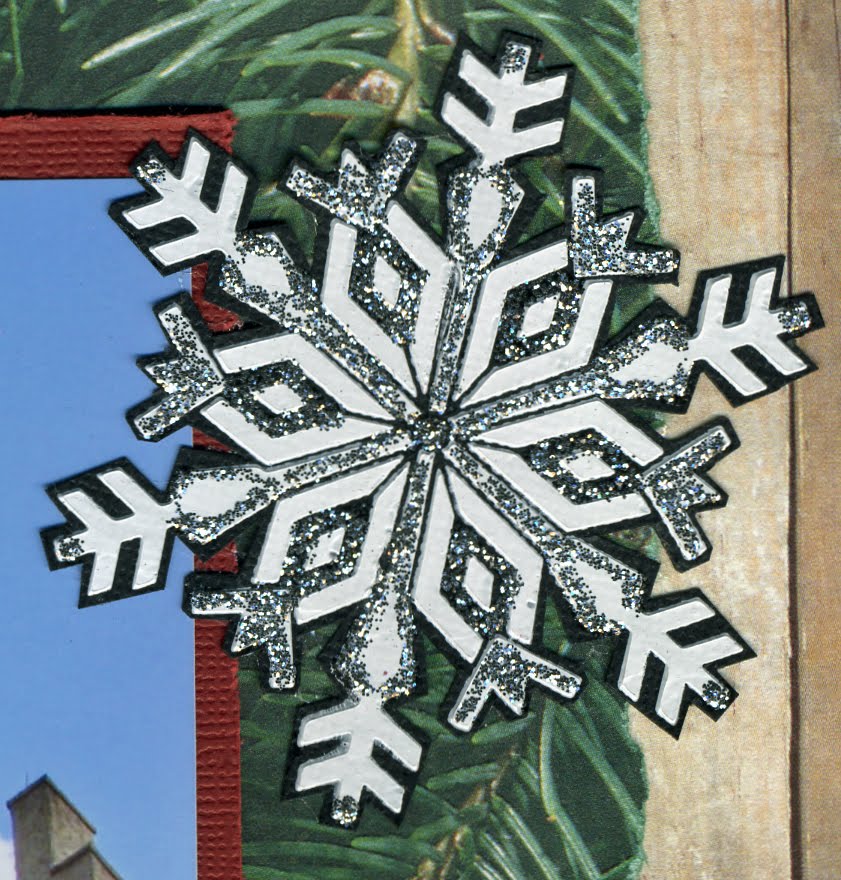
It may come as a surprise to my followers that I have always considered myself a scrapbooker, NOT a card maker. Recently, I have joined a great group of online scrappers. The Disney Scrappers, as they call themselves, have reinvigorated my scrapbooking. Here it is, a layout that combines four of my passions: Disney, scrapbooking, the Silhouette Machine and Dreamweaver Stencils. These photos were from a trip to Epcot in November, just as the Christmas Decorations were being put up. I decided to reflect some of the decorations in the embellishments: snowflakes and ice skates.
The first stencil that I used was the Ice Skates Stencil LL 3016. I taped it down on top of black cardstock and right onto my craft sheet with removable tape. I actually taped it upside down because I wanted the skates to face in. I then got out my Dreamweaver Spatula and the original embossing paste. I placed some of the embossing paste above the stencil. I laid my spatula at a 45 degree angle from the table and pulled the paste over the stencil toward me. I made sure that the spatula was in contact with the stencil at all times. I tried to cover it all in one stroke. The remaining paste went right back into the container. After the paste was dry (about a half an hour) I colored the heels with a Copic marker and the blades and lace accents with a silver paint pen. The original paste takes all sorts of techniques. I trimmed around the edge, attached it to the page and added a brad.
The snowflakes used almost the same technique. Instead of the Original Embossing Paste, I used the Glossy White Embossing Paste.
It is more opaque (obviously shinier), and a little thinner in consistency. I always make sure that I work just a little quicker with the glossy paste because I find that it has more of a tendency to try and "bleed" under the stencil than the original. I pasted these stencils: LL 399 Antler Snowflake, LL 396 Gothic Snowflake, LL 398 Southwest Snowflake, and LS 26 Snowflake (which I pasted twice). When these were dry, I used silver Stickles to sparkle them up. You can see that I had fun using the stencilled snowflake with different patterns of Stickles.
Oh, and I mentioned the Silhouette Machine (the best die cutting machine in the world). Well, that title? It was cut on my Silhouette. The font is a dingbat font called Prototype Community. It contains the original logos of everything in Epcot. If you are a Disney fan and a Silhouette user, you DEFINITELY need this font. I was also surprised that the Silhouette cut the mirror paper that I wanted to use. The top layer ripped just a little on some of the finer corners, but I think that may have been due to a slightly duller blade. I just fixed it up with a little gold paint pen.

So, I am hoping that you like my extra posting this week. I sure had fun with it. Don't worry, regular cardmaking fans, I am still going to post my usual on Thursday with the rest of the Dreamweaver Stencil Design Team. It is already scheduled, in fact. If anyone is visiting from Disney Scrappers, you can expect to see me A LOT more active in the near future. I love both groups--you inspire me. Here's hoping I inspired someone else. See you Thursday!

Thursday, February 24, 2011

Thursday Dream Schemes--Sketch Challenge


Here is this week's challenge sketch. I don't know why, but when I first saw it, I thought of the Honeycomb Stencil LJ 806. I just couldn't get that thought out of my mind, no matter how much I tried. I just couldn't figure out how I wanted to execute it. Then, I went to CHA and met a wonderful Australian lady named Julie Makela. She showed us a technique with Stampee Crafts foil that was PERFECT.


First, you emboss the image, either traditionally or with a machine. (I chose traditionally).


Then, you use pigment ink to stencil the image. (I used Adirondack in two colors of yellow).


While the ink is still wet, pour the powdered glue on it, and heat. It can't overheat, nor does it matter if it is a little undercooked at this point, so there is no pressure.


You then place the foil over the top of the image, and send it through a thermal laminator. I used the transparent color Cracked Ice and just purchased the laminator at Target for under $30.


Finally, you let the image cool a little and then pull the foil off quickly, in one fell swoop. (Think Bandaid).


This was REALLY easy, and just look at the beautiful results. Even more stunning in person, this honeycomb sparkles in holographic colors when hit by the sun.
So, then I began to think about the details. Bees were an obvious choice. I looked for the extra bees that I used on the card that I had published. (Stampers' Sampler Dec/Jan 2010-2011--shameless plug!). Not finding them (of course), I decided to recreate them. This is how I did it:
I conditioned and rolled out black polymer clay.
I used bee stamp (by the now defunct Cornish Heritage Farms), to press the design into the clay.
I cut around the bee with a craft knife.
I rubbed a little Moonstone Metallic FX onto the wings with my finger.
Then, I baked the bees according to the polymer clay instructions.
After the clay cooled, I glued yellow flock into the stripes using Art Institute Glue and added Purple Stickles to the eyes.
Then, it was time for assembly. I used My Mind's Eye paper, dark teal cardstock, and a stamp by Cornish Heritage Farms. I attached the bees with Glue Dots.
I was very happy with this card, which I promptly gave to my aunt--whose husband keeps bees!