Welcome to a new year with Dreamweaver Stencils! I am proud to say that I am carrying over my term as a Design Team Member for another year. This year, the commitment requires only alternate week posts, so I may not be posting every week. Then again, I am used to the old schedule, so I might continue to post weekly......
Anyway, this month our challenge is Mists, Drizzles and Showers. If you can come up with a project that fits, don't forget to email a picture to Lynell@Dreamweaverstencils.com for your chance to be published on the blog and possibly win a prize! You don't HAVE to make a card. As an example, here is my project this week:
I got the sketch from Disneyscrappers. It was the February challenge, and was created by Susan Stringfellow.
MATERIALS for the whole project:
Dreamweaver Stencil LJ 905 Rain
Dreamweaver Stencil LJ 908 Umbrella Background
Dreamweaver Stencil LG 737 Umbrella
Medium Blue Mercart Metal
Double Sided Mounting Paper
Stamping Details Rubber Embossing Mat
Manual Die Cut Machine (I used the Cuttlebug)
Manual Alphabet Dies (I used Lifestyle Crafts Oatmeal)
Patterned Paper (Mine was from the DCWV Old World Stack)
Card Stock
Vellum
Tim Holtz Distress Ink in Stormy Weather and Salty Ocean
Non Stick Craft Sheet
Tim Holtz Alcohol Ink in Sail Boat Blue and Pebble
Tim Holtz Ink Blender with One Felt and Two Foam Pads
Vellum Writer Pen
Xyron Machine with Permanent Adhesive
Mickey Head Punch
Sandpaper
Scissors
Adhesive
DIRECTIONS for the metal portions only:
I am only including the metal parts in the directions. You can probably decide how to put together a scrapbook page, based on the photo and materials list.
1) Use the manual die cut machine to add texture to the metals. The "sandwich" for the Cuttlebug is A Plate, stencil face down, metal, rubber embossing mat and the two B Plates. You will need to use the Rain stencil once, with the metal in the sandwich blue side down. The Umbrella will use the metal blue side up, and the Umbrella Background will be run twice, with the blue side up. To run the stencil twice, simply run it and scoot the metal down so that the Umbrella Background will be above the previous one. Just make sure that the rubber embossing mat does not cover the already embossed area. There will be a slight flat area in between, that is what the pink card stock strip is for......
2) Cut the Double Sided Mounting Paper into a 1" strip and a 1/4" strip. Also, use the Mickey punch on the mounting paper.
3) Use the scissors to cut strips from the rain metal and attach to one side of the mounting paper.
4) Attach one side of the Mickey head to the back of the rain metal.
5) Cut the rest of the rain metal in half and attach to the mounting paper, half blue side up, half silver side up.
6) Attach the umbrella background metal and the umbrella metal to Double Sided Mounting Paper, silver side up.
7) Put three drops of Sail Boat Blue Alcohol Ink and two drops of Pebble Alcohol Ink on a felt pad and "pounce" the color on the umbrella and umbrella background metals.
8) Use the scissors to cut scallops on the bottom of the 1" strip. I cut around the raindrops.
9) Cut several raindrops out of the extra metal on the adhesive sheets.
10) Sand all the metal.
Assemble the page. With the mounting paper on the back, it is easy to adhere the metal to the page!
I hope you feel inspired. Check out the rest of this week's blogs, including our guest blogger, Alison Heikkila! You will be glad you did.
Dream It Up!
Alison Heikkila
Laura Drahozal
Lyn Bernatovich
Pam Hornschu
Heidi Erickson
Louise Healy
Jessica Griffin
Cyndi Bundy
Showing posts with label Disney Scrappers. Show all posts
Thursday, April 4, 2013
Thursday, May 31, 2012
Black, White and (a little more than) a Pop of Color!
Okay, so maybe there is a little more than just a pop of color here, but I think this is a fun card. I am planning on using it for my guitar-playing nephew's birthday.
The guitar was created using the LL 3028 Electric Guitar Stencil. I simply ran it through my Cuttlebug with red coated aluminum from Mercart Metals. The sandwich for the Cuttlebug is Plate A, stencil face down, metal red side down, Details Embossing Mat, and then the two B Plates. After using the Cuttlebug, I placed the metal face up on top of LJ 915 Opto Checkerboard. I used an artists blending stump to rub over the background metal, revealing the pattern. Finally, I carefully sanded the entire thing. I made sure that the raised parts of the guitar were particularly clean. After that, it was simply a matter of layering.
Easy, huh? You could do one, too. Simply create either a graduation or black, white and pop (or more than a pop) of color. Then, email it to Lynell or link it to the Dream It Up blog. That's it. You could win some fabulous stencils.
This week's card was so simple, that I have decided to offer a bonus project. It answers the "Does it have to be a card?" question with a resounding NO. I have created a scrapbook page for the Twisted Sketches site, where the "twist" is white. I made this one black and white and two pops of color.
You can see the sprayed black on the background, the Mad Hatter inspired Silhouette Machine cut hat and the two pops of color--green and pink. You may wonder where the stencil is. It is the LM 2008 Bunny. You can see it on the pink crepe paper hat band. It was created with the Double Glitter technique. I soaped the back of the stencil, brushed off the extra soap and placed it soap side down on the adhesive paper. Then, I carefully added Microfine Opaque #507 Black Wing to the eyes and nose. I pushed it down and brushed off the excess. Then, I used pink Fun Flock in the ears, and tan and white Fun Flock in the body. I used a lot and pressed it down hard with my thumb. I thoroughly brushed the excess off. I then removed the adhesive paper from the stencil and covered it in Art Glitter Ultrafine Transparent #85 Crystal. I cut around the outside of the bunny, peeled off the backing, and attached it directly to the crepe paper.
Once again, I would like to remind you that this can be an easy project. Check out the rest of the Dreamweaver Team blogs today, get inspired, and come play with us for your chance to win!
The guitar was created using the LL 3028 Electric Guitar Stencil. I simply ran it through my Cuttlebug with red coated aluminum from Mercart Metals. The sandwich for the Cuttlebug is Plate A, stencil face down, metal red side down, Details Embossing Mat, and then the two B Plates. After using the Cuttlebug, I placed the metal face up on top of LJ 915 Opto Checkerboard. I used an artists blending stump to rub over the background metal, revealing the pattern. Finally, I carefully sanded the entire thing. I made sure that the raised parts of the guitar were particularly clean. After that, it was simply a matter of layering.
Easy, huh? You could do one, too. Simply create either a graduation or black, white and pop (or more than a pop) of color. Then, email it to Lynell or link it to the Dream It Up blog. That's it. You could win some fabulous stencils.
This week's card was so simple, that I have decided to offer a bonus project. It answers the "Does it have to be a card?" question with a resounding NO. I have created a scrapbook page for the Twisted Sketches site, where the "twist" is white. I made this one black and white and two pops of color.
You can see the sprayed black on the background, the Mad Hatter inspired Silhouette Machine cut hat and the two pops of color--green and pink. You may wonder where the stencil is. It is the LM 2008 Bunny. You can see it on the pink crepe paper hat band. It was created with the Double Glitter technique. I soaped the back of the stencil, brushed off the extra soap and placed it soap side down on the adhesive paper. Then, I carefully added Microfine Opaque #507 Black Wing to the eyes and nose. I pushed it down and brushed off the excess. Then, I used pink Fun Flock in the ears, and tan and white Fun Flock in the body. I used a lot and pressed it down hard with my thumb. I thoroughly brushed the excess off. I then removed the adhesive paper from the stencil and covered it in Art Glitter Ultrafine Transparent #85 Crystal. I cut around the outside of the bunny, peeled off the backing, and attached it directly to the crepe paper.
Once again, I would like to remind you that this can be an easy project. Check out the rest of the Dreamweaver Team blogs today, get inspired, and come play with us for your chance to win!
Thursday, March 22, 2012
Dreamweaver and Twisted Sketches
Okay, so I don't know if this one qualifies as CAS, but I thought it was pretty simple (at least the Dreamweaver Stencils part). I am super excited, because this is also my first post for my new design team position with Twisted Sketches. (It is where the new blinkie leads, even if the blinkie itself doesn't seem to be scrolling correctly.) Anyway, every week they post a sketch with a "twist" (this week's twist is Wish), and every two weeks I am responsible for a layout.
This layout is about the "Wishes" fireworks show at Walt Disney World. It is my absolute favorite fireworks show. It has a storyline and a song which includes the lyrics "All your wishes will come true" and that line of the song kept running through my mind when I saw the twist.
I followed the sketch pretty well. It can be found here. The stitching is from the Bazzill in Stitch'z template and the letters are Espresso (large) and Phoebe (small) from Lifestyle Crafts.
Now for the exciting part--the handmade fireworks embellishments. I used the Dreamweaver Stencil Fireworks LJ 886, Mercart metal in red and blue coated aluminum, the Mercart Teflon Tool, a sanding block, double sided adhesive paper, a pair of scissors and a blending stump (a cheap drawing tool). Here are the simple steps:
1) Place color coated aluminum on top of the firework that you wish to create.
2) Gently rub the metal with the blending stump until you can see the edges of the firework.
3) Using the fine point of the teflon tool, you need to define the edges and "color" in the fireworks.
4) While the metal is still on the stencil, sand over the top to remove the color.
5) Remove the metal from the stencil.
6) Put the metal on one side of the double sided adhesive paper.
7) Trim around the outside of the firework embellishment.
8) Peel the backing off of the firework and attach--you are done!
So, that was simple enough, wasn't it? If you have done something Clean and Simple with Dreamweaver Stencils or products, link it up to the Dreamweaver Stencils Blog for the chance to win some beautiful stencils. In the meanwhile, go check out the posts of the rest of the team. Get inspired, and create something beautiful! I will see you next week! Until then--may all your wishes come true...
This layout is about the "Wishes" fireworks show at Walt Disney World. It is my absolute favorite fireworks show. It has a storyline and a song which includes the lyrics "All your wishes will come true" and that line of the song kept running through my mind when I saw the twist.
I followed the sketch pretty well. It can be found here. The stitching is from the Bazzill in Stitch'z template and the letters are Espresso (large) and Phoebe (small) from Lifestyle Crafts.
Now for the exciting part--the handmade fireworks embellishments. I used the Dreamweaver Stencil Fireworks LJ 886, Mercart metal in red and blue coated aluminum, the Mercart Teflon Tool, a sanding block, double sided adhesive paper, a pair of scissors and a blending stump (a cheap drawing tool). Here are the simple steps:
1) Place color coated aluminum on top of the firework that you wish to create.
2) Gently rub the metal with the blending stump until you can see the edges of the firework.
3) Using the fine point of the teflon tool, you need to define the edges and "color" in the fireworks.
4) While the metal is still on the stencil, sand over the top to remove the color.
5) Remove the metal from the stencil.
6) Put the metal on one side of the double sided adhesive paper.
7) Trim around the outside of the firework embellishment.
8) Peel the backing off of the firework and attach--you are done!
So, that was simple enough, wasn't it? If you have done something Clean and Simple with Dreamweaver Stencils or products, link it up to the Dreamweaver Stencils Blog for the chance to win some beautiful stencils. In the meanwhile, go check out the posts of the rest of the team. Get inspired, and create something beautiful! I will see you next week! Until then--may all your wishes come true...
Tuesday, January 10, 2012
And Now For Something a Little Different.....
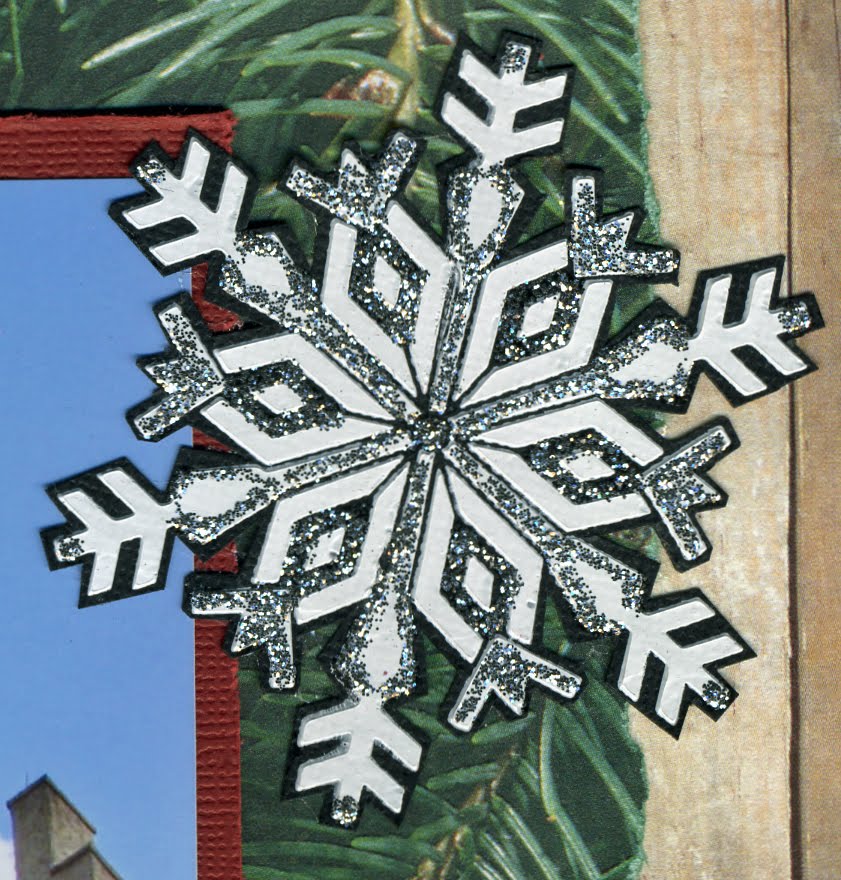
It may come as a surprise to my followers that I have always considered myself a scrapbooker, NOT a card maker. Recently, I have joined a great group of online scrappers. The Disney Scrappers, as they call themselves, have reinvigorated my scrapbooking. Here it is, a layout that combines four of my passions: Disney, scrapbooking, the Silhouette Machine and Dreamweaver Stencils. These photos were from a trip to Epcot in November, just as the Christmas Decorations were being put up. I decided to reflect some of the decorations in the embellishments: snowflakes and ice skates.The first st
encil that I used was the Ice Skates Stencil LL 3016. I taped it down on top of black cardstock and right onto my craft sheet with removable tape. I actually taped it upside down because I wanted the skates to face in. I then got out my Dreamweaver Spatula and the original embossing paste. I placed some of the embossing paste above the stencil. I laid my spatula at a 45 degree angle from the table and pulled the paste over the stencil toward me. I made sure that the spatula was in contact with the stencil at all times. I tried to cover it all in one stroke. The remaining paste went right back into the container. After the paste was dry (about a half an hour) I colored the heels with a Copic marker and the blades and lace accents with a silver paint pen. The original paste takes all sorts of techniques. I trimmed around the edge, attached it to the page and added a brad.The snowflakes used almost the same technique. Instead of the Original Embossing Paste, I used the Glossy White Embossing P
aste.

It is more o
paque (obviously shinier), and a little thinner in consistency. I always make sure that I work just a little quicker with the glossy paste because I find that it has more of a tendency to try and "bleed" under the stencil than the original. I pasted these stencils: LL 399 Antler Snowflake, LL 396 Gothic Snowflake, LL 398 Southwest Snowflake, and LS 26 Snowflake (which I pasted twice). When these were dry, I used silver Stickles to sparkle them up. You can see that I had fun using the stencilled snowflake with different patterns of Stickles. Oh, and I mentioned the Silhouette Machine (the best die cutting machine in the world). Well, that title? It was cut on my Silhouette. The font is a dingbat font called Prototype Community. It contains the original logos of everything in Epcot. If you are a Disney fan and a Silhouette user, you DEFINITELY need this font. I was also surprised that the Silhouette cut the mirror paper that I wanted to use. The top layer ripped just a little on some of the finer corners, but I think that may have been due to a slightly duller blade. I just fixed it up with a little gold paint pen.
So, I am hoping that you like my extra posting this week. I sure had fun with it. Don't worry, regular cardmaking fans, I am still going to post my usual on Thursday with the rest of the Dreamweaver Stencil Design Team. It is already scheduled, in fact. If anyone is visiting from Disney Scrappers, you can expect to see me A LOT more active in the near future. I love both groups--you inspire me. Here's hoping I inspired someone else. See you Thursday!
Subscribe to:
Posts (Atom)