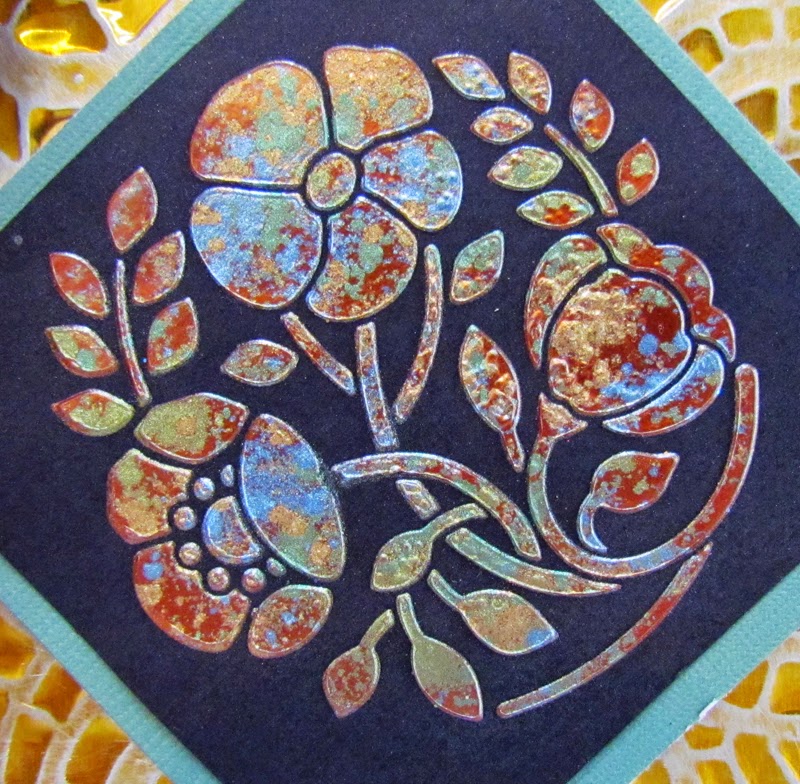
Showing posts with label metal. Show all posts

Thursday, August 20, 2015

Dreamweaver Double Days

This week, the Stampendous theme is Dreamweaver Doubles.  We are supposed to use one stencil two ways or two stencils one way.
 I can tell how much I adore a stencil by the number of different ways I have used it.   There are certain stencils that I just LOVE. The LL 3004 Falling Leaves stencil is definitely versatile.  Let me show it to you not one, but five ways:

This one was very easy.  I simply ran the stencil through my Cuttlebug with the Stamping Details Rubber Embossing Mat.  Then, with the stencil still on, I used my stencil brush and pigment inks to add color.

This one used the Double Glitter Technique.

 This one was created with the Molten Magic Technique.  I used Gold Metallic Embossing Paste, dropped some Metallic FX mica powders in it while the paste was very wet, and then heated the whole thing with my embossing heat gun until it bubbled up and dried.

 This was simply Red Glossy Embossing Paste with some embossing powders through in while the paste was still wet.  You could use any color embossing paste for this one, as long as it was glossy.  The glossy is tackier.


This was teal coated aluminum run through my Cuttlebug with the Stamping Details Mat.  Then, I added some alcohol inks with a cotton swab on the leaves.  Finally, I sanded it.

Here are the other Double Days posts for the day:


Thursday, July 2, 2015

Dreamweaver By The Sea


STM_MayArtsBanner2

We’ve got lots going on this week to keep your Summer Vacation hopping with inspiration. In one event we’re hopping all week with one of our very favorite craft partners. May Arts ribbon is an extremely generous sponsor for us here at Stampendous and our Design Team is absolutely in love with their gorgeous ribbons, cords, strings and specialty items. You’ll find loads of beautiful May Arts on all our samples.
This is also Dreamweaver Thursday and the Stampendous theme for the week is "By the Sea".  I followed all the guidelines with my post for today:

I have posted this once before, but it is one of my favorite and features one of my go-to May Arts ribbons, the 1.5 inch White Net Ribbon.  I used the Jellyfish Stencil through my Cuttlebug with my Stamping Details Rubber Embossing Mat.  The material I embossed was medium blue coated aluminum.  I placed the stencil face down on the A Plate and covered it with the metal, face down, the embossing mat and the two B Plates.  I did the same with the LM 248 Happy Birthday Stencil, except that I placed both the stencil and the metal face up.  In this way, I "debossed" it, sending the metal into the wells of the stencil. You should LEAVE the stencil behind the sentiment until you are done sanding. After the metal was embossed, I colored the backgrounds a little with Color Solutions in Aquarius, Iceberg and Blue Velvet.  I used these colors on the Happy Birthday wish as well.  Then, I lightly sanded the jellyfish and fully sanded the outside of the letters to reveal the silver.  (After this step, you should remove the stencil.) 


 After sanding, I tapped some of the White Pearl Color Solutions over the top of the jellyfish.


Of course, that gorgeous webbing fit right in with the stencil and the undersea theme.  
All week you’ve got a chance to check out our Design Team Inspiration as well as the Ribbonistas over at the May Arts Blog.  Be sure to comment and tell us where you’re from, because our Australian Distributor The Stencil Specialists are sponsoring a prize for one friend “down under” to win a Stampendous Stamp, a Dreamweaver Stencil and a surprise goodie from their terrific stock of Stampendous merchandise!
There are Stampendous prize packages up for grabs. THREE US commenters  will receive a prize of their choice in any one roll of ribbon from May Arts and a $20 reward card. Tell us what state you live in when you comment. Stampendous Official Rules.
Be sure to stop by the May Arts blog each day, because they are having a prize also! How’s that for an amazing week of prizes!

Prize

Three prize packages that will be winner choice – any one roll from May Arts and a $20 reward card from us. Stampendous Official Rules.
Make sure you comment on both this blog and the others listed below for your chance to win!
I also participated in Dreamweaver Thursday posting today.  There were a few others who were not participating with May Arts.  They are listed below:
Dreamweaver Posts


Jamie Martin

Thursday, March 26, 2015

Woodware Blog Hop!

WW_STM_banner
This week we’re going to celebrate with the awesome Woodware Design Team and the Dreamweaver Stencils Dream Team all of the the great Stampendous and Dreamweaver Stencils products that Woodware makes available to the UK market. This is good news for our crafty friends in the UK because we’ll be offering prizes and our UK friends are eligible to win!! We’ll be offering three prizes in the UK and three in the US. Each prize package will consist of Nathalie Kalbach’s terrific Grunge Mixed Media Cling Rubber Stamp Sets and the beautiful Zen Butterfly Dreamweaver Stencil! Both products are ideal for adding texture and backgrounds to your projects!
Deadline to comment is  Sunday, March 29th, Pacific Time. Winners will be picked using  random.org and announced Tuesday, March 31st, in the afternoon.

Here is my take on the theme TEXTURE for today:


For this project, I used LJ 841 Fleur De Lis Stencil,  LG 760 Feather and LS 1001 Merci Stencil.  I simply used a stencil brush to add blue ink through the Fleur De Lis Stencil on light blue card stock.  The Merci Stencil and the Feather Stencil were run through my Cuttlebug die cut machine with brown latte aluminum.  I placed the stencil on the A Plate and covered it with the metal, the Dreamweaver Extra Large Rubber Mat, and two B Plates.  The difference in the look is how the stencil and metal are placed on the A Plate.  The Merci Stencil was placed face down with the metal also placed face down.  The feather stencil and the metal were both placed up.  The additional texture on the feather was created by using an embossing tool on the back of the metal.  All the metal was sanded to enhance the texture.  The ribbon is from May Arts.
 
And that’s our theme!! Making Texture. We hope you’ll enjoy the wonderful inspiration that three talented teams will bring you this week! Be sure to visit all the blog links listed and leave your comments! Each comment will count as an entry towards one of the terrific prize packages.
Here are the designers sharing the projects today

Stampendous Blog

Pam Hornschu

Kristine Reynolds

Lea Kimmel

Woodware Craft Collection Blog

Debs Frost

Dreamweaver Stencils Blog

Lyn Bernatovich

Gill Wilson

Laura Drahozal

Louise Healy

Lynn Mercurio

Thursday, January 29, 2015

The Fifth Thursday

It is the fifth Thursday of the month, so the whole team is playing this week.  Of course, our theme is still birthdays, but I always prefer a nice, all occasion type card for birthdays.  I feel better when I can write in anything I want.
 
 For this card, I used two different techniques.  First up, I pasted LM2011 Poppy Circle with Metallic Copper Embossing Paste.  While it was still wet, I sprinkled on some Metallic FX in http://www.stencilwithstyle.com/accessories/fxpins.html, FX 10 Kiwi, and FX 17 Navajo Sky.  I let them dry for awhile, but then got a little impatient, and used my heat gun to speed the process.  It caused a few little bubbles on the surface, but I really liked it.  When everything was completely dry, I rubbed off the excess Metallic FX with a Swiffer refill.  Here is a little detail shot:


 While the paste dried, I ran the LJ 901 Mosaic Swirls Stencil through my Cuttlebug with yellow coated aluminum and the Stamping Details Rubber Embossing Mat.  After the embossing, I simply sanded off a little of the gold color.
     With the addition of some May Arts ribbon and a little card stock, I was finished. 
     Thanks for stopping by today. Try making something yourself and upload it to the Dream It Up! Blog for your chance to win a great prize.  For inspiration, be sure and check out the other team members this week at the following links:

Thursday, January 15, 2015

Birthday Cards and New Adventures

This month at Dreamweaver, we are celebrating birthdays.  It seems appropriate, then, that the company is celebrating a rebirth of sorts this month as well.  Dreamweaver Stencils has been purchased by Stampendous!  This should open new creative options for our stencils.  It is a very exciting time!  You can learn more about the new plans by visiting the Dreamweaver Stencil Blog.
As for the Dreamweaver Design Team, we are still going strong, so continue joining in on the fun.  You never know what sort of special things are in store during this exciting time.
For my birthday post, I chose to create with a couple of different techniques.  I ran the LJ 901 Mosaic Swirls Stencil  through my Cuttlebug with metal and the Stamping Details Rubber Embossing Mat.  After the embossing, I colored it with alcohol inks and then sanded it.

I created the gecko using a modified Double Glitter Technique.  First, I soaped the back of the Lizard Stencil LM2004 with Hawaiian Coconut Soap.  Then, I brushed off the excess with a large stencil brush.  I placed the stencil, soap side down, on one side of the Double Sided Mounting Paper.  I pressed red, gold and copper foils in the exposed areas using my fingers and the Small Embossing Tool. Once I had all of the foil I needed, I pressed black flock into all the "wells" of the stencil.  Then, I thoroughly brushed off the excess materials.  I carefully removed the stencil by placing it face down on a table and gently peeling off the paper.  Then, I covered the whole thing in white glitter.
The words are just cheap letter stickers.  Everything else is card stock.


I really enjoy working with this technique.  I hope you were inspired to create a project of your own.  If you do get a chance, link it over to the Dreamweaver Stencils Blog for your chance to win something wonderful!

Thursday, December 4, 2014

Quick and Cute Week One

In a flurry of a hurry? This month the Dream Team are all about the Quick and Cute...whether that be cards, gifts, wrapping, or tags...we have sleigh-loads of ideas! Play along by posting your creations using the Inlinkz tool on the Dream It Up! blog, for a chance to win the stencil of your choice, and a possible bonus stencil for using Dreamweaver products in your Quick and Cute project! Here's what fun I've been up to this week:


If you follow the blogs regularly, you might wonder if this is REALLY "Quick and Cute".  After all, I have used four different stencils:  LX 7002 Plaid, LL 3005 Holly and Swirls, LL 589 Musical Christmas and LM 139 Happy Holidays.  It also uses a couple of different techniques:  Double Glitter with a pigment ink enhancement, simple die cut machine embossing with the Stamping Details Rubber Embossing Mat, metals (copper coated aluminum) and Color Solutions Alcohol Inks (in Crème Brulee and Darkest Brown), and paste embossing with Silver Embossing Paste.  Happily, this actually was very quick for me.  You see, I save all the left over pieces from classes and rejected ideas and cards.  I simply had to sand down the metal on the musical piece and cut it with the Dreamweaver Die Cut DD001 Nesting Frames and then trim things up and assemble.  So, I guess what I am saying is that you, too, should save your rejects and extras.  You never know when you can put them to use.  It is quick and cute.
 
I'd love to receive a comment from you before you head on to the rest of the "A" team:


Thursday, October 30, 2014

HallowThanksMas Week 5

We are back to the original theme of the month, HallowThanksMas!  Yes, Halloween, Thanksgiving AND Christmas, but not all together, mind you.  As usual, we'd love for you to play along with the challenge and link your creations to the Inlinkz tool on the Dream It Up! blog. Just in case you are wondering...NO, YOU DO NOT NEED TO POST SOMETHING WITH ALL THREE HOLIDAYS ON IT! However, you get bonus points for actually using Dreamweaver stencils and product on your creations! And bonus points might actually earn you an extra stencil as our monthly winner...just sayin'!
 
Here's my creation for today: 
 
This is another metal creation.  I used both the green coated aluminum and the red coated aluminum.  I cut the ornaments out first using the DG674 Nested Ornaments Die and my Cuttlebug.  I then placed them on the LX7026 Chevron Background and ran it through my Cuttlebug with the stencil face up, the metal face up on the red and face down on the light green, the Rubber Embossing Mat and two B Plates.  I used the same sandwich with the red metal (face up) and the LM 283 Vertical Celebrate Stencil.  I dripped Color Solutions in Mojito into the "wells" on the lighter green ornament.  I sanded all of the metal projects to remove the coating on the raised portions.
 The background was created much the same way, but with paper in the sandwich and both the LX7025 Crusade Background Stencil and the paper face down.  I left the stencil in place as I sprayed it with Memory Mist MM25 Gold. 
The holly ornament was created with the FJ917 Holiday Greetings Embossing Folder. I put a couple of drops of Winter Red Color Solutions into the berry sections.  I then lightly sanded the whole thing.
I attached the two chevron ornaments and the celebrate word with Double Stick Mounting Paper.  Then, I pasted the LL3045 Small Oval Ornament Stencil with Glossy White Embossing Paste and attached the holly ornament while it was wet.

Remember to visit the entire Dream Team for more inspiration:

 
An InLinkz Link-up

Thursday, September 4, 2014

Christmas in September?

Where did the summer go? Kids are back in school, with all the insanity that goes with it, vacations are a not-so-distant memory, and it is once again time to get busy with the important things in life...crafting for the holidays! Yay! All of September the Dream Team will be featuring all the new goodies we have for the "Most wonderful time of the year", the fall and winter holiday season. New stencil designs, new dies, and...(coming soon) brand new embossing folders featuring some of our top-selling designs, all to be found on-line through the Stencil with Style web-site, or your local papercrafting store.
 
Here's my holiday inspiration for this week:
I created it using metal and velvet paper, which means that it did not photograph as well as I would like to (the only thing about these two materials that I don't like), but perhaps a couple of closer shots and some more detailed explanation would be helpful.
For the flowers, I started by running green metal through my Cuttlebug with this sandwich:  A Plate, Stencil LL3046 Tall Poinsettia (face up), Green Coated Aluminum (face up), the Stamping Details Rubber Embossing Mat and two B Plates.  You might wonder why I have those little lines through the metal.  Well, true confession time, I was all out of the Mercart Metal, so I used a different brand in the same color.  If you use the metal that I linked, you won't have that problem.  Anyway, I then left the stencil under the metal as I gently pressed the metal against the inside of the stencil with the Teflon Tool in the Basic Metal Kit.  You can skip this step if you want to, it just won't have as crisp of edges.  Then, I used the Color Solutions Remover on a Q Tip to remove the green inside the flower and seeds.  I left just a little in the edges so that it would darken the tips.  I dropped a little Christmas Red Color Solutions inside the wells of the flowers and Lemoncello inside the seeds.  I did not worry too much about it going over the edges because I knew I would sand it later.  I enhanced the colors a little with Q Tips and Paprika Red in the flowers and Gourd Green in the leaves.  I then sanded the top and brushed of the dust with a stencil brush.  I pulled the metal off the stencil, and placed it on Double Stick Mounting Paper, burnishing it down with my fingers.

 
For the background, I repeated the embossing process I explained, except that I put Stencil LX 7027 Quatrefoil face down and the velvet paper face down on top of it.  Other than that, I used the same sandwich.  For the letters, I used the new Dual Alphabet Dies in my Cuttlebug with green metal.  The sandwich for this was A Plate, dies face up, metal face down, C Plate and B Plate.  If you have any trouble cutting all the way through the metal, a slight shim of cardstock should fix it. Then, I sanded just the outside of the letter and reassembled them on Double Stick Mounting Paper.
Finally, I assembled the card, using the other side of the Double Stick Paper to attach the metals.

 
Of course, we have our monthly challenge for you to play along, so post your own holiday creations, and use the Inlinkz tool on the Dream It Up! blog, for a chance to win the prize at the end of the month. We also have our fabulous Guest Designer for the month of September, Wendy Price! Here's the list of our "A" Team with their links for the week:


;

Thursday, August 21, 2014

Back to August as an Adjective

After all the blog-hopping excitement of last week, we are back to "August as an Adjective".  Yes, that is right, we are using the term august as, "marked by majestic dignity or grandeur", with synonyms such as, "dignified, distinguished, imposing, portly, solemn, staid, and stately". How about trying along with us, and linking YOUR creations to the inlinkz tool on the Dream It Up Blog for a chance to win the wildest stencil design your little heart is screaming for.
Here's my creation for this week:
 
 
All the metal is aluminum with a medium blue coating.  The part that appears black in the picture is actually navy blue suede paper.  I used the Dreamweaver Stencils LX 2001 Damask and LL565 Script Thank You with the Rubber Embossing Mat in my Cuttlebug for super easy embossing.  The background was embossed, with the metal and the stencil face down.  The Thank You was debossed, with the metal and the stencil face up.  Both were sanded.  I attached the Thank You with both Double Sided Mounting Paper and small jeweled brads.  That's it.  Very simple, and, I think, rather august.  Now, check out the other posts for the week and then try your own.


Friday, August 15, 2014

Christmas in August Blog Hop with Woodware--The Final Day


Yes! It's that time of year again! The time when we inspire crafters on both sides of the "pond" with a mix of both Dreamweaver and Woodware UK* products for the holidays! Six days, SIX, of beautiful, elegant, merry, cute, artsy, and craftsy projects to have you heading out to your local stores or internet sites to buy these goodies immediately!


Of course, there will be prizes as well. Three prize packages will be given to three commenters during this week's posts on the team's blogs, including five stencils and one nested die set. You can have an opportunity to win these goodies by leaving some holiday sweetness for each team member posting each day, to be one of the three winners for the week. Here are the team members that are inspiring you today:
Here's my creation: 

 
First, I stamped with a beautiful Woodware stamp on white card stock with Jet Black Archival Ink.  Then, I ran a couple of stencils through my manual die cut machine with the Rubber Embossing Mat.  I ran the Dreamweaver Stencil LX 7002 Plaid through with red velvet paper.  The Dreamweaver Stencil LL557 Long Merry Christmas was used with Red Coated Aluminum.  I put the aluminum red side up over the stencil, which was also right side up.  I enhanced the "debossing" with the Teflon Tool from the Beginner Metal Tool Set.  I used a Qtip with Color Solutions Alcohol Ink Thinner to remove the red in the holly leaves.  I then used a little Color Solutions in Pine Bough to add green to  the leaves.  Finally, a sanding block removed all the color I did not want.  I did all of these steps with the stencil still behind the metal. 
 
The image was colored with Crayola Crayons.  The card was assembled using regular adhesive, Double Stick Mounting Paper behind the metal, 3D Dots and a lovely May Arts Ribbon.
*For a stockist near you contact Woodware Craft Collection in the UK and Notions Marketing in the USA.

Thursday, May 29, 2014

Fifth Thursday

On months with fifth Thursdays, the entire Dream Team is going to post, and this is our first fifth Thursday of the term.  In keeping with this month's Flora and Fauna team, I am posting an easy floral thank you card.
Here is how it was made.....

MATERIALS:
Dreamweaver Stencil LX 7024 Zen Flower
Dreamweaver Stencil LS 1009 Thank You
Stamping Details Rubber Embossing Mat
Mercart Aluminum in Yellow
Mercart Basic Metal Tool Kit (or just Teflon Deer Foot Tool)
Color Solutions in Paprika Red
Color Solutions in Cosmo Pink
Large Stencil Brush
Fiberglass Erasing Brush (optional)
Scissors
Cotton Swabs
Paper Towels
Sanding Block
Card Stock
Adhesive
Manual Die Cut Machine (I used a Cuttlebug)

DIRECTIONS:

1)  Cut the aluminum to the size of the stencil with scissors.  Cut for each stencil.


2)  Place the stencil face up on the base of your die cut machine and cover with aluminum, yellow side up.

 
 3)  Cover with the rubber embossing mat and your top mats.  For the Cuttlebug, it goes A Plate, stencil, metal, rubber mat, and two B Plates.

 
4)  Run through the machine.

5)  Leaving the stencil in place under the metal, use the Mercart Teflon Tool (in basic kit) to "sharpen" the edges of the stencil wells and "draw" lines in the petals.

 
 6)  Drop a drop of Paprika Red Color Solutions in each well, leaving the innermost ones empty.

 
 7)  Use a cotton swab to move the color around the well.


 8)  Blot off any excess color with the paper towel.


 9)  Repeat steps 6-8 using Cosmo Pink in the inside petals, leaving the very innermost circles yellow.  You can put a little pink in some of the red areas.


10)  Lightly sand over the top of the project.  You will be removing color from the outlines of the petals, the uppermost parts of the lines inside them, and the background.

 
 11)  You can use the fiberglass brush to clean out any additional areas that you would like to leave silver (OPTIONAL).

 
 12)  Use the brush to remove all the powder remaining from the sanding.

 
13)  Repeat steps 1-5 with the Thank You stencil, then sand well.

14)  Carefully remove the metal from the stencils and assemble the card.

 
I hope you enjoyed my Fifth Thursday post.  Check out the other posts this week and get inspired.  If you link up your Flora and Fauna creation to the Dream It Up! blog, you could win a prize.