Showing posts with label stencils. Show all posts

Friday, October 28, 2016

Witch Legs--Wrapped Up in Costumes


Today's project is doing double duty--both as a 31 Days of Halloween post, and my answer to the "Wrapped up in Costumes" theme for Stampendous.  I used it for the theme because it reminded me of an adorable witch costume.  

Here's how I did it:

MATERIALS:

Witch Boots Metal Stencil FMS4035
Palette Knife
Paste Spreader
Regular Embossing Paste
Embossing Powder in Violet Opaque, Clear Emerald, Clear Sparkle Lime and Silver Tinsel
Micro Glitter in Purple, Lime, and Orange
Pearl Tigerlily Glitter
Royal Purple Glass Glitter
Removable Tape
Versamarker Pen
My Colors Card Stock in Black, Harvest Orange, Grape Vine and White
Creative Impressions Ribbon 80263 3/8" Purple and Orange Gingham
White Glue
Zip Dry Glue
Manual Die Cut Machine
Embossing Heat Gun
Rubber Embossing Mat
Rhinestones

INSTRUCTIONS:

1) The card base is 8 1/2" by 5 1/2" folded on the side.
2)  Tape the stencil onto black card stock, using a full strip of tape across the top which will be used as a hinge later.  Be sure to tape all the way around.
3)  Remove paste from the container with the palette knife and place on the bottom of the paste spreader.
4)  Place the paste spreader on the top of the stencil, with the paste facing you.
5)  Pull the spreader towards you, keeping contact with the stencil and filling in the wells with the embossing paste.
6)  Replace the excess paste into the container.
7)  Carefully remove the tape from the sides and bottom of the stencil.
8)  Using the top piece of tape as a hinge, carefully remove the stencil and let the paste dry.
9)  When the paste is dry, use the Versamarker Pen to color in one section that you want embossed.
10)  Cover with the embossing powder, flick off the excess, and heat emboss.
11)  Repeat steps 9-10 until you have colored all the sections that you want embossed.
12)  Place glue in one section at a time and cover with glitter until the while image is finished.
13)  Trim the mats.
14)  Add ribbon.
15)  Assemble the card.

Thanks for stopping by.  Here are the links to the other posts for the day:


Thursday, July 14, 2016

'Tis the Season Snowflake Card

This week, the Stampendous team is having a catalog sneak peek.  We are featuring projects from this July catalog, which includes holiday items.  I guess that means I am doing "Christmas in July".  During the hottest days so far here in Michigan, I am featuring snowflakes.  Here you go:

Here is how it was made:

MATERIALS:

Snowflake Cascade Metal Stencil  FMS4042
Joys of Winter Rubber Stamp RS-L269
Fitted Frames A DCP1005
Glossy White Embossing Paste DWDGWP
Dreamweaver Palette Knife DWDPK
Paste Spreader DWLM2010
Stampendous Crystal Glitter
Versafine Ink in Majestic
Manual Die Cut Machine (I used a Cuttlebug)
My Colors Card Stock in Winter Lake, Oceanside and Smooth White
Removable Tape
Zip Dry
3D Foam Squares


INSTRUCTIONS:
1)  Tape the stencil down on the back (smooth side) of the card stock with the removable tape.  Be sure to tape all the way around the stencil.  The first piece of tape should go all the way across the top.  It will act as a hinge.
2)  Use the palette knife to remove paste from the jar and place across the bottom of one side of the paste spreader.
3)  Place the paste spreader on the top of the stencil, paste side towards you.
4)  Pull the paste spreader towards you, maintaining contact with the stencil at all times.  It will act as a squeegee, despositing paste in the wells of the stencil.
5)  Remove the excess paste from the spreader using the palette knife and replace into the paste container.
6)  Remove the tape from the three sides of the stencil, leaving the first piece attached.
7)  Using the remaining piece of tape as a hinge, gently lift the stencil from the cardstock and then remove completely.
8)  Sprinkle the wet paste with the glitter and let dry completely.
9)  Stamp the sentiment on white card stock.
10)  Use the frames and the die cut machine to cut the image and its mat.  To get the placement just right, you can use a small piece of the removeable tape across the frame and card stock before you put it into the die cut machine.
11)  When the paste is dry, brush off the excess glitter and add rhinestones.
12)  Assemble the image, using Zip Dry or whatever adhesive you prefer.  You can use the 3D Foam Squares to pop up the sentiment.

Thank you for visiting on this Christmas Preview day.  You will DEFINITELY want to check out all the posts today for a little preview of what is to come.  Here are the links:

Thursday, June 30, 2016

Florals and Foliage Week- -Hibiscus Bag

This week at Stampendous, the theme is Florals and Foliage.  Our fearless leader, Laura Weed says that flowers are always appropriate, and I couldn't agree more!  This week, I chose to do something a little different with my floral stencil.  Here is my little decorated bag.


MATERIALS:

Small Stencil Brushes (The more the better, so you don’t have to keep cleaning them)
Removable Tape
Tulip Soft Fabric Paint in Matte Crimson Red, Christmas Red Metallic, Matte Tropical Green, Velveteen Green, Sunshine Yellow Matte, and Chocolate Matte
Cloth Bag (I bought mine for $1 at Target)
Paper Towels
Scrap Cardboard, at least the size of the bag
Scissors for the cardboard

DIRECTIONS:
1) Cut the cardboard to fit inside the bag.  It needs to be large enough to keep the entire front of the bag flat.  It will be almost the full size of the bag.

2) Slide the cardboard into the bag.

3) Tape the stencil on the bag, using tape across the top and the bottom of the stencil to hold it in place. 

4) Paint the image with the following process:  For each color, load it on the stencil brush, tap off the excess paint on the paper towel and gently tap the color over the stencil.  Start with the yellow portions of the hibiscus.  Be sure to layer the colors for more interest.

5) After you have painted the entire main image, load the brush with just a little brown paint and tap off the excess.  Brush from the stencil outward to create the brown border.  Start with the exposed areas on both edges.  Then, remove the top tape and hold the stencil down gently, painting off of the stencil.  Remove the bottom tape and hold the stencil down gently as you paint off the bottom.

 6)  Remove the stencil and let dry.

Thanks for stopping by today.  I hope you enjoyed my little bag.  Here are the rest of the posts for today.....check them out!


Friday, June 26, 2015

More Flowers and Fairies

For today's "Flowers and Fairies" Theme, I present a card created with the Peony Spray Rubber Stamp.  I colored it with Faber Castell Aquarelles, which I got as a part of the cross promotion we had with them.  I used the Green Set and the Red Set.  For the background, I placed the Plaid Stencil LX 7002 on white paper and used a Stencil Brush and the green tones from the Splendor Circus Pad to create stripes.  Then, I moved the stencil at a 90 degree angle to the original inking and did it again to create plaid.  After that, I simply assembled the card.  I hope you like it.  I would love to read your comments.  Also, visit the rest of the blogs today and check out some more "Fairies and Flowers".

Thursday, May 28, 2015

A Linnie Blooms Collaboration

1908142_10203174247272098_6866324387937828000_n

At Linnie Blooms you're going to find oodles of fun projects to really take your mixed media in a new direction. We met this new company at CHA in January, and we immediately had heaps of ideas for using her clever products. What a new dimension to journals, canvases, books, scrapbook pages! We know you're going to love seeing the inspiration from this week's hop!
Plus there are prizes!! Three lucky winners will each win a set of Linnie Blooms Fabric Mini File Folders just like they provide for our team. Plus, you'll receive a Dreamweaver Stencil background, and our Vintage Press Perfectly Clear Stamps™ Set. You'll be creating Mixed Media fabric accents in no time! These winners have to have a U.S. mailing address (official rules here), but Aussie Fans - good news! The Stencil Specialists are sponsoring one Australian prize for this collaboration! You could win a Stampendous stamp, an LL sized Dreamweaver Stencil of your choice, a silicone buttons mould, and a Stampendous Embossing Powder (your color choice)... Wow!! Be sure to let us know you're from Australia in your comments!!

Honestly, while I truly appreciate canvas mixed media projects, I have never really made anything like this myself.  I had no idea where to begin.  Finally, I decided that I had to think along the lines of what I loved--scrapbooking.  I created these projects and the ones for tomorrow to eventually insert under titles in my scrapbook.  And what do I like to scrapbook the most?  Disney.

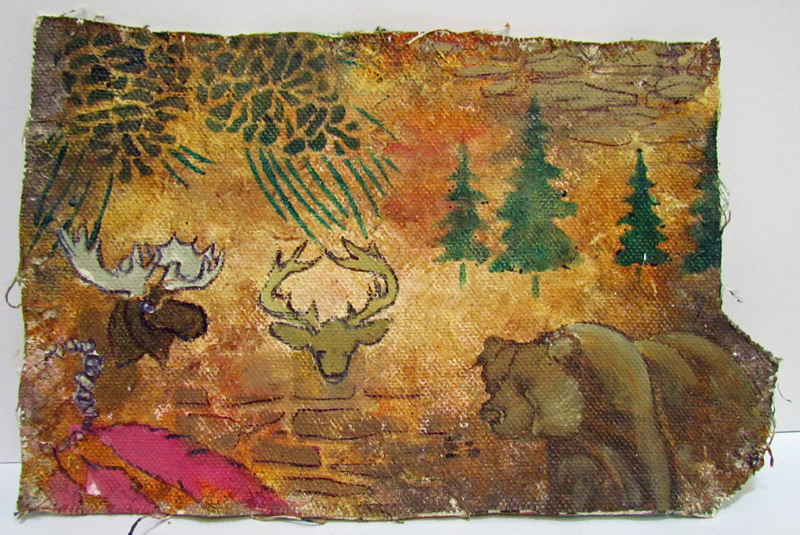
Today, I offer you three of six mini canvases (actually the opened folders) based on lands in the Magic Kingdom.  I created all of the canvases by starting with a layer of gesso, and then adding a background of acrylic paints and stencilling over the top with acrylic paints and a stencil brush.  I added in details with an ordinary ball point pen.  I will list the stencils under each page.


 The first page represents Main Street.  The LL 3017 Cameo stencil represents the silhouettes that I used to get on Main Street as a keepsake.  I also used LG 684 Wrought Iron, LL 431 Sundae,  LG 698 Corner Flourishes, LM 149 Music, and, an apparently discontinued LG 632 Columns (sorry, when I used it, I thought it was still current.)  I pasted the LJ 886 Fireworks stencil with Translucent paste, which I covered in Stampendous glitters.   It took a long time to dry, even after I heated it with a heat gun.  Ultimately, I did not particularly like the look when I  was done, so I did not paste any others.


 The second piece represents Frontierland.  I used the LL 394 Feathers stencil, LL 430 Buck, LL 598 Grizzly, LG 715 Moose, LG 611 Stone Wall, LL 570 Pine Trees, and LG 675 Pine Cones.

And on my final project for today, I feature a Fantasyland themed project.  I used LL 493 Teacups Vertical, LS 6 Scallop, LM 186 Chameleon, LR 502 Sun, LJ 806 Hexagons, LJ 838 Waves and LJ 848 Fish Background.

Tomorrow, check back for the other sides of these pieces!  In the meantime, take a look at the fun inspiration our design teams have for you today! Be sure to leave your comments for a chance to win!
If you don’t see the Blog Hop post as soon as you click the link, you may need to click on the header or home button of the blog and scroll a bit to find the post. Some bloggers post for more than one thing each day. If you have trouble commenting on a blog, please let us know at submissions@stampendous.com. Thanks for your patience, designers across several time zones mean every post may not be active immediately.

Thursday, March 19, 2015

Ready for fresh air, sunshine, new leaves, and flowers blooming? Well, the Dream Team is right there with you! Our challenge for the month of March is...coincidentally...Marching into Spring. Per usual, we'd love to have you play along with us, and link your own creations to the Inlinkz tool on the Dream It Up! blog, or at the bottom of this post. Play as many times as you'd like. Those of you who work Dreamweaver and/or Stampendous products into your projects receive bonus points, but everyone has an opportunity to be the winner who receives the stencil of their choice.

For my post (on the last day of winter), I chose to create something with bright spring colors:

First, I used two different colors of blue pigment ink on blue card stock to create the background.  I used the Design I Beam Stencil.  The first layer that I brushed on was the lightest color, which was very close in hue to the card stock.  It went over the entire card.  Then, with the stencil still in place, I brushed the darker color over the top, focusing on the edges of the paper.  This created a "spotlight effect" in the center of the card.
Next, I used the Stylized Dahlia Cutting Die to cut the textured pink card stock for the flower and the green card stock for the leaves and stem.  I shaded them with a little pigment ink in corresponding colors.  To raise the die cut up and to add another color, I used the Pearlescent Embossing Paste with the Stylized Dahlia Stencil and placed the cut out pieces in place while the paste was wet.  I did place some pieces a little off the paste to create a slight white outline.  


I then let the paste dry, but decided that there was not enough contrast between the green parts and the background.  I remedied this by drawing a line over parts of it with a green Sharpie.  Then I added a little green ribbon and a pink card stock mat and was done!

Thanks for stopping by to see my post.

The "A" team would love to share their interpretations of this theme:


Thursday, September 4, 2014

Christmas in September?

Where did the summer go? Kids are back in school, with all the insanity that goes with it, vacations are a not-so-distant memory, and it is once again time to get busy with the important things in life...crafting for the holidays! Yay! All of September the Dream Team will be featuring all the new goodies we have for the "Most wonderful time of the year", the fall and winter holiday season. New stencil designs, new dies, and...(coming soon) brand new embossing folders featuring some of our top-selling designs, all to be found on-line through the Stencil with Style web-site, or your local papercrafting store.
 
Here's my holiday inspiration for this week:
I created it using metal and velvet paper, which means that it did not photograph as well as I would like to (the only thing about these two materials that I don't like), but perhaps a couple of closer shots and some more detailed explanation would be helpful.
For the flowers, I started by running green metal through my Cuttlebug with this sandwich:  A Plate, Stencil LL3046 Tall Poinsettia (face up), Green Coated Aluminum (face up), the Stamping Details Rubber Embossing Mat and two B Plates.  You might wonder why I have those little lines through the metal.  Well, true confession time, I was all out of the Mercart Metal, so I used a different brand in the same color.  If you use the metal that I linked, you won't have that problem.  Anyway, I then left the stencil under the metal as I gently pressed the metal against the inside of the stencil with the Teflon Tool in the Basic Metal Kit.  You can skip this step if you want to, it just won't have as crisp of edges.  Then, I used the Color Solutions Remover on a Q Tip to remove the green inside the flower and seeds.  I left just a little in the edges so that it would darken the tips.  I dropped a little Christmas Red Color Solutions inside the wells of the flowers and Lemoncello inside the seeds.  I did not worry too much about it going over the edges because I knew I would sand it later.  I enhanced the colors a little with Q Tips and Paprika Red in the flowers and Gourd Green in the leaves.  I then sanded the top and brushed of the dust with a stencil brush.  I pulled the metal off the stencil, and placed it on Double Stick Mounting Paper, burnishing it down with my fingers.

 
For the background, I repeated the embossing process I explained, except that I put Stencil LX 7027 Quatrefoil face down and the velvet paper face down on top of it.  Other than that, I used the same sandwich.  For the letters, I used the new Dual Alphabet Dies in my Cuttlebug with green metal.  The sandwich for this was A Plate, dies face up, metal face down, C Plate and B Plate.  If you have any trouble cutting all the way through the metal, a slight shim of cardstock should fix it. Then, I sanded just the outside of the letter and reassembled them on Double Stick Mounting Paper.
Finally, I assembled the card, using the other side of the Double Stick Paper to attach the metals.

 
Of course, we have our monthly challenge for you to play along, so post your own holiday creations, and use the Inlinkz tool on the Dream It Up! blog, for a chance to win the prize at the end of the month. We also have our fabulous Guest Designer for the month of September, Wendy Price! Here's the list of our "A" Team with their links for the week:


;

Friday, June 13, 2014

Endless Possibilities Blog Hop Day 5


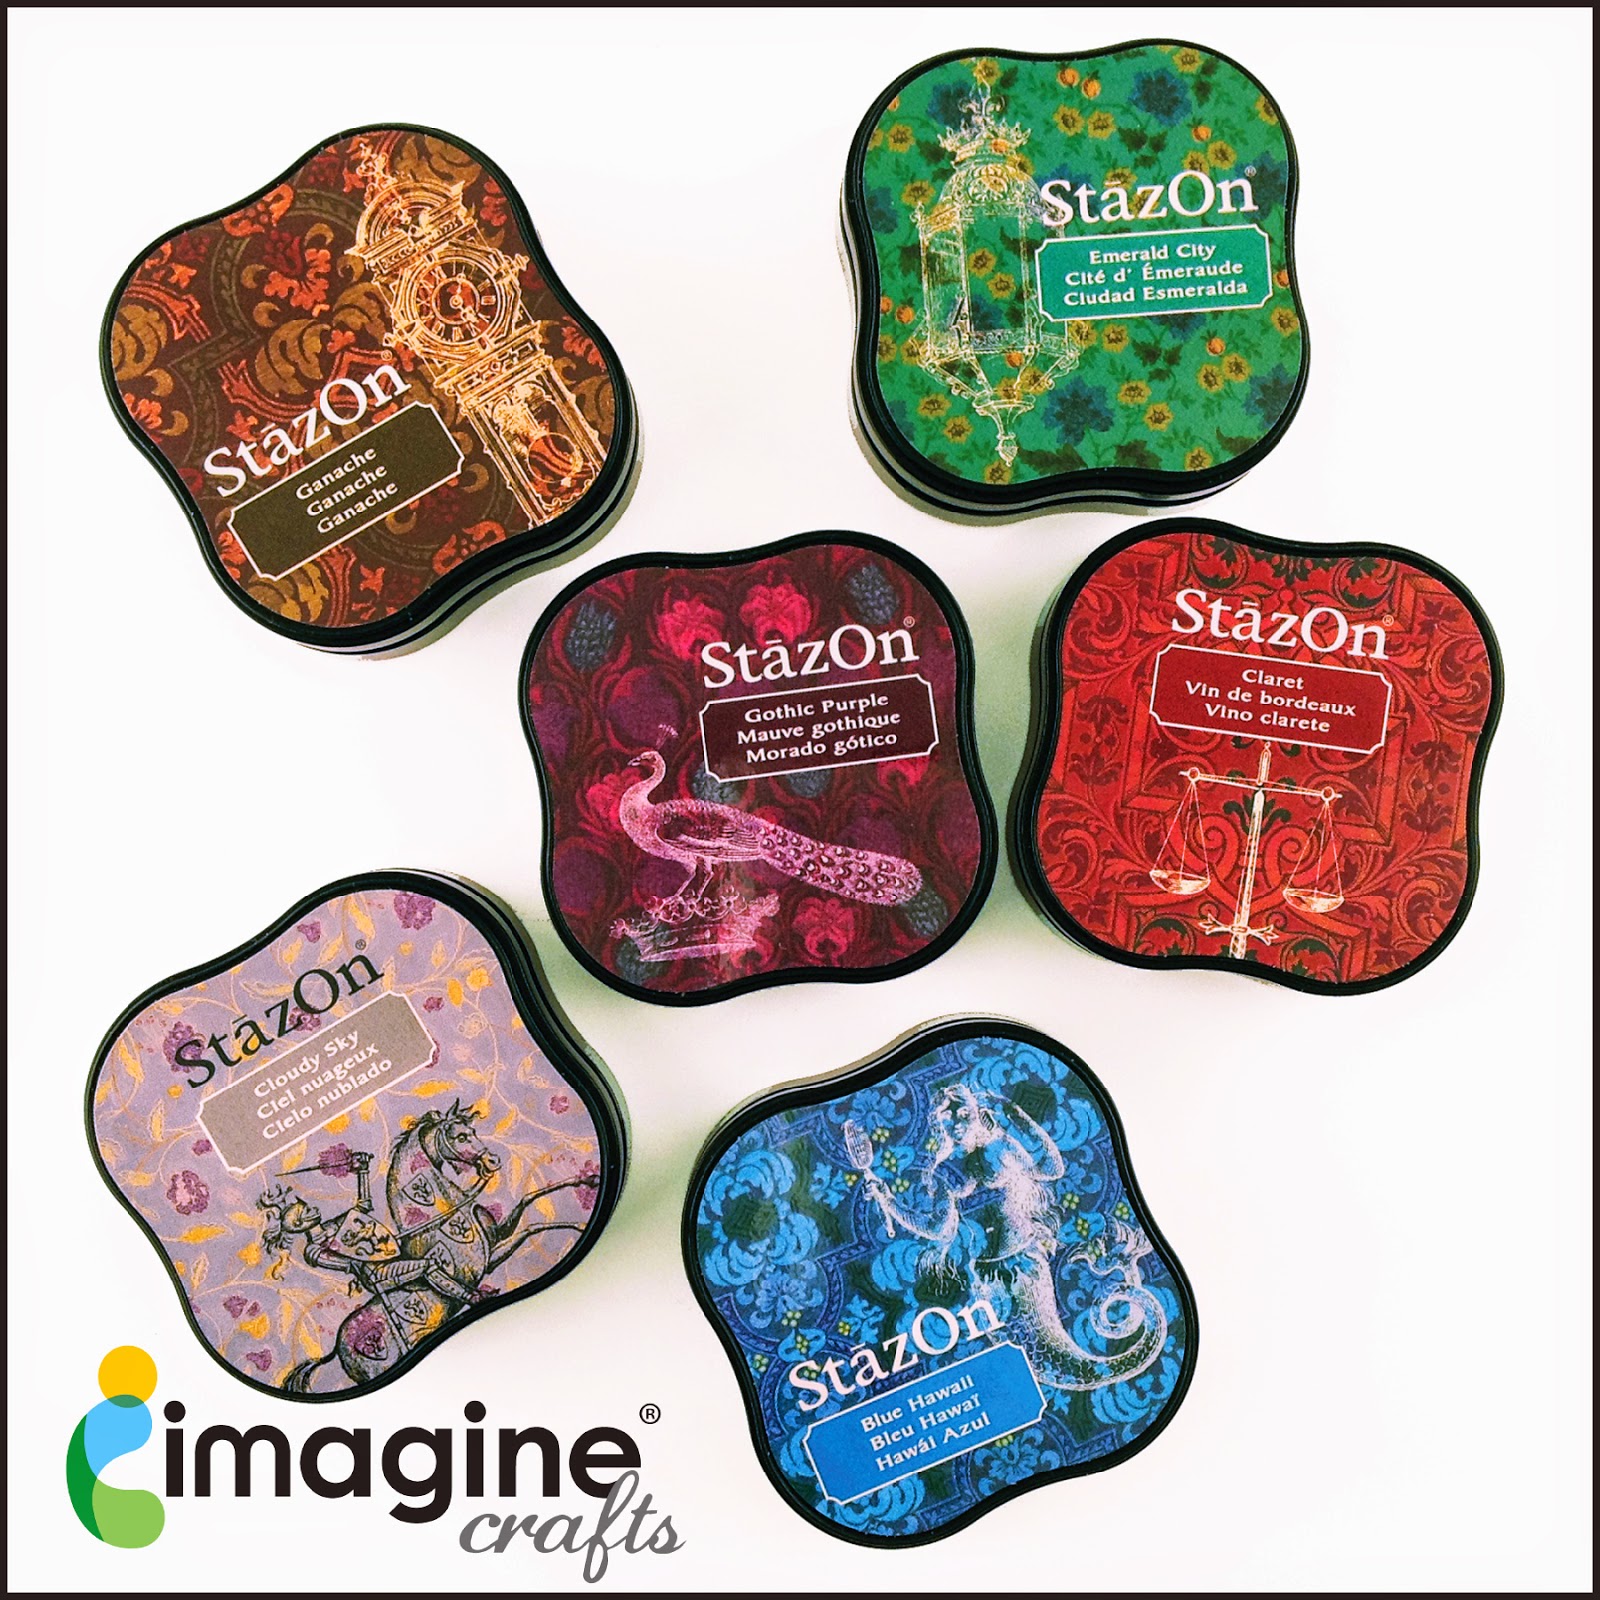
 Welcome to our first ever collaboration week with Imagine Crafts/Tsukineko! We've shared all of our toys on both sides, so be prepared for Endless Possibilities! Three prize packages are available, each containing one set of each of these inks and stencils/dies. Just leave comments on each post of each day this week (June 9th - June 13th) for a chance to win! Winners will be announced on Tuesday, June 17th!
Imagine Crafts New StazOn Pads from Tsukineko
Stencils and Dies Prize Package
Here's my creation for today:
 
     Here is my true confession:  although I create cards all the time for my blog, I don't often use them.  This one, however, was specifically created for my darling niece, who is graduating from high school this year.  She is a beautiful and classy young woman.  I wanted to reflect that in her card.  In case you hadn't guessed, her high school colors are red and white.
     For this card, I used the Dreamweaver Stencils Damask LX 7001, Graduation LL 449 and Congratulations LS 22.  The Graduation and Congratulations Stencils were run through my Cuttlebug with the Stamping Details Rubber Mat.  I used black card stock for both.  I also ran the Graduation Stencil through twice more, once with a glittering ivory, and a second time with a textured white.  I hand embossed the tassel a little more with the small embossing tool
     Then, I enhanced the embossing with some gorgeous inks.  The Silvery Shimmer Delicata was added to the hat with a stencil brush.  I used the finger daubers with the Golden Glitz Delicata on the tassel and the word.  I masked the area next to the string with a little paper.  The background and diploma were colored with a stencil brush and Versafine in Crimson Red and the Golden Delicata.  I was so impressed with the shimmer from the Delicata.  I am just not used to ink being so shimmery.  Here is a slightly askew picture so you can see what I mean.

 
The beautiful red velvet ribbon is by May Arts and adhered with my Xyron X.

Just Imagine the possibilities of what everyone else has created!
 

Thursday, June 12, 2014

Endless Possibilities Blog Hop Day 4

 Welcome to our first ever collaboration week with Imagine Crafts/Tsukineko! We've shared all of our toys on both sides, so be prepared for Endless Possibilities! Three prize packages are available, each containing one set of each of these inks and stencils/dies. Just leave comments on each post of each day this week (June 9th - June 13th) for a chance to win! Winners will be announced on Tuesday, June 17th!
Imagine Crafts New StazOn Pads from Tsukineko
Stencils and Dies Prize Package
Here's my creation for today:

 
   It is about as close to Clean and Simple as I am going to get.  The colors were chosen because of the ribbon, and are actually a much closer match than they appear to be in this picture.  I used the Dreamweaver DG 743 Stylized Dahlia die on a piece of Vertigo from Imagine Crafts.  This was the hardest thing to do on this project.  The dies aren't really designed to cut through thick plastic, but it made a nice score line.  I had to use a craft knife to assist in removing the Vertigo.  I decided to leave those inside petal shapes attached on top and just bend them outward.  I did this to add different colors and textures.
    I ran the LG 743 Stylized Dahlia Stencil through my die cut machine with the Stamping Details Rubber Embossing Mat and white card stock.  I colored the image with sponge daubers and Radiant Neon Ink in Electric Yellow, Electric Green and Electric Purple.  I also ran a little Electric Purple around the edges, both on the cardstock and the Vertigo.  I put adhesive under the area that I was going to put the ribbon.  Lastly, I added the gorgeous May Arts Solid Reversible Dots (ED-1) Ribbon that started it all.
Just Imagine the possibilities of what everyone else has created!
 
Dream It Up!

Thursday, April 24, 2014

Dreamweaver and Stampendous Collaboration


Welcome to another "Dream-Pendous" week of inspiration! The Stampendous team and the Dreamweaver team are collaborating once again with all the fun toys in both team's arsenal. Of course, as usual, there will be great prizes available for those who comment throughout this week. There will be three prize packages available to win. Each will have a great selection of Dreamweaver Stencils and Stampendous images and dies...one of which is the new "Blossom Beauty" face image as shown on the badge above.


Here is my creation for the day:

I created it using the Dreamweaver Stencils LX 7012 (Waves and Dots), LJ 899 (Petals Background), and LS 96 (Hello).  I also used both Dreamweaver DD001 Nesting Dies and Stampendous Blossom Beauty Die Cut Set.  Of course, you can see the beautiful new "Blossom Beauty" Stamp.  It was stamped with Archival Inks in Coffee and Plum.  I used only three colors of card stock:  white, pink and dark blue.  All the additional colors were created with a Splendor Circus Ink Pad with Stencil Brushes and Prismacolor Colored Pencils.  That's it! 
Tomorrow is the big final hop day, so be sure to come back and check out my new project then.  In the meantime, take a look at the other blogs for today:
Leave a comment for your chance to win!  See you tomorrow.