Showing posts with label stampee foil. Show all posts

Thursday, March 6, 2014

Dreamweaver March Madness Challenge

MAD I tell you! We're all going MAD! That is...MAD for Dreamweaver Stencils! Welcome to our "March Madness" challenge! Anything goes, and the more outside-of-the-box, the better. This year, we're aiming to play with non-traditional challenges whenever possible. So, break out all of your I-never-quite-knew-what-to-do-with-these-products stash, look at your Dreamweaver stencils in a whole new creative light, and get crafting! Oh, and don't forget to link those creations to the linkytool on the Dream It Up! blog for one of THREE chances to win the stencil of your choice! Need some crazy ideas? Check our "A" team first, and our very special guest designer and Certified Dreamweaver teacher...

 
Here's my personal act of madness:

I used two different stencils to create this embellishment:  LJ844 Dragon and LJ 903 Lg Open Fan.  First, I traced the inside of the fan on Double Sided Mounting Paper.  I cut around the image and set it aside. Then, I soaped up the back of the dragon stencil using Handmade Hawaiian Coconut Soap.  I brushed off the excess soap crumbles with a large stencil brush.  I put the stencil soap side down on the fan shaped Double Sided Mounting Paper.  I used Stampee Foil on the dragon copying the colors from the dragon fan in the photo.  I pressed the foil down with my finger and ran an embossing tool around the edges.  After I had the colors the way I wanted them, poured crystal glitter over the top of the dragon.  I brushed off the excess glitter.  Placing the stencil face down on a flat surface, I carefully peeled off the paper and covered it with black glitter.
Then, it was time to soap up the back of the fan stencil.  I placed it, soap side down, on another piece of Double Sided Mounting Paper.  I positioned the dragon fan paper inside the open fan on the stencil.  I covered it with black glitter.  Then, I placed the project stencil side down on a flat surface and carefully peeled the paper off.  I covered the remaining paper with crystal glitter and cut around the shape.  Viola!  I had an embellishment.
I hope you enjoyed the project today.  I just wanted to show how you could use Dreamweaver Stencils to create a unique scrapbook page.  Don't be afraid to break away from the card and see what you can do!

Thursday, January 17, 2013

A Truly Fresh Start

You don't normally find me making baby cards, but these two stencils were perfect for each other, and pink seemed like the right color scheme--so a baby card it is!  Although, I would be comfortable using this combination (perhaps in different colors) to congratulate someone on their very first musical or drama performance as well.

MATERIALS:
Dreamweaver Stencil LX 7017 Stars
Dreamweaver Stencil LS 1012 A Star is Born
Double Sided Mounting Paper
Dreamweaver Handmade Hawaiian Coconut Soap
Large Stencil Brush
Embossing Tool
Stampee Foil in Pink
Art Glitter Mircofine Opaque 508 Silver Moon
Art Glitter Ultrafine Transparent 85 Crystal
Pink Cardstock
White Cardstock (use behind the words)
3D Dots

DIRECTIONS:
1)  Soap the back of the star stencil until it appears to have a cloudy film over it.
2)  Use stencil brush to brush off the soap crumblies that have attached themselves to the stencil.
3)  Remove one side of the mounting paper and attach to the soaped side of the stencil.
4)  Press the foil over the star sections of the stencil.  Rub a little with your fingers.
5)  Use the embossing tool to go around the edges of the stars as well as possible.
6)  Repeat the first five steps with the word stencil.  Leave a little extra mounting paper around the outside of the stencil.  Put the foil in the words and around the edges of the stencil.
7)  Cover both stencils with the silver glitter.  Press in a little with your finger.
8)  Brush off the excess silver glitter.
9)  Place stencils face down on a flat surface and carefully remove the mounting paper, leaving the stencils flat.
10)  Cover with crystal glitter.
11)  Brush off excess glitter and assemble card.

This card is a "fresh start" because it is for a baby, but it also uses one of the brand new stencils!  If you have a "fresh start" card, enter our challenge.  You only have to photograph it, and send it to Lynell@dreamweaverstencils.com. You could win $25 worth of Dreamweaver stencils!  Check out the other blogs for more inspiration, and give it a try!

Thursday, August 23, 2012

Christmas Hearts in August--Woodware Blog Hop Day Four


All of this week, the Dream Team and the Woodware UK teams are celebrating the release of the new holiday designs from Dreamweaver Stencils. Of course, no celebration is complete without prizes...and there are some fabulous ones for those commenting on both sides of the "pond".

Each team will be providing the opportunity to win four prize packages of stencil designs, perfect for the holidays. Just leave your comments each day on each players' post as well as the Dream It Up! and Woodware UK blogs, and the Dreamweaver and Woodware Facebook pages. Two random commentors will be chosen from the batch of weekday posts, one each from the DW and WW Facebook pages, and from the big hop on Saturday...from each side of the pond!* That's a total of eight prize packages up for grabs! Here's what you could win:


My post today is very easy.  The Stencil does most of the work.  Here are the materials and directions:
MATERIALS
Cardstock in brown and red
Ribbon
 
DIRECTIONS
1)  Soap the back of the stencil
2)  Brush off the excess soap fragments that are stuck to the insides of the stencil
3)  Remove the paper from one side of the Double Sided Mounting Paper and place stencil on it, soap side down on the adhesive.
4)  Start with the Hot Pink Stampee Foil.  Place dull side down on top of the hearts. 
5)  Rub gently with fingers in the center of the heart. 
6)  Remove foil and replace with the red foil, also dull side down.
7)  Rub around the edge of hearts with the embossing tool.
8)  Apply colored glitter as follows:  Place a little glitter on the stencil near the area that you want the color.  Gently shove into the holes with finger and rub down a little.  I used Microfine Glitter to get into all of the tiny areas.
9)  Brush off the excess glitter. 
10)  Place a little gold glitter over the stencil and rub into ALL the holes--including the heart area.
11) Brush off excess glitter.  Be thorough.
12)  Carefully remove the paper from the stencil by placing the stencil face down on a flat surface and pulling the paper off while "walking" your fingers across the stencil to keep it flat.
13)  Cover the entire paper with the Ultrafine Crystal and brush off excess.
14)  Remove the paper from the other side of the Double Sided Mounting Paper to adhere to cardstock mat.
15)  Assemble card.
 
It was simple, really.  This card took very little time and made a complete picture with only one stencil.  Give it a try yourself!
 
Don't forget to leave me some holiday cheer as you move on to the other players for today:

Remember to follow along with the challenges on the Dream It Up! and Woodware UK blogs for more prize opportunities, and more crafty inspiration, as well as "liking" DW and WW on Facebook.
*Winners selected must be from USA/Canada/UK only.


Thursday, August 9, 2012

Christmas Chickadees in August


My Christmas creation this week combines some of my very favorite products with the Double Glitter Technique.  If you would like to recreate this, follow a few simple steps.  First, soap up the back of the stencil LG 708 with the Handmade Hawaiian Soap.  Brush the soap crumblies off with a large stencil brush.  Then, place it on exposed adhesive of Double Sided Mounting Paper.  Next, put red pearls into the holes for berries. Stampee Foil goes on the gold beaks and the green leaves.  It is easy.  Just put the foil dull side down over the area where you want it and press it down with your fingers or an embossing sylus.  Then, pull the foil off.  The branches are Ultrafine Opaque Art Glitter in 58 Brown.  You can sprinkle a little on the stencil and push it in with your finger.  Then, use Stampendous Fun Flock in Plain Ol' Black over the whole thing.  When using the flock, you need to use quite a bit and push it down hard to make it look plush.  Then, brush off the excess well, so that it doesn't migrate when you remove the stencil.  Put the whole thing stencil side down on a flat surface and carefully peel the paper off, keeping the stencil flat.  Cover the whole thing in Ultrafine Transparent Glitter in 85 Crystal.
That is it.  It was great fun.  Now, it is your turn.

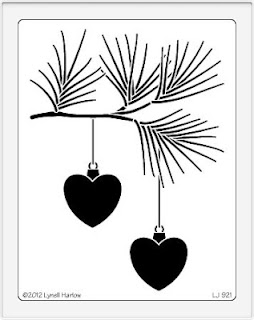
Want to get into the holiday spirit a little early? Link your own Christmas in August creations to the Dream It Up! blog mr. linky, or email pics of your creations to lynell@dreamweaverstencils.com, for an opportunity to win this wonderful newly released Heart Ornaments:


Don't you just love this new design? There are several newly released stencils and products from CHA last month, which you can view for yourself HERE. During the week of August 20th - 25th, the Dream Team will be posting all week with a hop on Saturday to top it all...featuring all of these new fabulous designs...in collaboration with the Woodware UK team. Just a little hint...you may want to buy all of these new designs now, so you are ready and waiting for the inspiration that will come your way that week! Meanwhile, check out what the rest of the team has been creating this week:

Thursday, July 12, 2012

Alice's Mushrooms and a Summer Fun Challenge

Okay, I confess.  I started this project months ago at the Winter CHA.  I was playing around with some of the Stampee Foils and wasn't paying any attention to the placement and colors that I used.  When I was finished, I declared them to be "Alice in Wonderland mushrooms", and I really liked them.  So I took them home.  When this "Summer Fun" challenge came up, it seemed like a perfect fit.  Here is the card I made.
The process is very simple.  First, I soaped up the back of the Dreamweaver Stencil LL 3025 Mushrooms.  I used the Handmade Hawaiian Soap because it was easy to cover the stencil with it.  I brushed off any soap "chads" that were hanging from the stencil.  Then, I placed the stencil soap side down onto a piece of Double Sided Mounting Paper that was about an inch larger than my stencil in each direction.  Then, the color fun started.  I used various colors of Stampee Foils on the project.  I placed them dull side down onto the adhesive.  Then, I rubbed them with my finger.  I ran the small side of a Double Ended Embossing Tool around all the edges.  The variance in color is created by layering the foils.  You only use one at a time, but you can place another over the same area after you remove the first one.  Everywhere that the foil did not stick to the adhesive, the new color will.  You can use the foil until all of the color is gone and only the clear backing remains.  In fact, you can create gorgeous blended colors by using the small remnants of color off of used foil.  You can create this look with new foil by crinkling it up before you use it.  Usually after I get the foil on, I coat everything with colored glitter or flock to get into all the grooves that the foil misses.  This time, I didn't have any handy, so I just peeled the backing off of the stencil and hoped for the best.  Then, I covered the whole thing with transparent glitter. 
After several months at the bottom of my "remnants" bin, I discovered the mushrooms a little scratched up.  I thought I couldn't use it until I came up with a new idea.  I used a little Art Institute Designer Dries Clear to create spots all over the mushrooms.  I let the glue dry until it was just clear and tacky.  Then, I covered it with Gold Stampee Foil and rubbed down.  It covered the scrapes and created a whimsical pattern. 
So, as I mentioned, it is Summer Fun month at Dreamweaver Stencils.  You could win a brand new (not yet released) stencil if you play along.  It is so new, in fact, that I can only show you a portion.
Trust me, it is gorgeous and you want to win it!  All you have to do is create a Summer Fun project (preferrably with Dreamweaver Stencils) and photograph it.  Then, either email it to Lynell at Dreamweaver Stencils or put it online and link it to the Dreamweaver Stencils Blog.  It is as simple as that.  Looking for more inspiration?  Check out the links on the left of this page.  Get inspired!  I will see you next week. 

Thursday, May 17, 2012

Ummm--Black and White and a Pop of Color?

Well, I ALMOST follow the challenge this week.  Silver is a neutral, after all.  This week, I have a tutorial featured on the Paper Craft Planet site.  My subject is foil with the Double Glitter Technique.  Pam was generous enough to let me count this as my blog post this week.

Two unusual things have come together this week:  I took WAY TOO MANY step out pictures and I am featured on Paper Craft Planet this week.  So, since I REALLY want you to visit my blog there, I am going to try something new.  I am going to give you a photo posting this week.

1) Gather materials


2) Soap the back of the stencil


3) See the soap crumblies?


4) Remove them with a stencil brush


5) Put Double Sided Adhesive Paper on Soaped side of stencil

6) Foil has dull and shiny side

7) Place dull side down on adhesive

8) Rub on with finger

9) Run around edges with stylus

10) Peel off foil
11) Foil backing is clear

12) Pour on coordinating glitter

13) Rub in glitter--I like Art Glitter Microfine

14) Brush off excess glitter


15) Carefully remove paper from stencil

16) Pour on Crystal Art Glitter

17) Finished Background

18) Using first few steps, put butterfly on adhesive

19) This time, use lots of colors

20) It only takes color where there is none

21) So you can layer colors

22) Lots of colors


23) Add Black Fun Flock instead of glitter


24) Brush off excess--WELL!


25)  Remove from backing.  Here is where you add Crystal Glitter
Well, there it is--my never to be repeated photo tutorial.  For the real deal, you will have to go here.
Meanwhile, I hope you have been inspired.  Check out the rest of the team blogs and you will be.  Then make something Black and White with a Pop of Color (or something close to it...), post and link it to the Dream It Up Blog or email it to Lynell for your chance to win!

Thursday, April 26, 2012

Two Flower Cards With One Terrific Stencil

This is the last post for the Dreamweaver Flowers Challenge, and I had a little dilemma.  I had two cards with one of my FAVORITE stencils (LL 3023 Tall Poppy) and couldn't decide which to post.  So, I decided to post both of them.  Two techniques with the same stencil and even the same colors.  Here is how they are done.
CARD 1:  The Metal Look
1)  Run the stencil LL 3023 through your manual die cutting machine with Mercart Green Coated Aluminum.  You are DEBOSSING, so the metal goes on top of the stencil with the green side up.  Here is my Cuttlebug sandwich:  Plate A, Plate B, Stencil face up, Metal green side up, Dreamweaver Details Embossing Mat, Plate B.  Leave the metal on the stencil and set aside.
2) Follow step one again, but with white cardstock (spritzed lightly with rubbing alcohol on the back) and Stencil LX 7002 Plaid.  Be careful to run this one through with the stripes perpendicular to the opening and right in the middle of the plate.  This one will sometimes bend if you are not careful.
3) Go back to the metal piece.  Use a Mercart Double Teflon Tool to refine the interior edges of the metal, pressing them against the stencil.  Use a couple of drops of Alcohol or Alcohol Blending Solution inside the main parts of the flower to remove the green from those areas.  Dab lightly with a paper towel.
4)  Drop Alcohol Inks into the wells that should be relatively clean of the green.  Use whatever colors you like.  Let dry for a few moments.  With the stencil still attached, sand all the color from the background. 
5)  Assemble the card.

CARD 2: Foils and Metallic
1)  Place Stencil LL 3023 Tall Poppies on a piece of ivory cardstock.  Tape down with removable tape all the way around the stencil.
2)  Using the Paste Spreader LM 2010 and the Green Glossy Embossing Paste, emboss the image. 
3)  Remove the stencil and sprinkle with Metallic FX in 10 Kiwi and 11 Ivy Garden.  Set aside to dry.  Do NOT wipe clean until it is completely dry.
4)  Soap the back of the Thank You Stencil LS 1009 to create a resist.  I use the Dreamweaver Handmade Hawaiian Soap because I can just apply it dry and do not have to adjust the amount of water that I add. 
5)  Brush the "Crumblies" off of the stencil (this part you will know when you see).  Attach to the Double Sided Adhesive Paper soaped side down.
6)  Pour glitter on the words.  I used Art Institute Glitter in Microfine 500 Ruby Red.  I love using the Microfine Glitter on detailed portions, because it makes them look so beautifully crisp.  Rub it in with your finger, then use a large, clean stencil brush to remove any excess glitter.  Brush it a couple of times just to be sure.
7)  Place the whole thing stencil side down and carefully remove the adhesive paper from the stencil.  Leave the stencil on a flat surface and walk your fingers along it to make sure that the stencil lays flat.
8) Pour glitter over the top.  I used Art Institute Ultrafine Transparent in 197 Flax, which created a lovely light ecru color.
9)  When the paste is dry, rub it with a Swiffer Refill Sheet to remove all of the excess Metallic FX Powder.
10)  Place glue over the parts that you want to be red.  You should apply it lightly and carefully.  I used Art Institute Designer Dries Clear Glue with the Ultrafine Metal Tip.  Wait for it to dry until it looks clear.
11)  Once glue is clear and still tacky, place red Stampee Foil over the top of it.  Be sure to lay it dull side down.  Give it a slight rub and pull it off.
12)  Squeeze Buttercup Liquid Pearls on top of the seed area of the flower.  Let dry.
13)   Assemble the card.
Both cards done!  Which was your favorite?  I am not sure which I like better.  I can tell you though that you should definitely enter the Dreamweaver Flowers Challenge.  You have until the end of the month to make a floral card and post it somewhere online.  Then, just link it to the Mr. Linky in the Dream It Up Blog.  Too complicated?  Email a picture.  You can find the info on that blog as well.  If you do, you are eligible to win wonderful stencilling prizes! 
In the meantime, check out the other blogs this week.  Also, if you scroll down a little, you will find the Connie Crystal Post which also uses a Dreamweaver Stencil AND last week's post which was scheduled to go on time, but somehow got messed up by Blogger.  Get inspired.  Enter the flower competition.  You have nothing to lose!

Monday, April 9, 2012

Dreamweaver and Stampendous Blog Hop Day One!


Get ready to be inked, pasted, encrusted, stenciled and stamped! All of this week the Dreamweaver Stencils' Dream Team and the Stampendous Design Teams will be providing some "Dream-pendous" inspiration for you, with multiple opportunities to win some fabulous prizes from both companies. Each day this week, you will be directed from both the Stampendous Impressions' blog or the Dream It Up! blog to the players du jour for your oohing and aaahing pleasure. Everyone will be playing on Saturday, the 14th with our final hop for the week. This is your opportunity to see how to mix and mingle your creativity...if you are a stenciler, you will be fascinated at combining stamps with your first love. If you are a stamper, you will be wowed at how stencils can add to your impressions.
Here is my creation.  It is an unusual style for me to be using.  It reminds me a bit more of my friend, Linda's style. I really enjoyed the stretch for this one.  Although I didn't realize it at the time, this card would probably qualify for the Stampendous Challenge on recylcing that is going on right now.  Let me explain.
I started this card with an encyclopedia that I found at the Salvation Army.  I knew that I had this lovely Stampendous Vintage Birdcage Stamp CRV266, so I found the page on Sound and ripped it out, ripped it up and distressed it with Tim Holtz Distress Brushed Corduroy Ink. I had two pieces when I was done, so I put them both on Double Sided Adhesive Paper to make my new "paper".  Then, I used that lovely stamp to stamp a couple of images in the background with the Distress Ink.  I also used that ink and stencilled just the musical staff portion of stencil LM 149 Music.  Using Versamark, I stamped the center birdcage and embossed it with Aged Gold Embossing Enamel.  This embossing powder is a little chunkier and creates a vintagey look, but don't expect it to show all the beautiful fine lines of a stamp like this.  This is why I stamped the black image.  I wanted to use something transparent for both this birdcage and the pasted bird's nest, but I did NOT want that overly shiney look of acetate.  That seemed too modern for my theme.  Fortunately for me, I had just finished a box of cereal that morning.  Well, I washed out the lining and used it here.  Clear, but not too modern looking.  I needed to use the Stayzon on the birdcage.  The Pearlescent Dreamweaver Embossing Paste was perfect on it with the LL 587 Nest Flourish Stencil.  I felt that both of these items could use a little extra "oomph", so I glued Mica Fragments on the reverse side with Art Glitter Dries Clear Designer Glue. The birdcage stamp was enhanced with FRM01-Pearlized Mica Fragments behind the bottom and top screw of the cage.  The bird was enhanced with FRM04-R Tea Stained, and the stencilled nest got FRM03-R Tarnished Mica Fragments.  I pasted the "Sing Your Song" off of the LG 734 Bird Words stencil with Dreamweaver Matte Black Paste. Finally, I used a modified Double Glitter Technique with stencil LS 94 Bird on Branch, Stampee Foil, Stampendous Plain Ol' Black Fun Flock and Stampendous Multi Fine Crystal Glitter.  The papers were edged with Versamark and Aged Copper Embossing Enamel.
Whew!  There was a LOT going on here.  (Quite the contrast with last month).  If you like these assemblages, definitely check back with me on Saturday this week (no, not Thursday this week) for another Stampendous Blog Hop Day.  Better yet, check in with the team daily--we will be hopping all week with Stampendous!

Be sure to leave comments as you tour the blogs (with your email addy!) for a chance to win* one of three combined sets of these Dreamweaver and Stampendous goodies:


Leave me some love before you "gear up" for the next player:


Stampendous Impressions!
Dream It Up!
Cherylynn Moser
Lynn Mercurio
Laura Drahozal
Kristine Reynolds
Pam Hornschu
Taylor Usry
*For shipping and handling purposes, USA/APO/FPO/Canada winners only.

Thursday, February 2, 2012

A New Challenge--St. Patrick's Day or Green

Is it February already? Yes, it sure is--and time for a new challenge. The winners of the Valentine's challenge are posted at the Dreamweaver Stencils blog at www.dreamweaverstencils.blogspot.com . The new challenge should be posted there, as well. You have until the end of the month to link your creation there. The theme is St. Patrick's Day OR green. Here, I have presented both. I began by running a piece of white cardstock through my Cuttlebug with a Details Embossing Mat and LX7002 Plaid Stencil. I then used the new stencil LG742 Pointed Celtic Knot on Double Sided Adhesive Paper. I soaped up the back first to make it easy to remove, and then placed it on the paper, soap side down. I placed green Stampee foil over the top and rubbed it down using a fine tipped embossing stylus. Once I pushed down as much as I could, I removed the foil and rubbed black flock over the whole thing. I vigorously brushed off the excess flock. Then, I put the whole thing stencil side down on the table and very carefully removed the paper from the stencil. I made sure to "walk" my fingers along the stencil to keep it flat while I removed the paper. I poured Crystal Art Glitter over the whole thing and brushed off the excess. The shamrock was created with green coated aluminum. I used stencil LS58 Clover. I placed the stencil face down on a hard surface, put the aluminum green side down over the top and pushed it into the opening using Mercart Metal Tools. I removed the stencil and placed the aluminum face down on a piece of suede, using the Mercart Ball Tool to create the dimension. I flipped it over, put it on a hard surface and used the Teflon tool to enhance the details and flatten the metal. I put Mercart Backing Paste in the clover and waited for it to dry. Then, I cut around the outside of the shape and assembled the whole card. A lot of steps, I know, but ultimately not difficult. c
Check out the rest of the blogs and get inspired. Don't forget to make a little something Irish, or green and link it over to the Dreamweaver Blog for a chance to WIN! I will see you next week!