We're already into April, and no foolin', the Dream Team has a spectacular month planned for you...filled with exciting news and inspiration for all of your crafting dreams! The exciting news will be announced in the Dream It Up! post on April 17th, but the "April Inspirations" challenge will run for the entire month. Each team member will post what inspires them in their creative life...maybe a Pinterest pic, a magazine pic, a quote, a book, a place, an artist, a crafter friend...along with their creation. We are hoping that you will feel inspired as well, and link your projects (and inspiration) to the inlinkz tool on the Dream It Up! blog. Check out what our Guest Designer and the "A" team has been inspired by for this week...
Here is my inspiration:

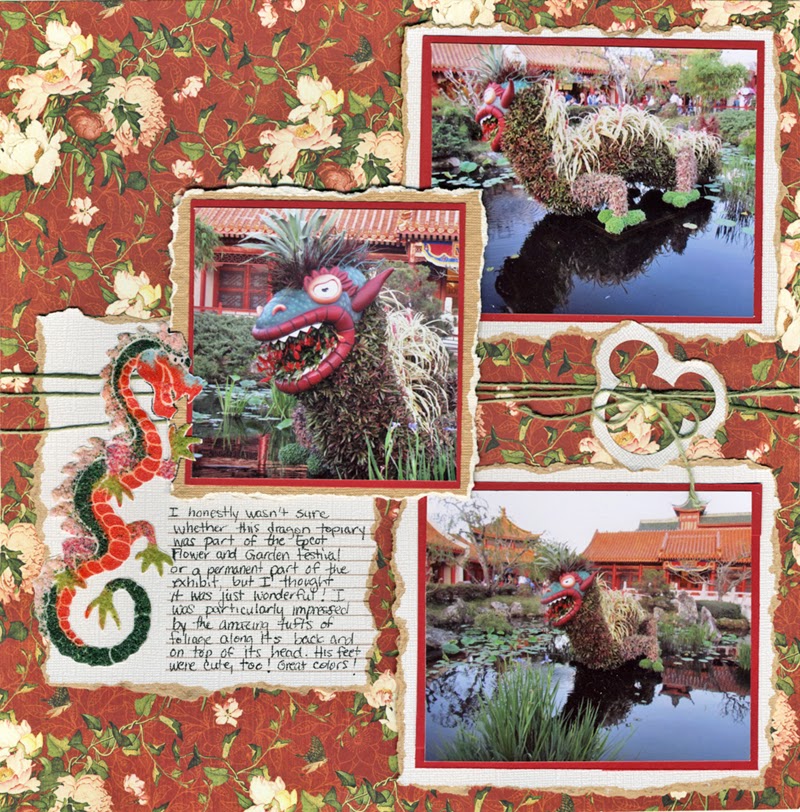
Yes, it is actually a photo that I took at Epcot. I always look to my pictures to inspire my embellishments, and this time was no exception.
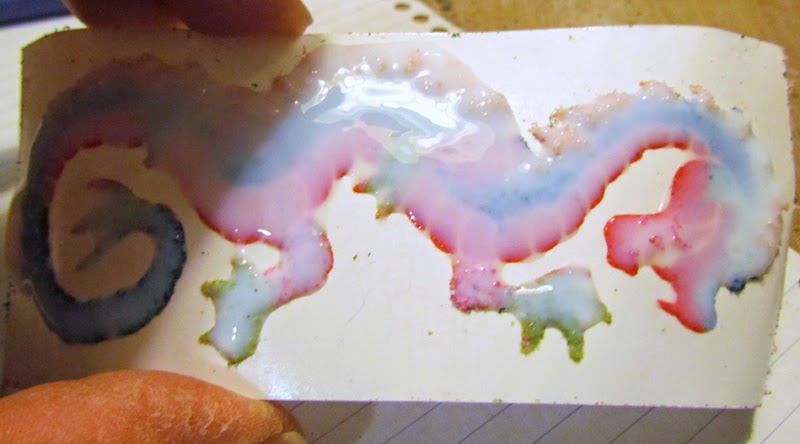
Here is the embellishment that I created using Dreamweaver Stencils:

See how I tried to match the topiary in the picture?
Here is how it fits on my scrapbook page:
I have a quick (mostly visual) tutorial of the embellishment.
MATERIALS:
Art Glitter Ultrafine Pearlescent 188 Black Vinyl
Ultra Fine Flower Soft in Sage, Pine, and Raspberry Fizz
Flower Soft in Baby Pink
Globecraft Glastique in Matte (or some other finishing glaze)
Pointed Scissors
DIRECTIONS:
1) Rub the soap on the back of the stencil. You will see a light filmy coating over the metal. This will help to get the stencil off of the paper later.


5) Carefully place the embossing powder into place.


7) Repeat steps 5 and 6 with the rest of the powder, glitter (in eyes), and Flower Soft.

8) Press down all the material one last time.

9) Brush off the excess material with the large stencil brush.


12) Trim around the embellishment. You can get very close and nothing should fall off. The great thing about this project is that you can still see the textures you created with the Flower Soft. Also, the embellishment is a sticker!

I hope you enjoyed my "inspired by" project. I am not sure it is what our Fearless Team Leader Pam had in mind with this challenge, but, honestly, when I scrapbook I take all of my inspiration from the pictures! Of course, with stencils I can make the perfect embellishment for any situation! Don't forget to check out the links above to see what inspires the rest of the team. Here's wishing you a month full of inspiration!


Wow Laura, wonderfully inspired project and cool technique too!
ReplyDeleteWow! Your photo sure inspired a great project...very nice done...and thank you for the great instructions.
ReplyDeleteraising my eyebrows as in HOW did you ever think of doing this. it's fabulous on the page.
ReplyDeleteWonderful embellishment Laura! Very creative and it matches perfectly!
ReplyDeleteFANTASTIC....great design and your trick about the soap is priceless! Love the use of all the different glitters, powders and Flower Soft!
ReplyDeletewhen I saw this in the e-letter I was really excited to see how you did it. didn't ever cross my mind to use flowersoft (what a great idea) and I still haven't used my distress powders but I really liked how they work in your dragon. will have to give that a try now :)
ReplyDeleteWow! That is so close to the inspiration photo it's amazing!
ReplyDeleteWonderful page! Love your colorful dragon and your inspiration!
ReplyDeleteI'm so stunning with this amazing tutorial!
ReplyDeleteThat dragon matches the Epcot dragon beautifully! Great tutorial and photography.
ReplyDeleteWOW! I love your dragon. It's perfect for your scrapbook page.
ReplyDeleteVery cool project, great tutorial, I'm very happy I came upon this today! TFS
ReplyDeletenice establishment for your scrapbook page! great job, thanks, -con
ReplyDelete