The store I work at has started playing Christmas music and, while I do sort of think it is too early, it was wonderful to listen as I taught this class. It was half of a workshop that I ran twice with my friend and coworker, Claudia. She taught a cookie recipe book, while I taught this box. When I created it, I thought of it as simply a cute recipe box that someone would fill with the special family recipes that you only use for Christmas. I worked on it, though, I got to thinking about what a great gift box it would make! (Just fill it with stencils and glitter for me, please!) Also, I was thinking I will probably put mine on the mantle as just a cute Christmas decoration.

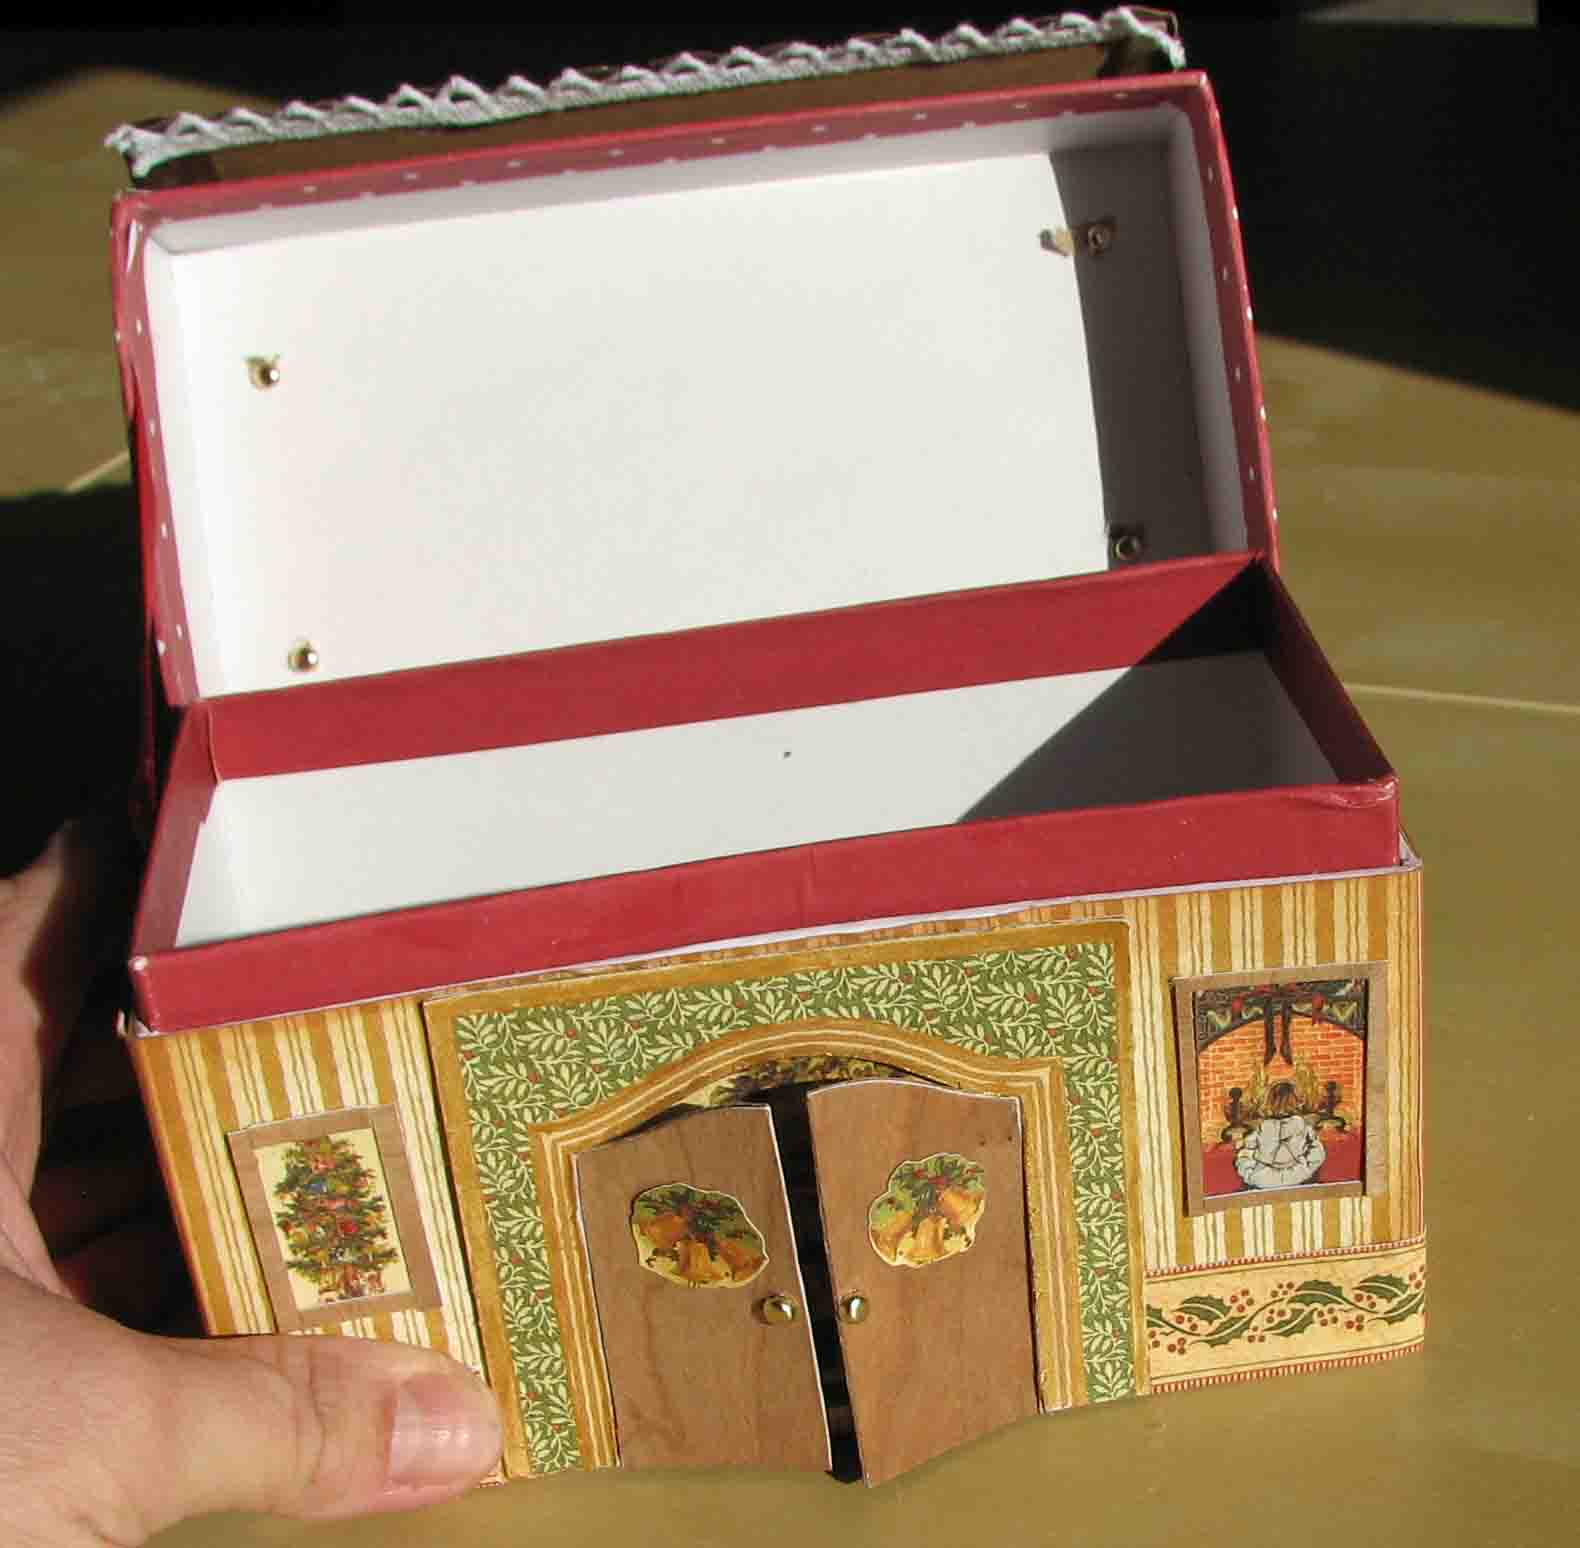
The box started as a $1 recipe box. I created the project adding a chipboard roof, Graphic 45 paper and Co'ordinations Cardstock. The box, of course, opens (for all that glitter to fit into!).
The box started as a $1 recipe box. I created the project adding a chipboard roof, Graphic 45 paper and Co'ordinations Cardstock. The box, of course, opens (for all that glitter to fit into!).

The doors, which are made with the Creative Imaginations Real Wood paper (the thicker Cherry wood), also open to reveal the cute Santa image. In the students' version, you can't see the back of the brads that make up the door handles, as they are hidden with the cardstock backing.


The images and the colorful frames are all from the Graphic 45 paper. The wooden frames are that real wood paper again, cut small and run through the Xyron. The "icicles" are a ribbon stuck under the eaves with Glue Dots.
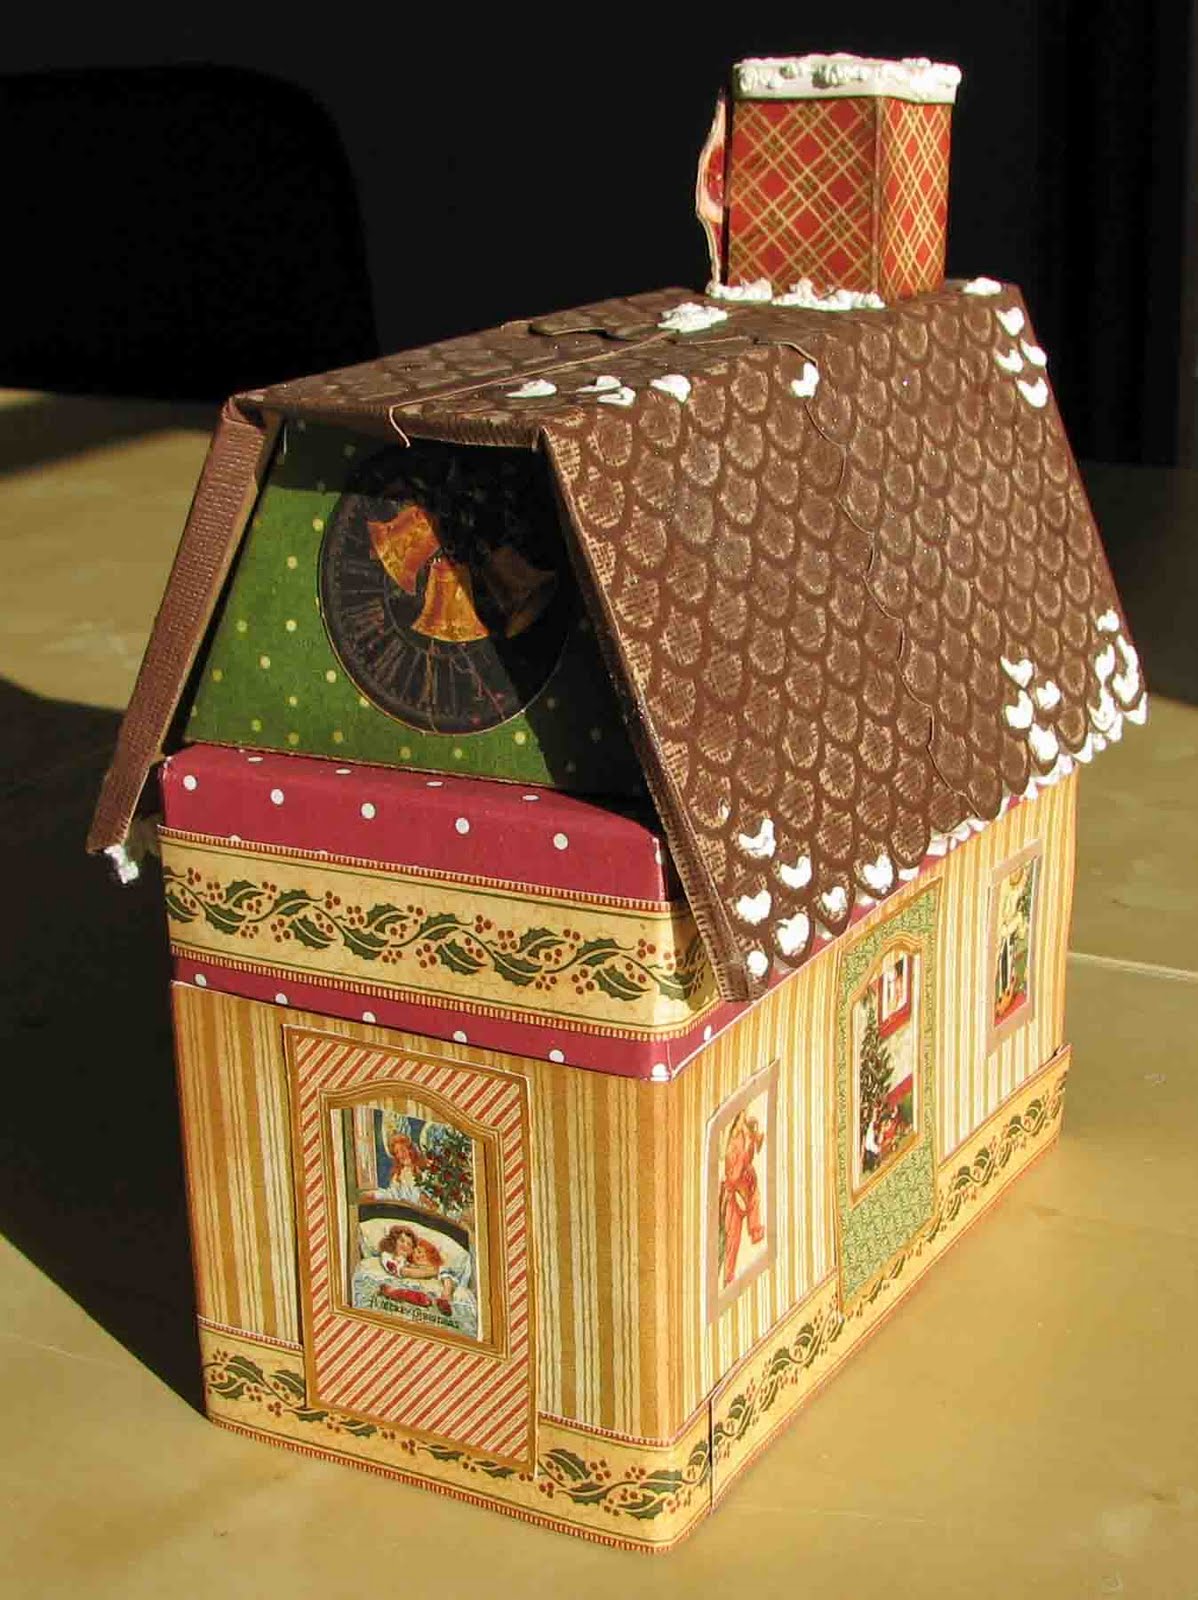

So, do any of my Dreamweaver followers recognize the roof? It is the Dreamweaver fish scales stencil run through my embossing machine with the Co'ordinations cardstock. It was then sanded and trimmed to make the cute roof. The slight white "frosty" shimmer comes from Metallic FX in Moonstone just rubbed over the top with a finger. It sticks in the texture to create the look. Then, I added white Liquid Applique, which I heat set for a puffy snow look.
Finally, the cute Santa. He, too, was taken from the paper and mounted on chipboard. I then cut out around the Santa. What you can't see in the picture is that the reverse of the same Santa (there was a front and back on the paper) was cut out and pasted on the back. You can see his belly poking out from behind the chimney on the back of the box. I took my two sided Santa and colored the black parts with a journalling pen. I then added white flock and a fantastically beautiful red Art Institute Glitter. He was just the finishing touch I needed!


Cute project and great use of the stencil on the roof!
ReplyDeleteLaura...the amount of work in this is unbelievable. Wish I lived close enough to take a class. L
ReplyDelete