Showing posts with label green glossy paste. Show all posts

Thursday, February 9, 2012

A Little Scottish Influence

Alright, so I know that the challenge this month is actually St. Patrick's Day, but I felt that it would be a great time to give a shout out to the Scots, with the beautiful Long Thistle Stencil LL 3001. Of course, I DID use green, and since that is another option in the challenge, it counts! That's right...you can use something green for your challenge post as well. Anything green. Then, you should link it over to the Dreamweaver Blog for your chance to win these stencils.

But I digress. Back to this week's post. I made this card with a wonderful group of women at Altered Art Addicts in Jackson, MI last weekend. Here is how it's done:
1) Paste the stencil LL 3001 using Green Glossy Embossing Paste on cream colored linen.
2) Let paste dry
3) Gently apply wet glue with a regular paintbrush. The glue should be about the consistency of milk. I used watered down Art Glitter Dries Clear Glue.
4) Let the glue dry until it is tacky and clear. There should not be any "pools" of glue.
5) Apply Metallic FX in Plum Royale, Purple Satin, Kiwi and Ivy Garden. Use this technique: dip a stencil brush into the pot of Metallic FX. Tap it lightly on a piece of paper towel to remove any excess. Then, tap the color into place on the paste.
Don't forget that you can always use a Picasso stencil to mask out areas if you want a precision look with exact shading of the different colors.
That's it. Just five steps! Me? Yep. I love the colors and shine of the Metallic FX. Sometimes less is, indeed, more. But don't quote me on that!
So, are you inspired yet? If not, go check out the rest of the Dreamweaver Team sites. They are listed to the left of this post. Then, get inspired, make a little something St. Patrick's Day, or just green. Post it anywhere online. (I think you can even do Flickr if you don't have a blog). Then, link it with the Mr. Linky at the bottom of the Dreamweaver Stencils blog. As simple as that, and you could win the beautiful, springy stencils above. (I don't even have those two, and I am really digging on that Long Lily one.)
Come play with us and have some fun. By the way, I am feeling a little inspired myself today. I am thinking that you might find something REALLY different here next week, if I have a little time to work on it..... See you next week!

Tuesday, January 24, 2012

CHA Sneak Peek Week Day 2

It is the second day of the CHA Sneak Peek Week, so here is a little more of what we have coming. This post features two stencils: the flower is a rerelease of LM 219 Plum Blossom Shape and the gorgeous LJ 919 Art Nouveau Flourish (Art Nouveau again--see the theme with me?). I used a slightly mottled green background paper. I pasted the flourish with Glossy Green Embossing Paste. Then, while it was still wet, I sprinkled Art Glitter in two different shades of transparent green over the top. The lighter green is on the right. As I let that dry, I used my embossing stylus to hand emboss some multishaded pink vellum. There really aren't very many lines to emboss and of course, vellum is transparent, so it was extremely easy to do. I just love the way that vellum embosses because it creates a completely different color when embossed. I stuck it on with a couple of small Glue Dots. Then, I added a brad in the center. That's it. Another simple card. Take a look at everyone's blogs (listed on the left) and if you see something you like, let your local scrapbook store owner know so that they can order it at CHA. In the meantime, make a little something that says "Valentine's Day" to you and link it to the Dreamweaver Blog. It could win one of two fabulous prizes this month. Give it a try--what do you have to lose?

Thursday, December 22, 2011

A Burgundy and Gold Dreamweaver Christmas

This week's challenge was burgundy and gold. I knew from the start which stencils I would be using--two of my favorite Christmas ones--I just didn't realize that I was going to be sassy and add a little green until yesterday. This particular holly was created as a sample pasting during a class. I used the Holly and Swirls Stencil LL 3005. The paste was the Green Glossy Embossing Paste and, as part of the demonstration, I sprinkled on Ivy Garden and Kiwi Metallic FX. Once the paste was dry, I used a Swiffer to remove the excess powder. I found the sample later when rummaging for the stencil, and it was just so pretty with the Metallic FX that I decided to use it, despite the burgundy and gold mandate. I also used the Metallic FX, in Goldfinch and Gold Dust on the Metallic Gold Embossing Paste for the word. I used the Christmas Stencil LL 3009 for that one.

The only other stencil that I used was the Plaid Stencil LX 7002. This was used with velvet paper and my Cuttlebug Machine. I just ran the stencil through the machine with the velvet paper and a rubber embossing mat. The actual color of the paper is almost identical to the cardstock, but velvet paper does not photograph very well, so there is a slight color shift. The berries are Queen and Company pearls, and almost an exact match as well. I raised the holly up just a little with 3D Dots and added a gold mat and ribbon. I was very pleased with the results. Here is another photo of the card. It shows the raised holly, dimension on the pearls and shimmer on the word just a little better than the previous picture.
So, Merry Christmas all, and a hearty "welcome" to the newest design team members, Cherylynn and Cyndi! I didn't have Cherylynn's blog info yet, but link on over to Cyndi's blog and check it out when you get the chance. Don't forget to check out all of the other Dream Team blogs, get inspired, and leave a comment if you can--we all like comments!

Thursday, December 8, 2011

Free Week--Upcoming Jackson Class


This week, I have decided to post a card preview for the class that I am teaching at Altered Art Addicts in Jackson, Michigan this Sunday. So here it is, all four cards. These techniques are a little easier than they are in my average post.
The first card I have featured is made with a simple pasting technique. I put the brown paper down on my craft sheet, texture side up. Then, I laid the Christmas Script Stencil LL 3009 on top of it, right side up, and taped it all the way around, directly to the craft sheet, with Scotch Removable tape. I used the back end of my spatula to get Gold Embossing Paste from the container and place it on one of the short sides of the stencil. Finally, holding my spatula at a 45 degree angle to the stencil, I pulled the embossing paste across it. I let the spatula scrape gently on the stencil as I did it so that the paste was level with the top of the stencil. I removed the stencil immediately, and then let the paste completely dry before I added Christmas Red Stickles to the "berries" on the image. I just love this stencil, especially with that gold paste.
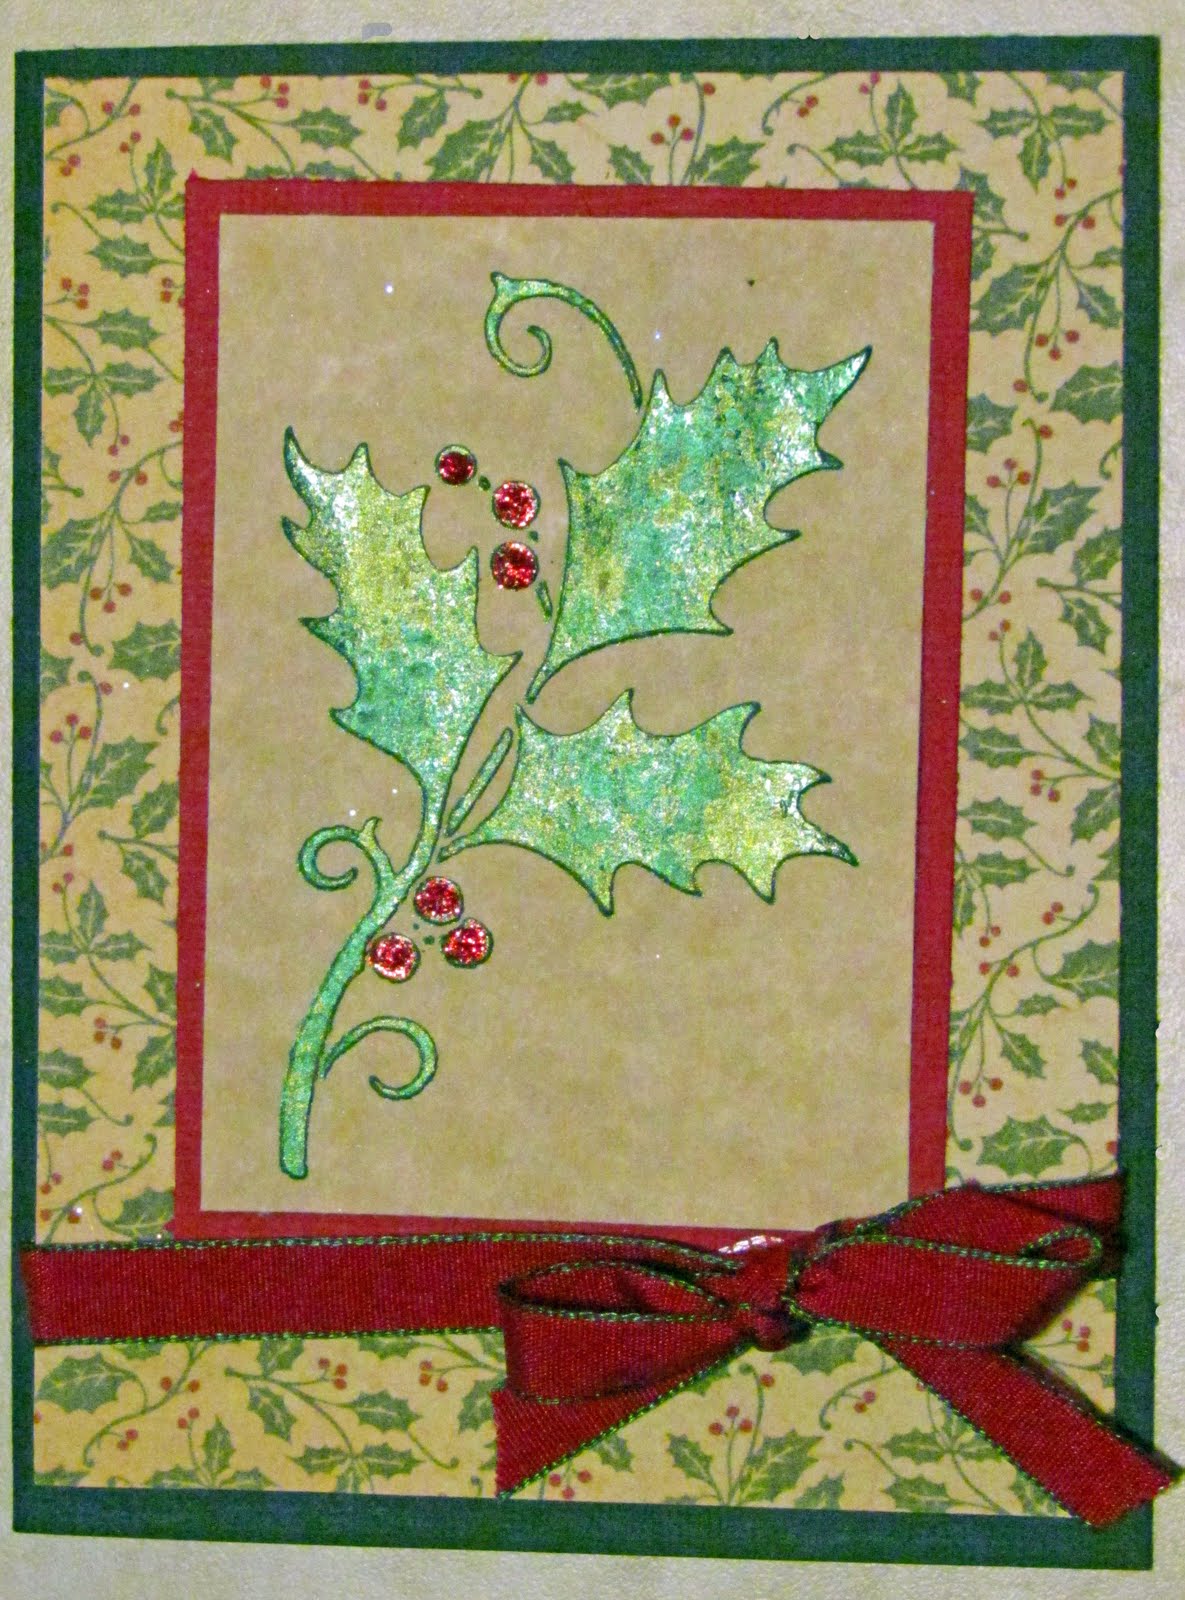
The second card here is also created with paste, and the basic technique is the same as the first. I used the Holly and Swirls Stencil LL 3005. Instead of the Gold Embossing Paste, I used the Glossy Green Embossing Paste. After I removed the stencil, I sprinkled Metallic FX in Kiwi and Ivy Garden over the top. I was able to sprinkle just a little on while the paste was still wet using cut straws to get the powder out of the containers. After the paste dried, I used a Swiffer refill to remove all of the excess mica powders. I like to use the micas in colors that are similar to the glossy paste color. I think the look is almost like a patina. When the paste was dry and the project swiffered, I used the Christams Red Stickles again for the berries.
The third card was created with the "double glitter" technique. First, I soaped the back of the Mistletoe Stencil until it had a "cloudy" look to the metal. (This stencil is discontinued, but will be yours if you sign up for the class.) The soap "crumblies" had to be removed with a clean stencil brush before I could proceed. Then, I peeled the paper off one side of the Double Sided Adhesive Paper and put the soaped side of the stencil down on the exposed adhesive. I put some small pearls into the "berry" holes of the stencil. I then used green flock in the plant portion and white flock on the square section. When I used flock on this project, I put a generous amount on the area that I needed filled, then I pressed it in vigoruosly with my thumb. After that, I brushed it off well, and, when I thought I was done, I brushed it again. Afterwards, I put the whole thing stencil side down and carefully peeled the adhesive paper off of the stencil, while "walking" my fingers along the stencil to keep it flat. Then, I flipped the paper over and poured Jadestone Art Glitter over it. I have used this stencil many times lately, as it is my giveaway for the holiday season, and I have to admit that this was probably my favorite technique with it.
Finally, I used the Holly Flourish Stencil LG 731 through my Revolution. (I could have used the Cuttlebug, but I like that the Revolution has a magnetic base.) First, I put the stencil face down on the plate. Then, I spritzed the back of the cardstock with a little rubbing alcohol and placed it on top of the stencil. Then, I used the rubber embossing mat, a couple of shims (this is determined by a little practice with your own machine, as they all vary a little) and my embossing mat. When the embossing was done, I left the paper on the stencil and flipped the whole thing over. I used Fantstix and Distress Inks in Peeled Paint and Pine Needles to add a little color. Then, I removed the stencil and colored the berries with Burgundy Stickles.
So, pick your favorite card and give it a try. Better yet, if you are in Michigan, call Altered Art Addicts and come out to take the class. Go to everyone's blogs and check out other things you can do with these fabulous stencils. Be inspired, and come back again next week, when we will have a sketch AND theme challenge.

Wednesday, August 24, 2011

Thursday Dream Schemes--Free Week


First off, let me tell you what is happening next week. The Dreamweaver Team is going to be blog hopping with the folks from Woodware UK. Yep, that's right. It is the WONDERFUL people that I worked with when I went to the UK for Lynell. I am so excited that I signed up for at least two days. I believe that I am first hopping on Monday or Tuesday, so stop by early next week and get in on this. This, by the way, is a NON CARD blog hop! I have a couple of cute things in store.

Anyway, on to this week. I am particularly proud of this one. I like to think of it as four ways to use a metallic effect. Here it is:

So, on to why I think of this one as metallic four ways:

1) The sentiment is done with metallic gold embossing paste. It tells a tale on me--I don't always use tape all the way around. That was the case with this one, stencil LM 146 Thinking of you. You can see the paste that went over the edge of the stencil on the top and the bottom. Usually, I trim this off and no one is the wiser. I liked the little borders in this case, so I left them on.

2) The metal on the background was run through the Cuttlebug with a rubber mat and stencil LJ 901 Mosaic Swirls. Then, it was colored using alcohol inks and sanded to enhance the detail.

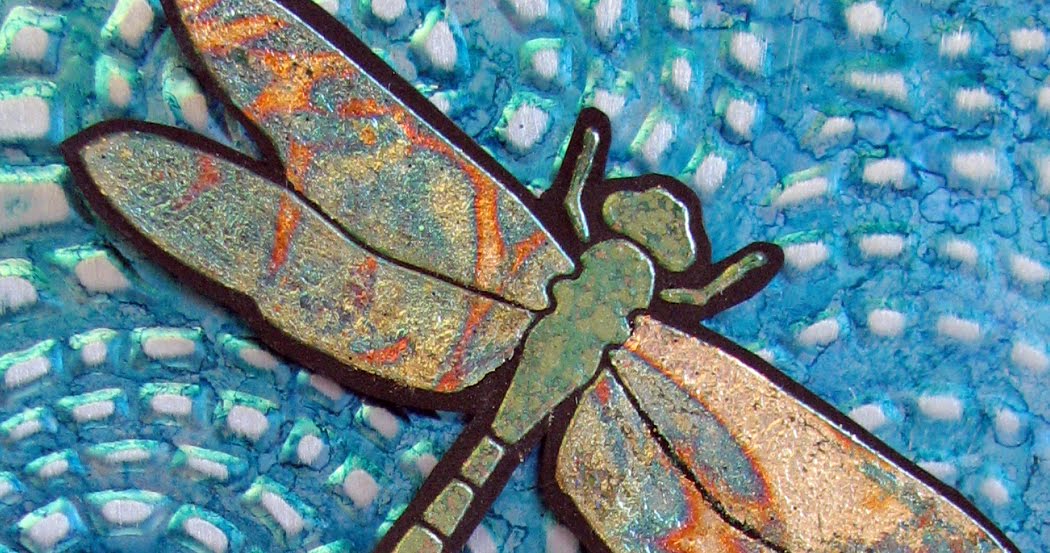
3) The dragonfly (stencil LM 193) and wings were both pasted with glossy green embossing paste. The body of the dragonfly was made by sprinkling Metallic FX in Kiwi, Ivy and Goldfinch on the paste while it was still wet. After it all dried, I brushed off the excess and then used a Swiffer cloth to get it really clean.

4) After all the green paste was dry, I covered the wings with glue and let it dry until it was tacky, but not completely dry. Then, I used Green Leaf over it. I noticed that the glue did not seem dry enough (but, of course, only AFTER I laid the gold leaf over it). At this point, I dried it with my heat gun. As the glue under the foil dried, it bubbled, raising the foil. When I pulled the heat gun away, it fell into a bit of a wrinkly heap. This was wonderful, and created a slightly reticulated look. It seemed to me to appear more "insecty" and was a true happy accident.

Now that you have seen what I had to show you, go around to the other Dreamweaver blogs and check them all out. Then, post something of your own. With no regular challenge this week, it should be easy to do. Link it to the Dreamweaver Blog, leave a comment for us, have fun, and just participate. Be sure to check back next week for a wonderful, non-card hop!