First off, let me tell you what is happening next week. The Dreamweaver Team is going to be blog hopping with the folks from Woodware UK. Yep, that's right. It is the WONDERFUL people that I worked with when I went to the UK for Lynell. I am so excited that I signed up for at least two days. I believe that I am first hopping on Monday or Tuesday, so stop by early next week and get in on this. This, by the way, is a NON CARD blog hop! I have a couple of cute things in store.
Anyway, on to this week. I am particularly proud of this one. I like to think of it as four ways to use a metallic effect. Here it is:
So, on to why I think of this one as metallic four ways:
1) The sentiment is done with metallic gold embossing paste. It tells a tale on me--I don't always use tape all the way around. That was the case with this one, stencil LM 146 Thinking of you. You can see the paste that went over the edge of the stencil on the top and the bottom. Usually, I trim this off and no one is the wiser. I liked the little borders in this case, so I left them on.
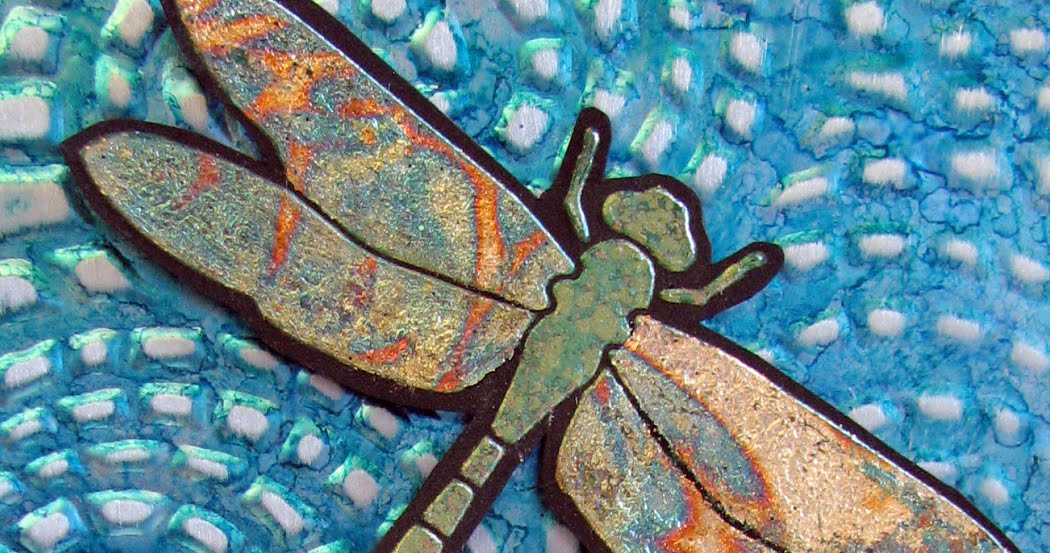
2) The metal on the background was run through the Cuttlebug with a rubber mat and stencil LJ 901 Mosaic Swirls. Then, it was colored using alcohol inks and sanded to enhance the detail.

3) The dragonfly (stencil LM 193) and wings were both pasted with glossy green embossing paste. The body of the dragonfly was made by sprinkling Metallic FX in Kiwi, Ivy and Goldfinch on the paste while it was still wet. After it all dried, I brushed off the excess and then used a Swiffer cloth to get it really clean.
4) After all the green paste was dry, I covered the wings with glue and let it dry until it was tacky, but not completely dry. Then, I used Green Leaf over it. I noticed that the glue did not seem dry enough (but, of course, only AFTER I laid the gold leaf over it). At this point, I dried it with my heat gun. As the glue under the foil dried, it bubbled, raising the foil. When I pulled the heat gun away, it fell into a bit of a wrinkly heap. This was wonderful, and created a slightly reticulated look. It seemed to me to appear more "insecty" and was a true happy accident.
Now that you have seen what I had to show you, go around to the other Dreamweaver blogs and check them all out. Then, post something of your own. With no regular challenge this week, it should be easy to do. Link it to the Dreamweaver Blog, leave a comment for us, have fun, and just participate. Be sure to check back next week for a wonderful, non-card hop!


 Posts