Friday, April 25, 2014

Dreamweaver and Stampendous Blog Hop


Welcome to the last day of our Dreamweaver and Stampendous week of inspiration! Of course, there will be great prizes available for those who comment this week.  In fact, there will be three prize packages available to win. Each will have a great selection of Dreamweaver Stencils and Stampendous images and dies...one of which being the new "Blossom Beauty" face image as shown on the badge above.

Here is my project for today:
 It is a very simple altered journal.

MATERIALS:
Dreamweaver Large Damask Stencil LX 7001
Dreamweaver Damask Stencil LJ 907
Dreamweaver Petals Background Stencil LJ 899
Dreamweaver Pearlescent Embossing Paste
Dreamweaver Palette Knife
Dreamweaver LM 2010 Paste Spreader
Removable Tape
Stencil Brush
Splendor Circus Ink Pad
Stampendous Blossom Beauty Stamp Set
Archival Ink Pad in Plum
Adirondack Lights in Cloudy Blue
Pink Card Stock
Prismacolor Colored Pencils
Small Rhinestones
Tweezers
Journal
 
 
 DIRECTIONS:
1)  Stamp two blossoms with plum ink on pink card stock.
2)  Stencil with petals stencil, stencil brush and pink ink from Splendor pad.
3)  Color flowers with pencils and cut out.
 
 
4)  Use removable tape on the binding of the journal to block out the edge.
 
 
5)  Tape down the large damask stencil.

 
6)  Use the palette knife to place paste on the tape above the stencil.
7)  Use the LM 2010 paste spreader to pull the paste over the damask stencil.


 8)  Remove the stencil.


9)  Place the flowers over the paste when it is wet.  It will hold them in place with no need for glue.


10)  Use tweezers to place the rhinestones on the paste when it is wet. 


11)  Decorate the top and bottom of the journal with rhinestones.

 
12)  When the journal top is dry, decorate the papers if desired by stamping with cloudy blue ink.

13)  You can stencil inside the journal with the smaller damask stamp and stencil brush.


Thanks for checking out my blog today.  Don't forget to leave a comment for your chance to win!  Also, be sure and stop by the blogs of everyone else playing today.


Thursday, April 24, 2014

Dreamweaver and Stampendous Collaboration


Welcome to another "Dream-Pendous" week of inspiration! The Stampendous team and the Dreamweaver team are collaborating once again with all the fun toys in both team's arsenal. Of course, as usual, there will be great prizes available for those who comment throughout this week. There will be three prize packages available to win. Each will have a great selection of Dreamweaver Stencils and Stampendous images and dies...one of which is the new "Blossom Beauty" face image as shown on the badge above.


Here is my creation for the day:

I created it using the Dreamweaver Stencils LX 7012 (Waves and Dots), LJ 899 (Petals Background), and LS 96 (Hello).  I also used both Dreamweaver DD001 Nesting Dies and Stampendous Blossom Beauty Die Cut Set.  Of course, you can see the beautiful new "Blossom Beauty" Stamp.  It was stamped with Archival Inks in Coffee and Plum.  I used only three colors of card stock:  white, pink and dark blue.  All the additional colors were created with a Splendor Circus Ink Pad with Stencil Brushes and Prismacolor Colored Pencils.  That's it! 
Tomorrow is the big final hop day, so be sure to come back and check out my new project then.  In the meantime, take a look at the other blogs for today:
Leave a comment for your chance to win!  See you tomorrow.

Thursday, April 17, 2014

A Little Inspiration!

This April, the Dream Team has a spectacular month planned for you...filled with exciting news and inspiration for all of your crafting dreams! The exciting news will be announced in the Dream It Up! post TODAY, but the "April Inspirations" challenge will run for the entire month. Each team member will post what inspires them in their creative life...maybe a Pinterest pic, a magazine pic, a quote, a book, a place, an artist, a crafter friend...along with their creation. We are hoping that you will feel inspired as well, and link your projects (and inspiration) to the inlinkz tool on the Dream It Up! blog. Check out what our Guest Designer and the "A" team has been inspired by for this week...
 
 
This was my inspiration.  A beautiful opal cameo.  Mine was fun to make and a lot cheaper.
 
 
This was created using the Dreamweaver Cameo Stencil LL3017.  The edges were created using the Double Glitter Technique.  The silhouette was pasted with Glossy White Embossing Paste and glittered.  The sparkling "opal" like background was created with layers of Art Institute Glitter and Ultra Thick Embossing Enamel.
 
 
Here is how it sparkles in the sun.  It isn't a real opal, to be sure, but  it is pretty and fun.
 
Now, check out the other links for the week....Did you notice a couple of extra?  They are part of the new Dreamweaver Design Team.  Everyone is listed on the Dream It Up Blog.  I am happy to announce that Dreamweaver has chosen to allow me to stay on the team!  I am very excited to see what sort of inspiration lays in store this year!
 

Thursday, April 3, 2014

April Inspirations!

We're already into April, and no foolin', the Dream Team has a spectacular month planned for you...filled with exciting news and inspiration for all of your crafting dreams! The exciting news will be announced in the Dream It Up! post on April 17th, but the "April Inspirations" challenge will run for the entire month. Each team member will post what inspires them in their creative life...maybe a Pinterest pic, a magazine pic, a quote, a book, a place, an artist, a crafter friend...along with their creation. We are hoping that you will feel inspired as well, and link your projects (and inspiration) to the inlinkz tool on the Dream It Up! blog. Check out what our Guest Designer and the "A" team has been inspired by for this week...


Here is my inspiration:
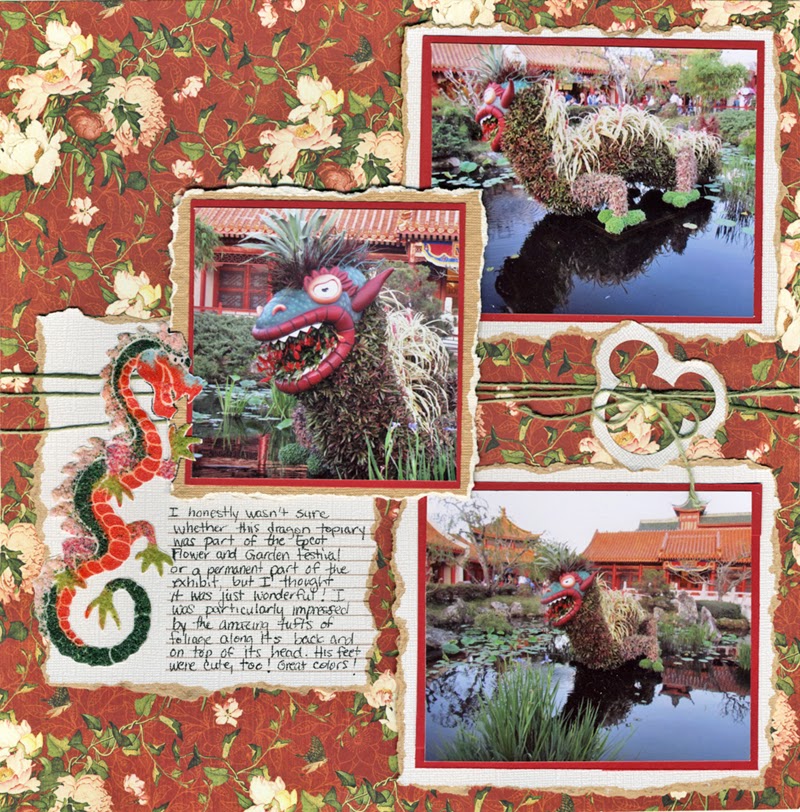
Yes, it is actually a photo that I took at Epcot.  I always look to my pictures to inspire my embellishments, and this time was no exception.  
Here is the embellishment that I created using Dreamweaver Stencils:


See how I tried to match the topiary in the picture?
Here is how it fits on my scrapbook page:


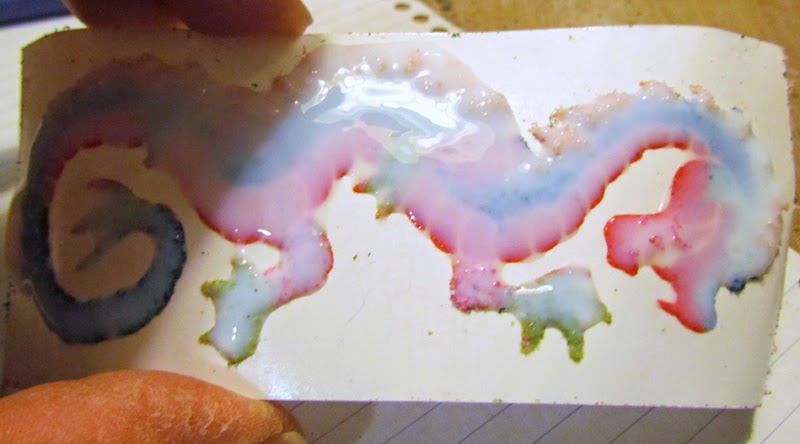
I have a quick (mostly visual) tutorial of the embellishment.

MATERIALS:

Art Glitter Ultrafine Pearlescent 188 Black Vinyl
Ultra Fine Flower Soft in Sage, Pine, and Raspberry Fizz
Flower Soft in Baby Pink
Globecraft Glastique in Matte (or some other finishing glaze)
Pointed Scissors

DIRECTIONS:

1)  Rub the soap on the back of the stencil.  You will see a light filmy coating over the metal.  This will help to get the stencil off of the paper later.

2)  Use the large stencil to brush the "crumblies" of soap off of the stencil.


 3)  "Crack" open one side of the mounting paper covering and peel it off.


 4)  Place the stencil on the paper, soap side down.


5)  Carefully place the embossing powder into place.


 6)  Rub the embossing powder into place with your finger.


7)  Repeat steps 5 and 6 with the rest of the powder, glitter (in eyes), and Flower Soft.


8)  Press down all the material one last time.


9)  Brush off the excess material with the large stencil brush.


 10)  Place the project stencil side down on a smooth, flat surface and carefully peel the paper off of the stencil.


 11)  Cover the entire project with Glastique.  (In retrospect, I could have trimmed the project before this step.) Then, let it dry over night.


12)  Trim around the embellishment.  You can get very close and nothing should fall off.  The great thing about this project is that you can still see the textures you created with the Flower Soft.  Also, the embellishment is a sticker!


I hope you enjoyed my "inspired by" project.  I am not sure it is what our Fearless Team Leader Pam had in mind with this challenge, but, honestly, when I scrapbook I take all of my inspiration from the pictures!  Of course, with stencils I can make the perfect embellishment for any situation!  Don't forget to check out the links above to see what inspires the rest of the team.  Here's wishing you a month full of inspiration!